30.9.15

HOT MILK CAKE

Lee Valley is a store for the serious woodworker hobbyist in Canada. One of the perks of living with a fine woodworker are the occasional cardboard boxes from Lee Valley.  I make a point not to advertise, but over the years Lee Valley provided my kitchen with lots of well made kitchen gadgets. I suppose they recognized that anyone who is into fine woodworking could be a fine gardener or even a fine cook. When yesterday’s box arrived, I was well pleased that my darling replaced my old measuring cups and measuring spoons and he even remembered my loose leaf Ceylon tea all from Lee Valley. The beauty of the measuring cups is the pulled handles. Soldered handles don’t last. I believe Jimre wants me to cook for him forever.

I thought these old-fashioned measuring cups deserved a celebration. And what would be more fitting than baking an old-fashioned cake? This cake is perfectly delicious as icing would just overpower the lovely flavour. 

HOT MILK CAKE
4 eggs
1-1/4 cups sugar
1 teaspoon vanilla extract
2-1/4 cups all-purpose flour
2-1/4 teaspoons baking powder
1-1/4 cups 2% milk [I used 1-1/8 cup 1% milk and 1/8 cup of whipping cream]
1/2 cup + 1/8 cup of butter, cubed

  • Set oven to 350F.
  • Line a 13X9 inch cake pan with parchment paper. Butter any surface not lined.
  • In a large bowl, beat eggs on high speed for 5 minutes or until thick and lemon-coloured.
  • Gradually add sugar, beating until mixture is light and fluffy.
  • Beat in vanilla.
  • Combine flour and baking powder; gradually add to batter; beat at low speed until smooth.
  • In a small saucepan, heat milk and butter just until butter is close to melting.
  • Gradually add to batter; slowly beat just until combined.
  • Pour into the prepared baking pan.
  • Bake in preheated oven for 45 minutes or until a toothpick inserted near the center comes out clean.
  • Cool on a wire rack. 


BATTER FRIED BROCCOLI

This reminded me of the pakora, except without spice, at our favorite Indian restaurant. I am not sure why vegetable tempura is made so complicated. The best fritters are always crispy and have the shortest ingredient list. There is no need for some leavening agent or ice water or chilling. No sensitive stomachs were harmed by this.

BATTER FRIED BROCCOLI 
1 broccoli flower
1 red pepper, diced
1 egg
1/2 cup flour
1/2 cup water
salt to taste
oil to fry

  • Wash the vegetables.
  • Chop the broccoli into bite sized portions and dice the red pepper.
  • In a large bowl, combine the egg, flour, water and salt to make a paste.
  • Roll the vegetables into the paste and coat them well.
  • In a large skillet, heat up the oil on medium heat.
  • Scoop up some broccoli with the red pepper and plunge them into the hot oil.
  • Fill the skillet comfortably, but leave room to turn over the vegetables.
  • When the vegetables are crispy and golden, take them out with a slotted spoon and place them on a paper towel lined platter. 
  • Sprinkle with salt and serve.

29.9.15

SWEET POTATO SPINACH BAKE

Yummy! A casserole such as this and I am almost tempted to become a vegetarian. I had the very last leftover yesterday with steamed green beans and broccoli for dinner. I didn’t miss the meat. Who would have thought sweet potato with spinach could taste so good? The original recipe called for more than a cup of whipping cream or double cream. I substituted half of the cream with 1% milk. I knew there would be a pool of liquid in the bottom of the baking dish. There was. Nevertheless it was magnificent! The next day when I heated up the leftovers, the liquid by then fully absorbed by the yam. but it was just as good as the day before. 

SWEET POTATO SPINACH BAKE
2 garlic cloves smashed
1 tsp of dried thyme, or 2 fresh sprigs
1/2 cup milk
1/2 cup whipping cream
1 bunch of fresh spinach
1 very large sweet potato [mine was 900g]
salt
1 Tbsp flour
butter for greasing or cooking spray
1-1/2 cups of hard cheeses [I used white and orange cheddar]

  • Place the garlic, thyme, milk and cream in a small pot and bring to the boil. Immediately remove from heat and let it cool down to room temperature.
  • Preheat oven to 375F.
  • Cut the stems off the spinach.
  • Discard the stems and wash the spinach. If the spinach is from the garden, I turn over every leaf and wash it under cold running water. The only protein I will want in this is cheese.
  • Chop the sweet potato into manageable segments, peel, rinse, and slice and set aside.
  • Place the spinach in a bowl and pour over it a kettle of boiling water.
  • Transfer to a colander and let it drain for a few minutes. Then squeeze out as much water as possible and set aside.
  • Put the milk mixture through a fine sieve. Discard the thyme sprigs and the garlic cloves.
  • Place 1 Tbsp of flour in a small bowl and very gradually stir in the milk mixture stirring continuously. Set aside.
  • Butter a medium sized casserole dish.
  • Lay half the sweet potato slices in the dish. Ever so lightly sprinkle with salt.
  • Cover with the fully drained spinach leaves and very lightly sprinkle with salt.
  • Top with the remaining sweet potato slices. [The cheese layer will be salty so I didn’t sprinkle the top with salt.]
  • Pour the milk mixture on the sweet potato slices.
  • Grate the cheese on the top sealing the edges.
  • Bake in the preheated oven for 45 minutes.
  • Remove from heat and cover for 10 minutes before serving.
  • Serves 6-8. The leftovers are nice reheated.

28.9.15

EGG BREAD

Made from White Bread Flour

Playing with Egg Bread

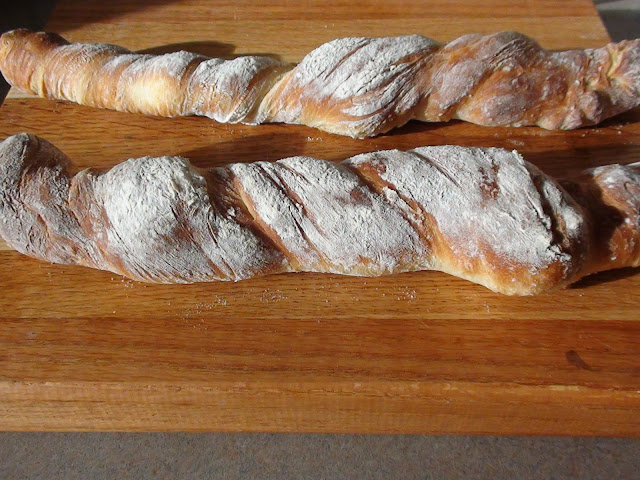
I make this so often Eva’s Egg Bread has become mine. Egg bread became the quick fix since I developed an allergy to something in commercial breads, perhaps a preservative. No longer a preference; it is a necessary I bake my own bread.

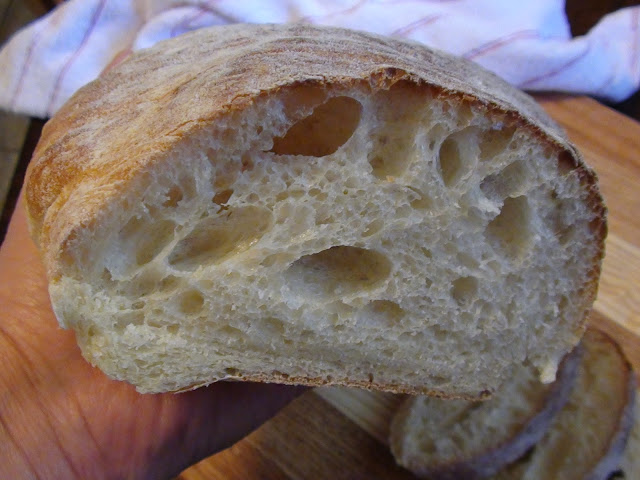
The first time I made it the stars aligned and the egg bread was perfect. Since then I made it so often I produced a few duds too. I used only all purpose flour, only bread flour or different mixtures of the two. Each variation of flour content and each rising time results in a different type of bread. Some I liked, some I didn’t like as much. I prefer my bread chewy, not fluffy or dense. The best texture so far is from 100% white bread flour. Yes, I come from a long line of bread eaters.

The recipe really doesn’t kid when it says “let the dough rest for 20 minutes”. The first rising can go on a bit longer, indeed the dough can more than double in volume, but you can’t mess with the second rising. Maximum 29 minutes of rising time allowed for this bread and that includes the 9 minutes my oven gets up to 500F. Any more than that and the bread will loose its elasticity and become a fluffy “Wonder”.

 Made from 50% all purpose and 50% bread flour

It is true that if a recipe works at first try, it may be due to a series of happy accidents. If you have a failure, it may not be because of the recipe. It could very well be something you did or did not do. Once the kinks are worked out and every possible thing that can go wrong does go wrong, the recipe could be perfect – that is perfect for you. But it may not be perfect for someone else. The variants will come in from handling, measuring, rising times, temperature, ovens or from different atmospheric conditions. You really have to make a recipe repeatedly before you can make it your own. A first time success could just have been a fluke.   


EGG BREAD
2 eggs
2 tsp sugar
3/4 cup lukewarm water
1/2 tsp vinegar
1-1/4 cups flour
1-1/4 cups bread flour
2 tsp instant yeast
3/4 tsp salt
white all purpose flour for handling

  • In the bowl of your stand mixer, place all the ingredients.
  • With the flat beater on low speed beat and fully incorporate the dough. The dough will be wet and sticky.
  • Switch to a dough hook and beat the dough vigorously for 5 minutes or until the sides of the bowl is cleared. You can knead the dough by hand on a floured surface, but this is a sticky-dough and any additional flour will result in a denser loaf.
  • Place the dough in a lightly oiled bowl, turn over and let it rise until it doubles in size. Time can vary.
  • Line a baking sheet with parchment paper. 
  • Roll out the dough on a really well floured surface to fit your baking pan. Make sure it is all purpose white flour and not bread flour.
  • Now roll up the dough, or twist it into a loaf.
  • Sprinkle the top with flour. [use only white all purpose]
  • Place the loaf on the prepared baking sheet. 
  • Allow bread to rest for about 20 minutes in a warm, draft-free place. It will rise a bit but not considerably.
  • Turn the oven to 500F. Set the timer for 9 minutes. [That is how long it takes for my oven to reach 500F]
  • Place the bread in the preheated oven. Set the timer for 5 minutes.
  • After 5 minutes, reduce the oven to 400F. Set the timer for 9 more minutes.
  • Remove the bread from the oven and place on a wire rack to cool before slicing.
  • Egg bread slices wonderfully.
  • Use the bread within 2 days and freeze part of it to retain the freshness. After 2 days, the egg bread goes stale. It will be still good for toast, French toast, croutons or breadcrumbs.
Now that's bread.

27.9.15

BRANDY YOGURT CAKE

To replace the cold drink with a hot one, here is a bit of an afternoon-delight for those “it gets dark too early” teas in the afternoon. After we rush the girl to dance lesson, when there is time to sit and relax, w have some fruit too, but really, the tea is about the cake. It was not quite at room temperature when I spread the frosting on. Normally it is not advisable to frost a warm cake, but there is a small window to serve a still slightly warm cake with frosting. Of course, you can always slice the cake and spread the frosting on it individually. To brandy out I added some brandy extract to the cake as well as to the frosting. Swoon... this is how I get my alcohol intake without reacting. Is it any wonder I eat? Ha!

BRANDY YOGURT CAKE 
Cake:
2-1/2 cups flour
3 tsp baking powder
1/2 tsp salt
1-1/2 cups plain yogurt with high fat content
1-1/4 cups sugar
5 eggs  
1 tsp pure vanilla extract
1/2 tsp brandy extract
1 tsp brandy
3/4 cup oil
Brandy Icing:
1/3 cup butter
1/2 cup brown sugar
1 cup icing sugar
1 Tbsp brandy or 1 tsp brandy extract
1/8 cup whipping cream

  • Preheat the oven to 350F.
  • Line a 9X13 inch cake pan with parchment paper.
  • In a bowl, whisk together the flour, baking powder and salt.
  • In another bowl, beat the yogurt, sugar, eggs, vanilla extract, brandy extract and brandy on medium speed until well combined.
  • Add the dry ingredients and stir to combine.
  • With a rubber spatula, fold the vegetable oil into the batter and fully incorporate.
  • Pour the batter into the prepared pan and bake until the cake tester comes out clean.
  • Meanwhile beat the icing ingredients smooth and fluffy.
  • Place the cake pan on a wire rack to cool.
  • When the cake is almost cool to the touch, spread on the frosting, slice and enjoy.

24.9.15

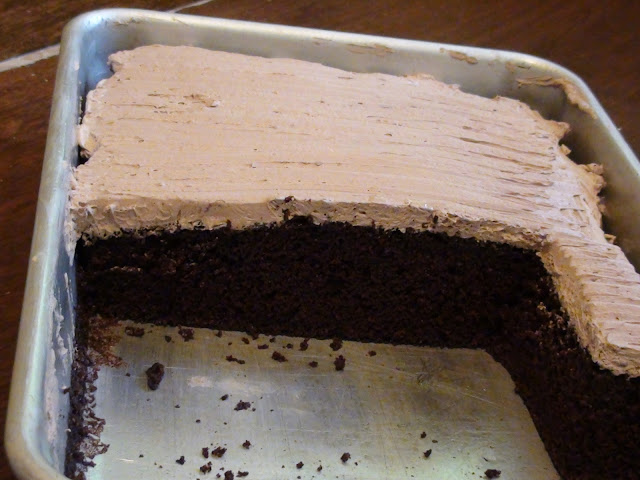
COCOA CAKE IN THE PAN

The leaves are still green and aside from the falling walnuts, a few days ago you wouldn’t even have known that change was upon us. Stillness lies over the garden, the light is soft. The tomatoes may turn colour, but nothing will grow anymore. I am keenly aware summer is ending. In British Columbia, soon after the Labor Day weekend we step into fall. Not officially, that was only yesterday, but it already felt like fall. The weather is always current here; we have four distinct seasons, the temperature, the landscape and the light is ever changing. Fall is my sad time. Even in the temperate parts of Canada winter is cold. Most people are unhappy in January. Not me, it is when I start looking forward to spring.

COCOA CAKE IN THE PAN
Cake:
2-1/4 cups flour
2 cups sugar
3/4 cups cocoa powder
1 tsp baking powder
2 tsp baking soda
1 tsp salt
3 eggs
1/2 cup oil
1 cup full fat buttermilk
1 tsp pure vanilla extract
3/4 cup strong coffee room temperature [don’t use instant for this]
Chocolate Frosting:
1/2 cup unsalted butter, soft
1 tsp pure vanilla extract
1 cup icing sugar
1/2 cup cocoa
1/2 cup whipping cream

  • Brew 3/4 cup of strong coffee and set it aside to cool.
  • Preheat the oven to 350F.
  • Fully line a 13X9 inch cake pan with parchment paper.
  • Place the flour, sugar, cocoa, baking soda, baking powder, and salt in a large bowl.
  • Whisk to combine.
  • In another bowl, beat the eggs, oil, buttermilk and vanilla until smooth.
  • Fold the egg mixture into the flour mixture.
  • Add the cool coffee and stir to combine.
  • Pour the batter into the prepared pan.
  • Bake in the preheated oven for 42 minutes or until a cake tester comes out clean.
  • Cool the cake in the pan completely. 
  • Meanwhile combine the frosting ingredients and beat until light and fluffy.
  • Next, grasp the parchment and pull it from under the cake. 
  • Spread the frosting on the cake and serve.

18.9.15

PORK RATATOUILLE WITH ZUCCHINI - HÚSOS MEDITERRÁN LECSÓ CUKKINIVEL

I used so little meat for this ratatouille; it would be easy to replace it, for instance, with mushrooms or some other flavourful vegetable. Then it would be truly a vegetarian meal. I served it with nokedli and salad and it was delicious. The one thing I would insist on is barely sauté the zucchini cubes; actually just lightly sear them before adding them to the finished ratatouille. If cooked in the sauce the zucchini would absorb the liquid and become soggy. Zucchini was one of the few vegetables that did well this crazy summer.  

You can use chicken breast; it’s definitely the leanest, but at the expense of flavour. If you are addicted to hot and spicy foods, you can certainly spice this up, but in my opinion, heat will never be a substitute for flavour. Begin with making the pork paprikás. Then morph it into a ratatouille. The only difference between a paprikás and a meaty ratatouille is the amount of tomatoes and fresh peppers you use. If you have an aversion to tomato skin, peel the tomatoes before adding them to the pan. I left on the skins for added roughage and because the tomatoes will not be fully obliterated. If the tomatoes are not very juicy, you may have to add a bit of water or stock. The ratatouille should not be dry. When all’s done, lightly sear the zucchini cubes in a separate non-stick fry pan. Then just before serving add the seared zucchini cubes, heat it through and serve. This is how you make pork ratatouille with zucchini. 

PORK RATATOUILLE WITH ZUCCHINI
150-200 g lean slices of pork meat, finely chopped
salt to taste
2 Tbsp extra virgin olive oil
1 onion, finely chopped
1 Tbsp Hungarian paprika
4 large tomatoes, chopped
2 red peppers, chopped
1 garlic, minced
1/8 cup of water or stock, but only if needed
1 Tbsp flour
1/4 cup of cold water or cold stock
1/3 cup 14% sour cream
1 Tbsp oil + 1 Tbsp butter
2 cups of diced zucchini 

  • Slice the pork and chop finely.
  • Wash the zucchini and dice. If using a mature zucchini, discard the pulp.
  • Heat the olive oil in a skillet on medium heat.
  • Slice the onion and add to the oil.
  • Lightly salt the onions and sauté until translucent.
  • Add the pork and braise until no pink is showing.
  • Add the chopped tomatoes, peppers, garlic and sauté for a couple minutes stirring often. If the tomatoes are not very juicy, add 1/8 cup of water or stock to start it up. Ratatouille should not be dry cooked or it will burn.
  • Sauté the ratatouille on medium heat until the meat and the peppers are tender.
  • Next measure 2 Tbsp flour into a small bowl and add 1/4 cup of cold water or stock.
  • Stir to make a smooth paste.
  • Add the flour paste to the ratatouille and stir to combine.
  • Bring it back to a simmer.
  • Stir in the sour cream and adjust the salt. Cover the skillet and set aside.
  • In a clean non-stick fry pan, heat the oil and the butter.
  • Add the diced zucchini and sear it stirring continuously.
  • Add the zucchini to the pork ratatouille heat through and serve.

15.9.15

OLIVIA CAKE

The first time I made this birthday cake was for Olivia’s family party back in 2014. We had a smaller crowd this year and I had the opportunity to take some photos. The cake consists of two layers of white and 2 layers of chocolate piskóta. In between there are two layers of hazelnut dacquoise, two layers of chocolate ganache and two thin layers of chocolate buttercream. The top and the sides of the cake have a thin layer of chocolate buttercream and chocolate ganache. I made a mistake with the second cake; I let the buttercream solidify before I spread the ganache on top. So it doesn’t have the lovely marbled effect, the mingling of buttercream with the ganache, that the first cake had. Next year!


OLIVIA CAKE

Note: to omit the dacquoise, increase the buttercream to 1-1/2 cups unsalted butter, 3 cups icing sugar and 1/2 cup cocoa.

  • Make the chocolate and the white piskóta, the hazelnut dacquoise, the chocolate ganache and the chocolate buttercream in that order.
White Piskóta:
6 eggs separated
6 heaping Tbsp sugar
6 heaping Tbsp cake flour
lemon zest, finely grated

Chocolate Piskóta:
8 eggs separated
8 heaping Tbsp sugar
5 heaping Tbsp cake flour
5 heaping Tbsp cocoa

Hazelnut Dacquoise:
1/8 cup + 2/8 cups sugar
1 scant Tbsp cornstarch
1/8 cup toasted, skinned, and ground hazelnuts
2 egg whites from small eggs, at room temperature
1/4 tsp vanilla extract
1/8 tsp cream of tartar

Chocolate Ganache:
3 oz bittersweet chocolate
1/4 cup heavy cream
1/8 cup unsalted butter, at room temperature, cut into small pieces

Chocolate Buttercream:
1 cup soft unsalted butter
2 cups icing sugar
1/3 cup cocoa, sifted

TO MAKE THE WHITE PISKÓTA:
  • Beat the egg yolks and sugar until thick and lemon coloured.
  • Add zest to sifted cake flour.
  • Stir the flour mixture into the yolk mix.
  • Wash the beaters and beat the egg whites until stiff peaks form.
  • Gently fold egg whites into the cake batter.
  • Line a 9-inch round cake pan with parchment paper.
  • Pour in the batter and gently level the top.
  • Bake at 350F for 23 minutes or until the middle springs back.
TO MAKE THE CHOCOLATE PISKÓTA:
  • Beat the egg yolks and sugar until thick and lemon coloured.
  • Whisk the cake flour and the cocoa.
  • Stir the flour mixture into the cake batter.
  • Wash the beaters and beat the egg whites until stiff peaks form.
  • Gently fold egg whites into the mixture.
  • Line a 9-inch round cake pan with parchment paper.
  • Pour in the batter and gently level the top.
  • Bake at 350F for 35 minutes or until the middle springs back.
TO MAKE THE DACQUOISE:
  • Lower the oven temperature to 300°F.
  • Draw a circle on parchment paper about 1 inch smaller than the bottoms of the cake pans used for baking the cakes.
  • Outline the circle with a felt pan.
  • Place the parchment sheet, tracing-side down on a baking sheet and set it aside.
  • Combine sugar, cornstarch and toasted, skinned, and ground hazelnuts in a food processor.
  • Pulse one or two times. Set aside.
  • Place the egg whites from small eggs in the bowl of a standard mixer.
  • Beat at low speed until frothy.
  • Add the vanilla extract and cream of tartar and beat at medium speed until soft peaks form.
  • Add sugar at 1 Tbsp at a time, and beat until stiff peaks form and the mixture is glossy.
  • Transfer to a wide, shallow bowl.
  • Sprinkle one third of the sugar-hazelnut mixture over the meringue and fold in by hand.
  • Repeat this two more times with the remaining sugar-hazelnut mixture.
  • Scoop this mixture inside the parchment circle and smooth out the top.
  • Bake for 40 to 45 minutes, or until the dacquoise is dry and brittle to the touch.
  • Turn off the oven and leave the dacquoise in the oven until it reaches room temperature, approximately 1 hour.
TO MAKE THE CHOCOLATE GANACHE
  • Chop the chocolate into small, matchstick-size pieces and place in a large stainless steel or heat-resistant bowl.
  • Bring the cream to a rising boil and pour, all at once, over the chopped chocolate.
  • Stir until the chocolate is melted and completely smooth with no lumps.
  • Quickly stir in one or two pieces of the softened butter at a time, until completely dissolved.
  • Set aside to thicken to a spreadable consistency.
TO MAKE THE CHOCOLATE BUTTERCREAM:
  • Beat the unsalted butter with the icing sugar on high speed for 5 minutes until soft and frothy.
  • Add the sifted cocoa and beat to combine.
TO ASSEMBLE THE CAKE:
  • Cut both cakes and the hazelnut dacquoise horizontally into 2 parts.
  • Divide the chocolate ganache into 2 parts.
  • Divide the buttercream into 4 parts.
  • Next, assemble the cake layers starting from the bottom: 
1 part chocolate piskóta
1 part chocolate buttercream
1 part white piskóta
1 part hazelnut dacquoise
1 part chocolate ganache
1 part chocolate piskóta
1 part chocolate buttercream
1 part hazelnut dacquoise
1 part chocolate ganache
1 part white piskóta

  • Cover top with 1 part buttercream
  • Cover side with 1 part buttercream
  • Cover top with 1 part chocolate ganache
  • Cover top with 1 part chocolate ganache
  • Place in the fridge to chill for 1 hour.

12.9.15

ZUCCHINI PATTIES - CUKKINI FASÍRT

Zucchini was not part of my culinary experience while growing up in Budapest, Hungary. It took me years to appreciate this vegetable and even longer to use it. This was the first year my darling planted zucchini in our garden and we have been enjoying it in various ways and keeping our friends and neighbours well supplied. Our next-door neighbour, Pat took in 6 orphaned specimens. It is amazing how fast a little zucchini grows into a formidable club and even with all the help we are getting with “using up” and “not wasting” these vegetable wonders, we can’t seem to keep up with their pace of growth. “Earth to earth” as Jim treats the garden when overabundance strikes. Back to the earth they go when overripe.

Fasírt is the Hungarian equivalent of the hamburger, but incomparably more tasty and palatable than hamburger.  You can take a fasírt to a picnic cold. It does not necessitate the smearing of several types of condiments, onions, tomatoes, cheese and bacon in order make the fasírt palatable. You just pop it into your mouth and the fasírt is good as is. No doubt, a similar recipe has made it into the realms of vegetarian cooking already, though not exactly the Hungarian way.  I replaced the lean ground pork with diced zucchini, [diced and not grated!], and because the flavours are delicate, I replaced the paprika with a roasted spice. Fusion! This is the zucchini fasírt.  

ZUCCHINI PATTIES
3 cups finely diced zucchini
2 sprinkles of salt
1/2 red pepper, diced
2 cloves of garlic, minced
1 egg
fine breadcrumbs
salt to taste
1 sprinkle of roasted garlic and red pepper spice or Greek Seasoning
1/8 cup oil for frying

  • Wash the zucchini.
  • If zucchini is large and a bit overripe, scoop out the pulp and the seeds from the middle and discard.
  • Do not grate the zucchini. Limp zucchini strands will make the patties slimy. First slice the zucchini very thin and with a chef’s knife chop it into tiny cubes. [I didn’t use the food processor. By the time I would have set it up, I already chopped up the zucchini.]
  • Place the diced zucchini in a bowl, salt it and give it a stir.
  • Let the zucchini rest for 10 minutes and then squeeze out all the juices.
  • Discard the juices and place the zucchini back in the bowl.
  • Add the diced red pepper, the minced garlic and the egg and mix to combine.
  • Gradually work into the mixture fine breadcrumbs to form patties. The reason I did not include the amount of breadcrumbs. The amount needed will depend on several other factors. Just keep in mind the texture should remain soft but not wet or sticky. Too much breadcrumbs on the other hand can make the patties dense and heavy. It is best to go by feel and not by measurement. 
  • Taste the mixture and adjust the salt.
  • Add the choice of seasoning and mix well.
  • Form patties and roll the patties into fine breadcrumbs.
  • Place a thin layer of oil in a non-stick skillet.
  • On medium heat, slowly fry the patties until both sides are golden brown. 
  • These patties are equally nice served with Garlic Mashed Potatoes or with Fried Potatoes and a salad. 

11.9.15

ZUCCHINI TOMATO TART

I was looking for new ways to cook zucchini. I looked at several cooking blogs for ideas and decided I liked the look of one recipe. It called for pie pastry and excessive amounts of onions, so I decided to make a small batch of my pizza dough and use less, a lot less onions. To reduce the acidity I used fresh cherry tomatoes instead of tomato sauce. Starting the first layer with mozzarella cheese was a good idea. The tart turned out really well, it was vibrant, fresh, and satisfying.  This recipe is for two people. 
ZUCCHINI TOMATO TART
Dough:
1-1/4 cups flour 
1 tsp sugar 
1/2 tsp salt 
1-1/4 tsp instant yeast
1/8 cup oil 
1/2 cup lukewarm water 
Toppings:
1 Tbsp oil
1 Tbsp butter
1/2 medium sized onion, sliced very thin
1 cup grated mozzarella cheese
1/2 cup shaved parmesan cheese,
2-3 cups thinly sliced zucchini
2 cups fresh cherry tomatoes
3 sprigs of flat leaf parsley
sprinkling of roasted tomato and red pepper seasoning

  • Prepare pizza dough first.
  • Place 1/2 cup of the flour, the sugar, salt and instant yeast in a large bowl. 
  • Add the oil and the lukewarm water. 
  • Mix until well combined. 
  • Let dough rest for 10 minutes. 
  • Place dough on a floured board and kneed until elastic. 
  • Let dough rise 1-1/2 hours or until doubles. 
  • Line a rimmed baking sheet with parchment paper
  • After the first rising of the dough punch down and roll the dough to fit the baking sheet.
  • Roll back the edge all around. Set aside.
  • Meanwhile prep the onions, zucchini and the fat leaf parsley.
  • Grate and shave the cheeses.
  • Preheat oven to 400F.
  • On medium heat slowly sauté the onion slices in oil and butter until soft. Do not brown.
  • Spread the mozzarella on top of the pizza dough.
  • Arrange the mozzarella cheese, onions, zucchini, parmesan cheese and flat leaf parsley on the dough in that order.
  • Sprinkle with roasted tomato and red pepper seasoning.
  • Place in preheated oven and bake until cheeses melt and lightly brown.

7.9.15

YORKSHIRE PAN PUDDING

All right! It’s yorkshire pudding! That was Jim yesterday. Every time I make it, I wonder why don’t I make it more often.

The consistency of the yorkshire batter is slightly less thick than the consistency of crepe batter. Aside from using room temperature ingredients, thin consistency is probably the most important factor in successful yorkshire making. I am used to make it by the feel, but this time I carefully measured out the recipe. In all probability, the yorkshire will be an accompaniment to something, so start dinner assembling the yorkshire and set it aside while you make the rest of the meal. The other requirement is a thoroughly heated pan with oil. No you can’t reduce the oil or spray the pan with cooking spray. When you pour the batter into the pan it should bubble up and grow instantly. If it didn’t, the pan and the oil was not hot enough. But don’t worry, the yorkshire still has a chance. Just don’t open the oven door until it's done. When done, thw yorkshire will have a deeply browned appearance. It will also deflate when you cut into it, but that is the way of the yorkshire pan pudding. Traditionally yorkshire pan pudding is baked in roast drippings, but I rather use the drippings for gravy. Not to mention that I had no pan drippings, 

YORKSHIRE PAN PUDDING
3 eggs
3/4 cup flour
2/3 cup milk
1/3 cup water
salt to taste
1/4 cup oil

  • In a medium large bowl, whisk together the ingredients, minus the oil, until well blended.
  • Set it aside while you make the main course.
  • Half an hour before the meal set the oven to 450F.
  • Pour 1/4 cup of oil in an ovenproof pan.
  • Place the pan in the oven for 10 minutes.
  • Whisk the dough. If it thickened loosen it with a bit of water.
  • Remove the pan with heavy oven mitts and quickly pour the chilled dough into the hot pan.
  • Place the pan in the oven for 25 minutes or until the yorkshire puffs up and parts of it are deep brown.
  • Remove the pan from the oven and slide the yorkshire onto a platter and serve it immediately.
  • I like to cut the yorkshire at the table as it deflates.
I served this yorkshire with Temesvári Sertésborda.

6.9.15

PEANUT BUTTER BARS

I am not a fan of peanut better but we always have a jar of Adams in the fridge. The man and the girl LOVE peanut butter. So occasionally, I make them a peanut butter treat. This recipe comes from allrecipes.com. It tastes just like a candy bar. The base is dense and crunchy and the frosting is chocolaty. I made the first bar a long time ago, and then I made it again the other day. I never have to freeze leftovers. I put it out and it just disappears.

PEANUT BUTTER BARS
Base:
1-1/2 cups flour
1/2 tsp salt
1/2 tsp baking soda
1-1/2 cups quick oats
3/4 cup butter
1 cup packed brown sugar
1/2 cup granulated sugar
1-1/2 cups creamy peanut butter, divided
2 eggs
1 tsp pure vanilla extract
Chocolate Frosting:
1/2 cup butter
2 Tbsp cocoa powder
1/4 cup heavy cream or whole milk  
1 tsp pure vanilla extract
3-1/2 cups icing sugar

  • Preheat oven to 350F.
  • Line a rimmed cookie sheet with parchment paper.
  • In a mixing bowl, whisk together flour, salt, and baking soda, then whisk in quick oats, set aside.
  • In the bowl whip together butter, brown sugar and granulated sugar for 3-4 minutes or until pale and fluffy.
  • Blend in 3/4 cup peanut butter.
  • Stir in eggs one at a time, mixing after each addition until combine.
  • Mix in vanilla.
  • On low speed, slowly add in dry ingredients and mix to combine.
  • Spread the mixture into an even layer into a prepared rimmed cookie sheet.
  • Bake in preheated oven for 13-15 minutes, until lightly golden.
  • Remove from oven and let cool for 5 minutes. At this point, it is too fragile to spread it with peanut butter.
  • After the base solidifies a bit spoon the remaining 3/4 cup peanut butter on the top.
  • Allow the peanut butter to rest for 1 minute then carefully spread it into an even layer.
  • Next, prepare the chocolate frosting.
  • Melt butter in a medium saucepan over medium heat.
  • Whisk in cocoa powder, then whisk in milk and bring mixture just to a boil.
  • Once mixture reaches a boil, remove from heat and stir in vanilla extract.
  • Add in icing sugar and mix until well blended.
  • Immediately pour over peanut butter layer and spread into an even layer. Beware the frosting sets quickly
  • Let the frosting cool before cutting into squares.
  • Store the bars in single layers.

5.9.15

CHICKEN PIE

Do you remember the chicken ala king with the canned mushroom soup and the bullion cubes? Chicken Pie, AKA Bizzy Lizzy’s Fish Pie recipe, is nothing like that! It is true that we eat with our eyes first. When I first saw it on Lizzy’s blog I wanted to have a helping, what kept me back aside from the huge distance, haha, was the fish thing. I fully resent everything that swims, floats or crawls in water. Then came the aha moment and I thought I could make this with chicken! I am so glad I did; the pie turned out superb. It is now up there among my comfort foods. Anyone who loves seafood will adore Lizzy’s recipe. What follows here is the cluck-cluck version. Jim and I loved it on the first day, but just as Lizzy said, it was even better the following day.

Instead of fennel and dill seeds, I used parsley, sage, rosemary and thyme. The popular song by Simon and Garfunkel is a perfect reminder what herbs would work with chicken. I didn’t have leftover mashed potatoes, but even if I had, the amount left over from two people would have been insufficient. I also substituted some of the potatoes with celeriac and after half way though it occurred to me I could have cooked them in a homemade chicken stock... maybe next time if I remember. The potatoes and the chicken stew layer were ready about the same time.

Simon & Garfunkel Scarborough Fair


CHICKEN PIE
Note: The layers listed in the order of preparation. The Chicken layer is on the bottom, the mashed potato layer is in the middle and the cheese layer is on the top.
Potato Layer:
6 potatoes
1 heaping Tbsp butter
1/8 cup warm heavy cream
1 egg yolk
Chicken Layer:
skinless, deboned chicken breast [150-200g] in slivers
2 Tbsp olive oil
2 Tbsp butter
1 small onion, finely chopped
salt and pepper to taste
1 heaped Tbsp flour
1/2 cup frozen peas
parsley, sage, rosemary and thyme
1 cup milk
Cheese Layer:
1 cup grated aged cheese, like cheddar

  • Peal, wash and dice the potatoes.
  • Cook in water until tender.
  • Preheat the oven to 350F.
  • While the potatoes cook, prepare the chicken layer.
  • Wash, dry and sliver the chicken breast meat and finely chop the onion.
  • Add the oil and the butter to a large non-stick skillet.
  • Add the chicken and season with salt and pepper.
  • On medium heat, sauté the chicken in the buttery oil until fully cooked.
  • Remove the chicken with a slotted spoon and set it aside.
  • Add the cooked onion to the remaining buttery oil in the pan, lightly salt it and sauté until very soft.
  • Sprinkle flour over the soft onions and stir.
  • Pour in the milk, stir and bring to a slow simmer.
  • Add the herbs. Sprinkle with dry herbs lightly; add more if fresh herbs are used.
  • Slowly cook for a couple of minutes.
  • Adjust the salt and remove skillet from the heat.
  • When the potatoes are tender drain, mash and add the rest of the ingredients.
  • Whip or stir until combined.
  • Grease the base and sides of a large glass pie plate or medium sized ovenproof dish with butter.
  • Layer the chicken mixture in the greased dish.
  • Fully cover with the potato layer, sealing the edges.
  • Grate the cheese on the top and bake in the preheated oven for 30 minutes.

4.9.15

FRESH STRAWBERRY CRUMB BARS

She reached for the plain sugar cookie and left the crumb bars. Those ones I made with fresh strawberries, I said, go ahead and try one. She was amazed. I thought it was jam and that it would be too sweet. Oh, these are good! Leilah inherited my palate. We don’t like overly sweet things. Neither of us smoked and our taste buds are still in overdrive. In the end, she left three for her dad and packed up the rest. What a difference fresh fruit makes!

FRESH STRAWBERRY CRUMB BARS
Base:
1-2/3 cups flour
1/3 cup sugar
1/2 tsp baking powder
1 pinch of salt
finely grated rind of half a lemon
1/3 cup butter, soft
1 egg, lightly beaten

Strawberry Filling:
2 cup diced fresh strawberries
1/2 cup sugar
1 Tbsp lemon juice
Crumble Top:
1-1/3 cup flour
1/3 cup sugar
1/2 cup butter

  • Preheat the oven to 350F.
  • Line a 9X13 inch baking pan with parchment paper.
  • Place the flour, sugar, baking powder, salt in a large bowl and whisk to combine.
  • Add the lemon rind and stir to distribute evenly throughout the flour mixture.
  • Rub the butter into the flour mixture.
  • Stir in the beaten egg.
  • Press the mixture into the prepared pan
  • Bake the base in the preheated for 20 to 25 minutes or until golden and firm.
  • Let it cool.
  • Meanwhile wash a hull the strawberries and dice them uniform.
  • Place the diced strawberries in a small bowl.
  • Add the sugar and the lemon juice and give it a stir.
  • Next, prepare the crumble topping.
  • In a bowl, whisk together the flour, sugar, and rub the butter into it.
  • Layer the strawberry mixture on top of the cooled base.
  • Top with the crumble topping.
  • Return to the oven and bake for 35 to 40 minutes or until golden.

3.9.15

ZUCCHINI LAYER CAKE

What to do with those large zucchinis people so generously give away this time of year? You make a zucchini layer cake. This was a large cake, I froze it for those times when the cake maker shuts down and Jim turns to saltines. Appearances can be deceiving; I am not a perpetual baker.

It tasted like spice cake and I could not have guessed it was a zucchini cake. The zucchini strands were indistinguishable; kids will not know they are eating a vegetable. Olivia picked the raisins out and lined them up on her plate as evidence of my betrayal. The frosting was reminiscent of a lighter cheese cream frosting. The cake had a lovely crumb, but sliced much easier after I chilled it. I jumped the gun a bit, hence the large slice. It took Jim and me two teatime snacks to finish it. Adapted from a nut version on CHOW, I decided the cake batter needed the addition of buttermilk. It turned out lovely and I will make this again. 

ZUCCHINI LAYER CAKE
Cake:
3 cups cake flour
1-1/2 tsp baking powder
1-1/2 tsp ground cinnamon
1 tsp baking soda
1/2 tsp ground nutmeg
1/2 tsp salt
4 eggs
1 cup dark brown sugar
1 cup sugar
1 cup vegetable oil
2 tsp vanilla extract
3 cups grated zucchini
1-1/2 cups of mixed golden and dark raisins
1 cup plain full fat Greek yoghurt
Frosting:
3/4 cup unsalted butter, soft
3 cups icing sugar
1 Tbsp vanilla extract
1 Tbsp fresh lemon juice
1/3 cup plain full fat Greek yogurt

  • For the cake:
  • Preheat the oven to 350F.
  • Fully line two 9-inch cake pans with parchment paper.  
  • Whisk the flour, baking powder, cinnamon, baking soda, nutmeg, and salt in a large bowl and set aside.
  • Add the zucchini and the raisins and stir until evenly mixed throughout.
  • Beat the eggs, sugars, oil, and vanilla until well blended.
  • Alternatively add the egg mixture and the buttermilk to the flour mixture.
  • Divide the batter evenly between the prepared pans.
  • Bake in the preheated oven until for 40 to 45 minutes or until a cake tester inserted in the center comes out clean.
  • Transfer the cakes to a wire rack to cool.
  • Meanwhile prepare the frosting.
  • Beat the butter and sugar until fluffy.
  • Add the vanilla, lemon juice and the salt.
  • Add the yogurt gradually until evenly combined.
  • Place a layer on a platter and spread on top 1/3 of the frosting.
  • Place the second cake on the top and spread the top and sides with frosting.
  • Chill the cake before slicing.

Privacy & Cookies

This site uses cookies. By continuing to use this website, you agree to their use. To find out more, including how to control cookies, see here: Cookie Policy

Translate

me

My photo
It began with posting a few recipes on line for the family. "zsuzsa is in the kitchen" has more than 1000 Hungarian and International recipes. What started out as a private project turned into a well visited blog. The number of visitors long passed the two million mark. I organized the recipes into an on-line cookbook. On top of the page click on "ZSUZSA'S COOKBOOK". From there click on any of the chapters to access the recipes. For the archive just scroll to the bottom of the page. I am not profiting from my blog, so visitors are not harassed with advertising or flashy gadgets. The recipes are not broken up with photos at every step. Where needed the photos are placed following the recipe. Feel free to cut and paste my recipes for your own use. Publication is permitted as long as it is in your own words and with your own photographs. However, I would ask you for an acknowledgement and link-back to my blog. Happy cooking!