28.3.21

SOFT BREAD ROLLS

AKA…two hoagies instead of four! The hoagies were such a hit; I also made 2 bread rolls. Then the following week 
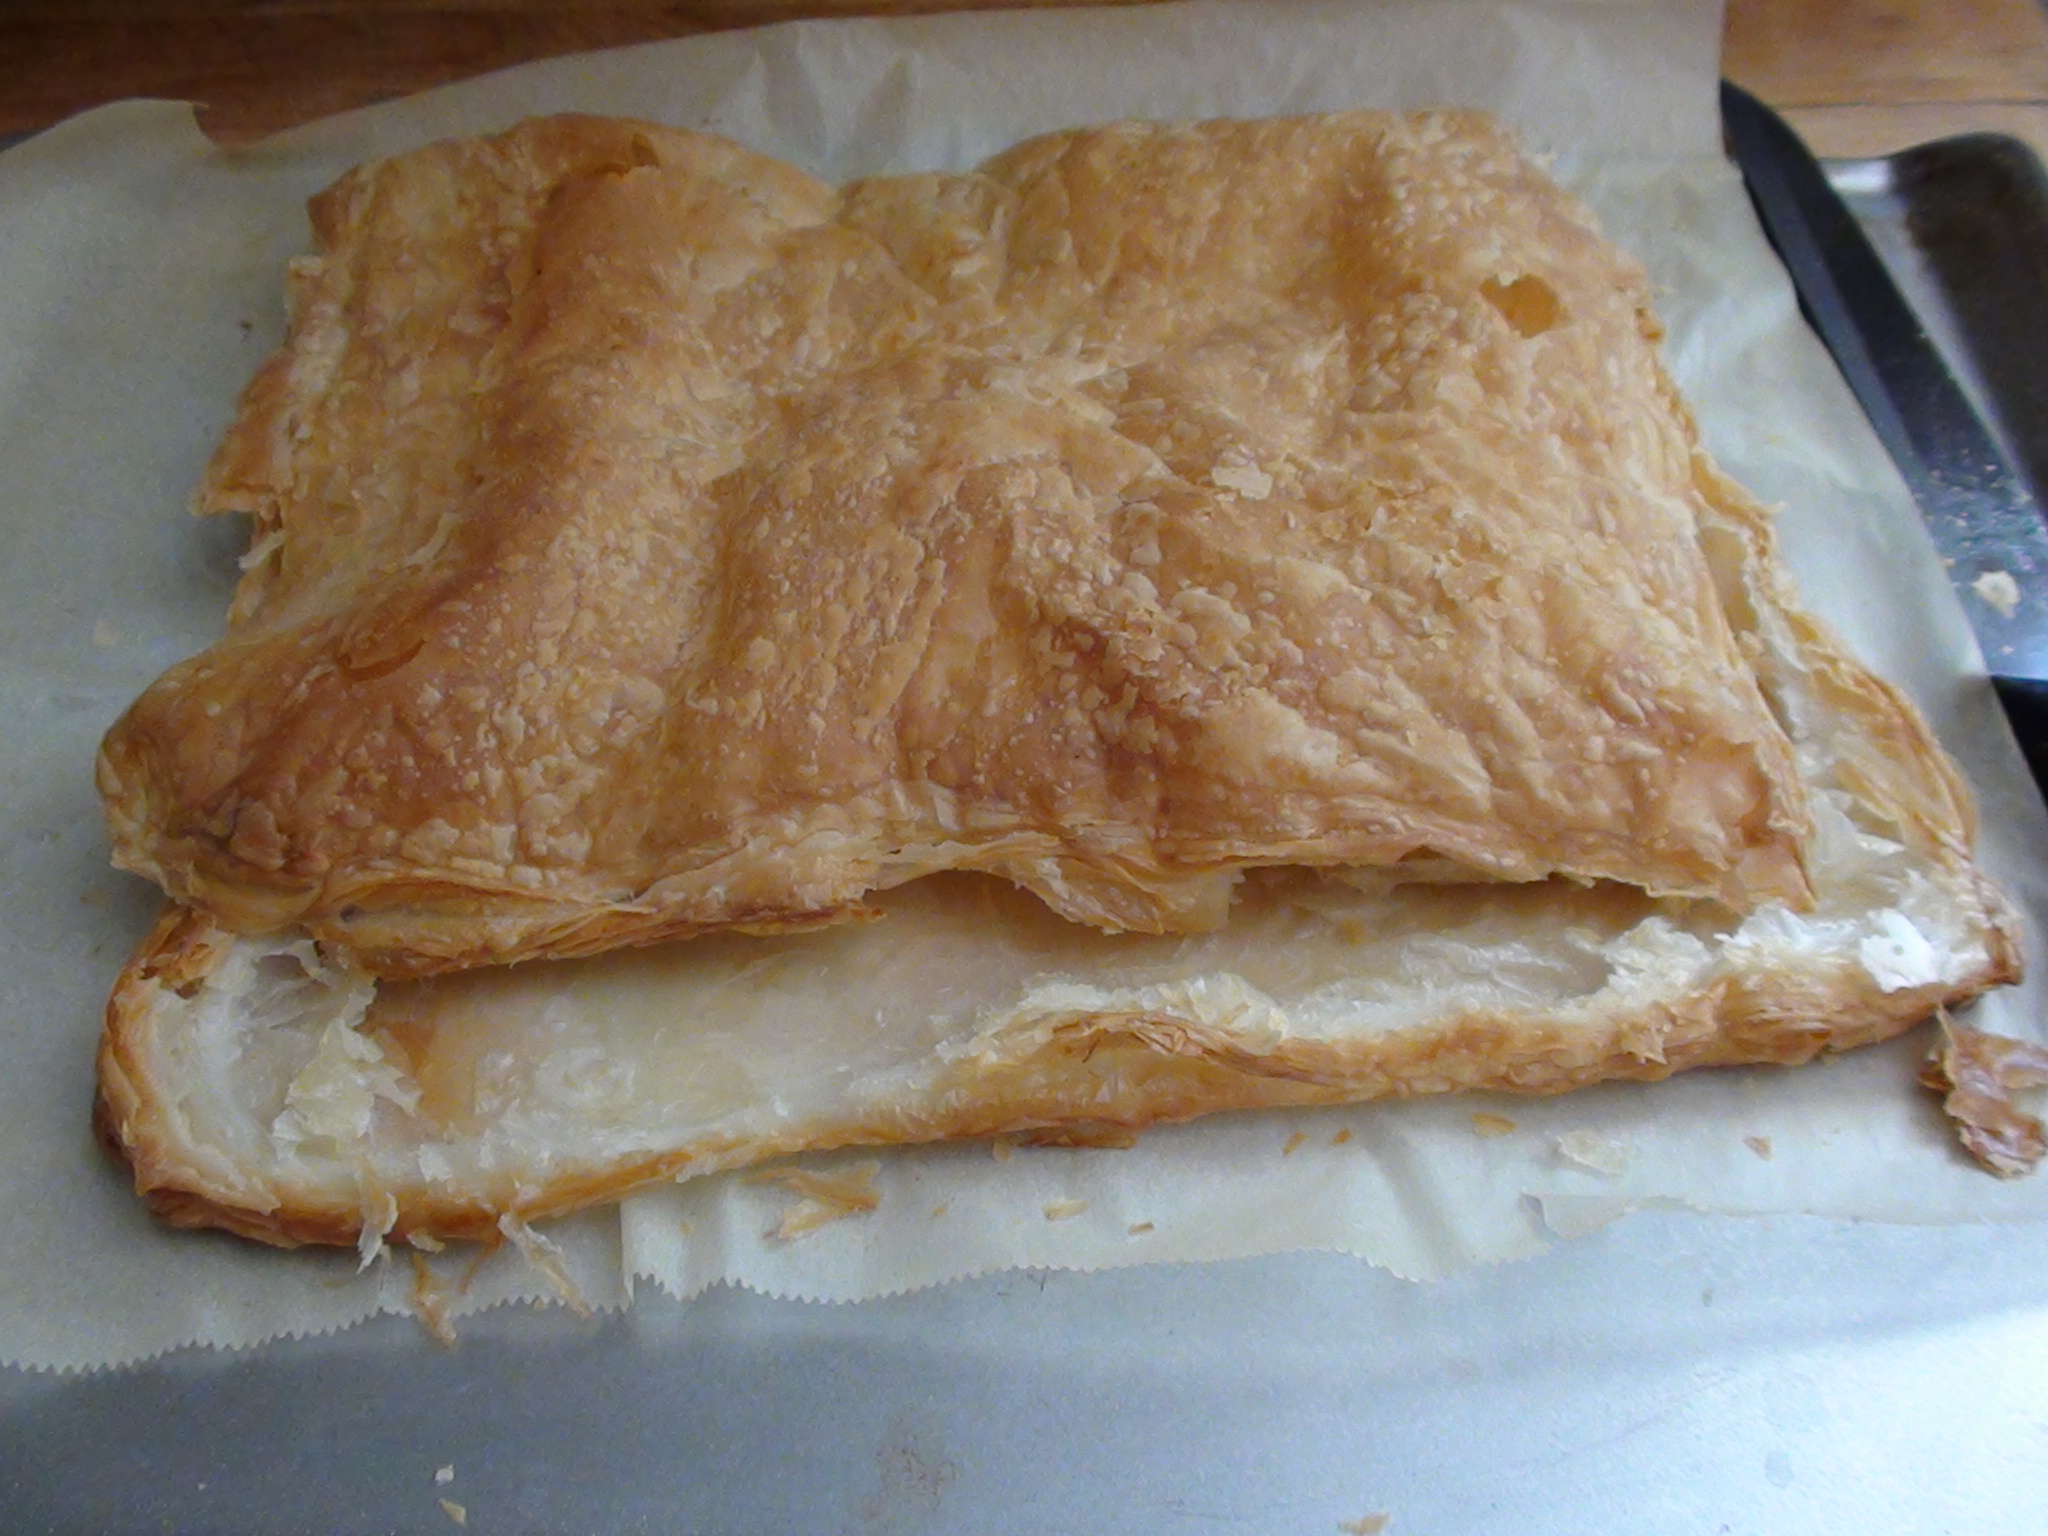
I made a whole wheat version. Scroll down to the bottom of the page for the pictures. They were all tasty and soft and not complicated. 

SOFT BREAD ROLLS 
1cup warm 1% milk 
2 tsp instant dry yeast 
2 Tbsp sugar 
1 tsp salt 
3 Tbsp butter, lightly melted [but not hot!] 
1 egg 
2-3/4 cups flour

  • In a large bowl combine milk, yeast, sugar, salt, and the butter.
  • Gradually start adding the flour. Don’t dump the whole amount in.
  • When dough has formed, transfer it to a stand mixer.
  • Knead and keep adding from the remaining flour until the dough is smooth.
  • Transfer dough to a lightly greased mixing bowl, flip over, cover with towel, and let it rise for 1 hour or until doubled in size.
  • Roll the dough into a 1/4 inch thick rectangle. The long side of the rectangle should be 24 inches.
  • Divide this by slicing through parallel to the long side.
  • Roll up both strips tightly starting from the long side. It will be the shape of a skinny French bread.
  • Pinch the ends together; otherwise the rolls will unravel during baking.
  • Place both roll on a prepared baking sheet and let them rise for 30 minutes.
  • Preheat oven to 375F.
  • Bake the rolls for 15 to 20 minutes or until lightly browned.


For the whole wheat version, I used 3/4 cup whole wheat flour and 2 cups of all purpose. The rest of the ingredients are the same as above. Oh and I only made one bread.

PARMESAN CRUSTED BABY ZUCCHINIS


I am not a fan of limp, soggy zucchinis. The secret of this recipe lies in using small zucchinis and barely blanching them. If they get tender, hey it happens, just serve them with butter. But if you don’t overcook them, the zucchinis will be hot and yet still crunchy through and trough.

PARMESAN CRUSTED BABY ZUCCHINIS
2 small baby zucchinis
2 tsp olive oil
2-3 Tbsp grated parmesan cheese
salt and black pepper to taste

  • Fill a medium pot with water and bring to a boil with 1 tsp olive oil.
  • Next set out a bowl of ice water
  • Wash the zucchinis and cut off ends and quarter them lengthwise.
  • Drop the zucchinis into the rapidly boiling water for 1 minute.
  • Remove with a slotted spoon and immediately plunge them into the bowl of ice water for a few minutes to halt the cooking process.
  • Drain in a colander and pat dry with paper towels.
  • Arrange zucchinis in rows, with the cut side up on the prepared pan.
  • Brush the tops with olive oil and sprinkle with a little salt.
  • Sprinkle parmesan cheese on top.
  • Place in the oven and turn the setting to broil until cheese is completely melted and well-browned.
  • Remove from oven and season with freshly ground pepper.
  • Serve hot or warm.
  • The zucchinis will be crunchy tender and delicious.


SOFT HOAGIES

Are they hoagies or subs? Depending on how many I shape, it can be a bread roll too. Either way these are tasty and soft and not overly complicated to make. This is a good thing, because these don’t last long around here. Why do I cook so much? I’ve become a sucker for watching people enjoying my food. Unequivocally, you can’t get it this good at the bakery. Never did and never will. Adapted from the Stay at Home Chef, these have become Jimre’s favorites. 

SOFT HOAGIES 
1 cup warm 
1% milk 
2 tsp instant dry yeast 
2 Tbsp sugar 
1 tsp salt 
3 Tbsp butter, lightly melted [but not hot!] 
1 egg 
2 3/4 flour 

  • In a large bowl combine milk,yeast, sugar, salt, and the butter.
  • Gradually start adding the flour. Don’t dump the whole amount in.
  • When dough has formed, transfer it to a stand mixer.
  • Knead and keep adding from the remaining flour until the dough is smooth.
  • Transfer dough to a lightly greased mixing bowl, flip over, cover with towel, and let it rise for 1 hour or until doubled in size.
  • Roll the dough into a 1/4 inch thick rectangle. The long side of the rectangle should be 24 inches.
  • Divide this side into 4 parts. You will get four 6 inches wide strips.
  • Roll up each strip tightly starting from the long side.
  • Pinch the ends together; otherwise the hoagies will open up during baking.
  • Place hoagies on a prepared baking sheet and let them rise for 30 minutes.
  • Preheat oven to 375F.
  • Bake hoagies for 12 to15 minutes or until lightly browned.
  • ZUCCHINIS IN JACKET

    There can be too much of a good thing. I recall last summer trying out new ways to use up the constant supply of zucchinis. We had more zucchinis growing than we knew what to do with after family; friends and neighbors no longer wanted them. This was just one of my more successful experiments. 

    ZUCCHINIS IN JACKET 
    1 medium large or 2 smaller zucchinis 
    2/3 cup 10% plain Greek yogurt 
    4 Tbsp flour 
    1 egg 
    salt to taste 
    1 garlic clove, minced 

  • Cut the zucchinis into finger thick slices.
  • Combine the yogurt, flour, egg, salt, and minced garlic in a medium sized bowl.
  • Roll the zucchini slices around the bowl with a fork to evenly coat each slice with the batter.
  • Place the bowl with the zucchinis in the fridge for half an hour.
  • Heat the oil in a large skillet on medium heat and one by one drop the zucchinis into the hot oil and fry them until golden.  
  • 27.3.21

    HUNGARIAN CHEESE SQUARES - OMLÓS TÚRÓS


    Hungarian túró is NOT cottage cheese. Lots of Hungarian on-line recipes and cookbooks substitute túró with cottage cheese. Don’t try these, they don’t work. Túró is virtually unknown in North America. Possible substitution for túró is curd cheese, or farmer’s cheese or quark. But since none of these are mainstays, it can be a challenge to find them. This is why I periodically make a batch of túró. You can also find recipes for curd cheese, farmer's cheese and for quark. Take your pick. Omlós Túrós, also known as Túrós Pite is one of those delicacies where making túró or some type of replacement is worth the effort. Just don't use cottage cheese.  

    1972 and Just arrived from Canada. The three of us are stuffing our faces with Nagymama's túrós.  My mom is enamored with Susie, her first grandchild. Peter is sitting by his red car. The rest of the family is watching us strange new birds...

    HUNGARIAN CHEESE SQUARES
    Pastry:
    1 cup flour 
     1/4 cup butter 
    1 egg yolk 
    1/2 cup icing sugar 
    1 tsp baking powder 
    grated peel of half a lemon 
    1 Tbsp 14% sour cream 
    Filling: 
    2 cups túró or curd cheese 
    1/2 cup sugar 
    1/2 cup semolina 
    1/2 cup 14% sour cream 
    grated peel of half a lemon 
    1/2 cup raisins 
    1 egg white for the top
    icing sugar for dusting

    • Line a square baking pan with parchment paper and set it aside.  
    • Rub the butter into the flour and add the remaining ingredients.
    • Combine to make soft dough and refrigerate to chill.
    • Meanwhile make the filling.
    • In a large bowl combine first five filling ingredients and mix thoroughly.
    • Stir in the raisins.
    • Preheat the oven to 350F.
    • Take the chilled dough and divide into two parts.
    • Roll out the first dough to fit the baking pan.
    • Spread the filling evenly over the bottom layer.
    • Roll out the second layer; making it slightly larger to accommodate for the slant of your baking pan.
    • Place the top layer on top of the filling..
    • Prick with a fork and brush the top with the beaten egg white.
    • Bake in the preheated oven for 35-40 minutes or until golden.
    • Let the square cool to room temperature before slicing.
    • Sprinkle icing sugar on the top. 
    Pastry

    Filling


    26.3.21

    WHEY BREAD

    Every time I made túró [Hungarian curd cheese] I felt guilty discarding the leftover whey. I tried making ricotta from it, but it was a complete disaster. Then the thought occurred to me what if I use  the whey for making bread? Adapted from the recipe from How to Feed a Picky Eater, when I make túró now, the following day we have delicious whey bread. There is no waste and the bread from whey is one of my favorites. The flavor is lovely, it is soft on the inside and crispy on the outside. 

    WHEY BREAD 
    2 cups lukewarm whey 
    3 tablespoons olive oil 
    2 tsp instant dry yeast 
    1 Tbsp sugar 
    2 tsp salt 
    5 cups whole purpose flour 
    2 Tbsp butter, melted

    • Place the first five ingredients in a large mixing bowl.
    • Begin to add the flour.
    • Keep adding the flour until a soft and slightly sticky dough forms.
    • Transfer the dough to an oiled bowl, turn it over and cover it with a clean kitchen towel.
    • Let the dough rise for an hour and a half.
    • Meanwhile line a regular size bread pan with parchment paper.
    • When the dough has doubled in size, transfer to the bowl of a standing mixer and knead it until shiny and very elastic.
    • Shape the loaf and place it in the prepared bread pan.
    • Brush the top with melted butter and set it aside to rise for another 30 minutes.
    • Preheat the oven to 375F.
    • After 30 minutes place the bread in the preheated oven and bake for 30 to 35 minutes.
    • Leave the bread in the pan for 5 minutes and then turn it out onto a wire rack to cool.

    CREAM BRAID - TEJSZÍNES KALÁCS

     Baked in a bread pan, I am certain; this braid would work using only all purpose flour. However bread flour enhances the texture. Awhile passed since I made it and wrote down the notes for myself, and of course memory fades but just looking at the pictures this couldn’t have lasted long at our house.

    CREAM  BRAID 
    1 1/4 cups bread flour 
    3 1/4 cups all purpose flour 
    1 tsp salt 
    3 1/2 Tbsp sugar 
     2 1/2 tsp instant yeast 
     3/4 cup whipping cream 
    1 whole egg 
    1 egg yolk 
    3/4 cup milk 
    1 whole egg beaten

    • In a large bowl, whisk together flour, salt, sugar and instant yeast.
    • Add the whipping cream, 1 egg, egg yolk, and roughly half of the milk.
    • Stir to form dough.
    • Gradually add from the remaining milk if the dough is too hard to knead.
    • Transfer dough to the bowl of standing mixer with dough hook and kneed for 7 minutes or until the dough is smooth, glossy and elastic and when you cut into it you can see large holes.
    • Transfer dough to a greased bowl, cover and set it to rise for 45 minutes.
    • Next cut the dough into 3 equal pieces
    • Round the pieces into strands and cover again and leave them to rest for 15 minutes.
    • Next braid the three strands and gently tuck the ends under.
    • Fully line a regular size bread pan with parchment paper.
    • Place the braid in the prepared bread pan and brush the top with the beaten egg. Make sure the egg does not drip between the braids.
    • Leave the braid to rise for half an hour.
    • Preheat the oven to 400F.
    • Brush the risen braid with the beaten egg again and place in the preheated oven for 10 minutes.  
    • After 10 minutes, reduce the heat to 375F.
    • Bake for another 30-35 minutes. If the top begins to brown excessively and the bottom is raw, cover the braid with aluminum foil.
    • To test for doneness, press lightly between the braids on the highest part of the braid; it should be firm. If you feel the creases give when lightly pressed, continue baking until they firm up.
    • Let the braid cool on a wire rack.

    25.3.21

    PAN SEARED PARSNIPS

    I had huge parsnips from our garden; as I recall I only used two for this recipe. From smaller parsnips I estimate about six to eight or 2 cups sliced is needed.

    PAN SEARED PARSNIPS 
    6 to 8 parsnips, 
    2+1 Tbsp light olive oil [not extra virgin] 
    1 tsp dried marjoram or oregano 
    salt to taste

    • Peel the parsnips and cut out the woody centers if any.
    • Slice them to 2 to 3 mm thickness.
    • Heat 2 Tbsp light olive oil in a large non stick fry pan on medium heat.
    • Spread the parsnip slices around the pan.
    • Drizzle with the remaining oil and sprinkle with salt and marjoram.
    • Toss to coat evenly.
    • Slow fry, gently turning the parsnip slices over a few times until they get a golden color. The sugar in the parsnip will caramelize. There is no need to add liquid; the parsnip will sweat a little. Don’t leave them though; sliced parsnips don’t take long to cook. 


    23.3.21

    EGGNOG CAKE

    This is a perfect way to say goodbye to the eggnog left from the holidays. One year I had quite a surplus and ended up freezing the eggnog in batches. For the next six months we had eggnog muffins and loaves well into July. This year I made a cake.

    EGGNOG CAKE
    Cake: 
    2 1/2 cups sifted cake flour
    1 1/2 cups sugar
    1 Tbsp baking powder
    1/2 tsp freshly ground nutmeg
    1/4 tsp salt
    3 eggs
    1 cup eggnog, divided
    2 tsp pure vanilla extract
    1-1/2 cups salted butter, softened
    Eggnog Buttercream:
    1 1/3 cups sugar 1/3 cup flour 
    1 1/2 cups whole milk 
    1/3 cup whipping cream 
    1 1/2 cup unsalted cold butter 
     2 Tbsp dark rum 
    1 tsp pure vanilla extract 
    1 tsp freshly grated nutmeg 
    1/2 tsp cinnamon 
    • Line two 9-inch round cake pans with parchment paper. 
    • Whisk together cake flour, the sugar, baking powder, nutmeg, and salt. 
    • In a small bowl whisk the eggs, half the eggnog, and vanilla. Beat the butter for 4 minutes or until frothy. 
    • Add the remaining eggnog and the flour mixture and beat until combined. 
    •  Add the egg mixture to the batter in three batches, blending well after each addition. 
    • Divide the batter between the prepared pans. 
    • Bake the cakes for 30 minutes or until a toothpick inserted comes out clean,
    • Let the cakes rest in the pans on a rack for 15 minutes. 
    • Remove the cakes and place them on the cooling rack to cool down completely. 
    • Next make the Eggnog Buttercream.
    • In a medium saucepan, whisk together the sugar and flour. 
    • Slowly whisk in the milk and the whipping cream.
    • Cook continually stirring over low medium heat for 8 minutes or until the mixture has come to boil has thickened. Make sure it does not burn.
    • Remove the pan from the heat, and strain the mixture through a fine sieve and into the bowl of a stand mixer.
    • Beat the mixture on high speed for 10 minutes or until it has come to room temperature. To speed up the process, pack around the bowl a couple of zyploc bags filled with ice.
    • Reduce the speed to low, and bit by bit add the butter.
    • Increase the speed to medium high, and beat for 5 minutes or until all the butter is combined and the mixture is light and fluffy.
    • It can be a bit disheartening when it looks like a mess, but just keep beating; in the end the buttercream will come together beautifully.
    • Finally add the last 4 ingredients and beat again until light and fluffy.
    • Spread 1/3 of the buttercream on top of the bottom layer.
    • Place the second cake on the top upside down.
    • Apply a thin layer of buttercream to the outside of the cake. 
    • Refrigerate the cake for 10 minutes for the crumbcoat to solidify.
    • Cover the entire cake with the remaining buttercream.
    • Combine 1 heaping teaspoon of sugar with 1/4 tsp cinnamon and a bit of freshly grated nutmeg and sprinkle it around the top. 


    SOUR CREAM MUFFINS WITH STREUSEL

    The oil makes them soft and the butter makes them taste good. As for the leaveners, the baking soda requires both acid and liquid to activate. The baking powder includes a leavener [sodium bicarbonate], but is also an acid, so it only needs liquid to become activated. You could say this recipe leaves nothing to chance.  

    SOUR CREAM MUFFINS WITH STREUSEL
    2 1/4 cups flour 
    1/2 tsp baking soda 
    2 tsp baking powder 
    1/4 tsp salt 
    1/3 cup butter, soft 
    1/3 cup oil 
    1 cup sugar 
    2 eggs 
    1 cup 14% sour cream 
    1/8 cup milk 
    2 tsp vanilla extract 
    Streusel Topping

    • Preheat oven to 350F.
    • Line a muffin tin with parchment cup liners, or spray the inside of paper cup liners with cooking spray.
    • Prepare the streusel topping [click on the link] and set it aside.
    • In a medium bowl, whisk together the flour, baking powder, baking soda and the salt. Set it aside.
    • In a measuring cup combine the sour cream, milk and the vanilla and set aside.
    • Beat the butter, oil and sugar on medium speed until well mixed.
    • Add the eggs, one at a time, beating well after each addition.
    • With a wooden spoon gradually fold the flour mixture, alternating with the liquid ingredients until just combined. [so dry ingredients are no longer visible] Avoid overmixing, this makes the muffins dense.
    • Divide the batter in the muffin tin and top with the streusel mixture.
    • Bake the muffins for 25 minutes, or until a toothpick inserted comes out clean.
    • Baking time will vary with the size of the muffin tin, the amount of batter in each cup and the performance of the oven.
    • Remove the muffins from the oven and place them still in the tins on a cooling rack.
    • In 5 minutes gently lift one side of each muffin so the bottom doesn’t get soggy during the cooling.
    • When the muffins can be handled, transfer them to the cooling rack.

    STREUSEL TOPPING

    Some streusel recipes call for sparse amount of ingredients and it’s disappointingly not enough. Then some call for so much I end up with enough streusel for a second time. So I save it, but of course I never use it, and months pass and that is when the leftover streusel is tossed. By then I feel less guilty for the waste, because… the streusel may not even be safe to use. Well no more, I am making a note for myself; this is the right amount of streusel for a dozen muffins or for one coffee cake.

    STREUSEL TOPPING
    1/4 cup nuts, crushed 
    1/4 cup flour 
    dash cinnamon 
    dash nutmeg 
    1/4 cup dark brown sugar
    2 Tbsp butter, soft
    • In a small bowl, first combine the dry ingredients.
    • Using a fork, cut the butter into the mixture until incorporated.
    • Distribute the mixture over the tops of your muffins or a coffee cake and bake.

    22.3.21

    NO RECIPE CHOCOLATE BARK

      No recipe required, all you need is good quality baking chocolate and some toppings. Easy to make and pleasure to consume. Better than candy bar.

    Good Quality Chocolate

    Various Toppings
    Also crushed potato chips, diced dried apricots,  orange zest, dried cranberry, raisins, chopped pistachios, salted peanuts,  candied ginger, sliced almonds, coconut flakes,  chocolate chips, peanut butter chips, butterscotch chips, crushed hard candies, crushed hard caramels, flaky sea salt, candied ginger, coconut chips, caramel sauce, chili flakes… 

    NO RECIPE CHOCOLATE BARK 

    • Melt the chocolate in a double boiler, over simmering water.
    • Meanwhile line a baking sheet with parchment paper.
    • Have the long side face you.
    • Pour some of the melted chocolate in a strip.
    • Spread it out with an offset spatula.
    • Repeat with remaining chocolate.
    • While the chocolate is soft, arrange the topping of choice on the top in a randomly pleasing pattern.
    • Pop the tray into the freezer for five to ten minutes to harden.
    • Once the chocolate is hard to the touch, it's ready.
    • Snap it or slice it.
    • Store the barks in the fridge.

    WHITE CHOCOLATE BROWNIES

    Use good quality white baking chocolate. It seems every recipe calls for melting the butter with the chocolate, but my instinct told me this would make the bar dense. Not wanting to waste half a pound of white chocolate, my effort paid off and the bars turned out wonderful! In this bar you can actually taste the white chocolate. 

    WHITE CHOCOLATE BROWNIES
    1 cup white baking chocolate, chopped 
    3/8 cup cold butter, diced 
    2 eggs 
    1/4 cup sugar 
    1 cup flour 
    1/2 tsp vanilla 
    1/2 cup chopped hazelnuts [optional] 
    1/3 cup white baking chocolate, chopped

    • Preheat the oven to 350F.
    • Line a square baking pan with parchment paper.
    • In a small heavy saucepan, barely melt 1 cup of white chocolate.
    • Remove pot from heat and keep stirring until all the remaining chunks melt.
    • Add the vanilla and the chilled butter and continue to stir until well combined.
    • Stir in the sugar.
    • When the mixture is at room temperature, add the eggs one by one and beat it with a wooden spoon until combined.
    • Last stir in the flour until just combined.
    • Spread the batter in the prepared baking pan.
    • Bake the brownie for 25 minutes or until the top is lightly browned.
    • Remove from oven and immediately sprinkle the 1/3 cup of white chocolate on the top.
    • As the chocolate melts spread it evenly over the top.
    • Put the pan on a wire rack and let the brownie cool completely.
    • Cut into squares.

    21.3.21

    CLASSIC POTATO STEW - KLASSZIKUS KRUMPLIFŐZELÉK


    This brings back THE meal. We were short of funds but with a good supply of potatoes. One day Nagymama came up with a creative meal plan. It started with potato soup. The soup was followed by potato stew and the “feltét” or topping was fried potatoes. We were potato-d out. After that I could never look at Van Gogh’s painting the same way again.

    The Potato Eaters by Vincent Van Gogh 
    CLASSIC POTATO STEW
    1 1/2 kg potatoes 
    3 - 4 tsp oil 
    1/2 onion, finely chopped
    1 tsp Hungarian pepper
    salt and pepper to taste 
    1 tsp dried marjoram 
    2 bay leaves 
    2 Tbsp flour 
    1 cup water 
    1/2 cup 14% sour cream

    • Peel and chop the potatoes.
    • In a medium sized pot, sauté the onions on low medium heat until translucent.
    • Stir in the paprika and immediately add the potatoes and give it a stir.
    • Next add the salt, pepper, marjoram and the bay leaves.
    • Add enough water to almost cover the potatoes.
    • Bring to simmer and cook until soft.
    • Next make a slurry.
    • Add the flour to a small bowl and gradually stir in the cold liquid.
    • Stir until a smooth.
    • Next whisk the cold slurry into the pot.
    • Bring it back to simmer and continue in a slow simmer for 2-3 minutes or until the starchy taste is cooked away. Don't cook longer or the starch will break down and the liquid will be thin again.
    • Just before serving stir in the sour cream.

    20.3.21

    PUFF PASTRY CREAM SLICE


    Absurd how an easy a thing as this can look and taste as good as it does. Just a bit of preplanning, to put the frozen puff pastry in the fridge for the night and you are home free. 

    PUFF PASTRY CREAM SLICE 
    1 ready rolled out puff pastry sheet or a block of puff pastry 
    1 1/4 cups whipping cream 
    2+2 Tbsp icing sugar 
    1/2 cup good quality dark chocolate [not chocolate chips] 

  • Thaw the frozen puff pastry in the fridge overnight.
  • The following day preheat the oven to 400F.
  • Take out the ready rolled puff pastry sheet. If using block pastry roll it on lightly floured surface to 1/4 inch thick.
  • Lift the pastry onto a parchment lined baking sheet.
  • Poke it with a fork at intervals.
  • Bake in the preheated oven until puffed up and golden brown,
  • With a long sharp knife split the pastry in two horizontally.
  • Find the weakest spot and carefully insert the knife and cut along the perimeter of the pastry rectangle until you separated the upper layer from the bottom layer.
  • Beat the cream with 2Tbsp of the icing sugar until stiff peaks form.
  • Spread the bottom layer with the sweetened whipped cream.
  • Grate half of the chocolate over the top of the cream layer.
  • Carefully put the second pastry on the top.
  • Lightly sprinkle with 2 Tbsp icing sugar.
  • Melt the rest of the chocolate and with a spoon drizzle over the top pastry.
  • As soon as the chocolate is set, it is ready to eat.
  • With a serrated knife cut the pastry at the table into serving size pieces. 


  • 19.3.21

    NO KNEAD BREAD

    Ever since the doctor and the chef collaborated on the 1st no knead bread book, one after the other every food writer and blogger came up with their own version of no knead bread. I tried many a recipes, both from the famous and the not so famous, but none can compare to Jenny’s.  Jenny Can Cook truly superseded all other no knead bread recipes. Jenny's recipe is easy and fast and you consistently end up with tasty, hole-riddled artisan bread. While many no knead breads are dense, this one is light and oh so nice to slice. And you don’t even need a Le Creuset. I’ve been using one of those navy blue enameled round roasters with a lid for the past two years. I just checked it, and the Superstore still sells it for $9.99. The most expensive item you will ever need to make this recipe is a really well insulated pair of oven mitts. They are a must to avoid burns, because you handle a very hot pot repeatedly. I cannot stress enough the importance of a reliable pair of oven mitts. Avoid kitchen towels, pot holders and dollar store oven mitts.
    NO KNEAD BREAD
    3 cups of bread or all purpose flour. [I like it half and half] 
    2 tsp or 1 pkg of instant yeast 
    1/2 tsp salt [I don’t like my bread salty] 
    1 1/2 cups fairly warm water 
     
  • Combine flour, yeast, and salt in a large bowl.
  • Stir in water to combine.
  • Cover with plastic wrap and let stand at room temperature for 1 hour.
  • After 40 minutes, place an ovenproof round roasting pan or Dutch oven with a lid into the oven.
  • Turn on the oven to 450F.
  • After the dough rested for an hour, place it on a well-floured surface and sprinkle flour on top.
  • With a scraper fold dough over 10-12 times and guide it into a rough ball.
  • Place in a parchment paper-lined bowl [not wax paper] and cover with a towel.
  • Let it rest for 15 minutes.
  • Wearing a sturdy pair of oven mitts, lift the parchment paper with the dough and lower it gently into the VERY hot pot.
  • Place the lid on top and put the roaster back in the oven.
  • Bake for 30 minutes.
  • After 30 minutes, remove the lid and parchment paper.
  • Return the pot uncovered to oven and bake for 10 to 15 minutes longer.
  • Remove pot from oven and turn the loaf onto a wire rack.
  • Let it cool down before slicing.


  • Privacy & Cookies

    This site uses cookies. By continuing to use this website, you agree to their use. To find out more, including how to control cookies, see here: Cookie Policy

    Translate

    me

    My photo
    It began with posting a few recipes on line for the family. "zsuzsa is in the kitchen" has more than 1000 Hungarian and International recipes. What started out as a private project turned into a well visited blog. The number of visitors long passed the two million mark. I organized the recipes into an on-line cookbook. On top of the page click on "ZSUZSA'S COOKBOOK". From there click on any of the chapters to access the recipes. For the archive just scroll to the bottom of the page. I am not profiting from my blog, so visitors are not harassed with advertising or flashy gadgets. The recipes are not broken up with photos at every step. Where needed the photos are placed following the recipe. Feel free to cut and paste my recipes for your own use. Publication is permitted as long as it is in your own words and with your own photographs. However, I would ask you for an acknowledgement and link-back to my blog. Happy cooking!