27.3.12

LEMON CAKE COOKIES

I think these would be great decorated with lemon curd, but since I was making several other cookies, I opted for the simple lemon glaze. I am not a fan of whoopie pies and I am notorious for changing cake cookies into crispy ones, but for some reason I kept the main premise of Anna Olson’s recipe and it was a surprise how delicious these cookies turned out to be. Olson’s cookies were bigger, flatter and slightly darker then mine, but I did take 1/2 cup of sour cream and some butter out of the recipe. 

LEMON CAKE COOKIES
Cookies:
1/2 cup butter, softened
1 cup sugar
1 Tbsp finely grated lemon zest
2 egg yolks
1 egg
1 cup sour cream
2-1/2 cups cake and pastry flour
3/4 tsp baking powder
3/4 tsp baking soda
1/2 tsp salt
Lemon Glaze:
1 1/2 cups icing sugar sifted
2 Tbsp fresh lemon juice
3 Tbsp unsalted butter, melted

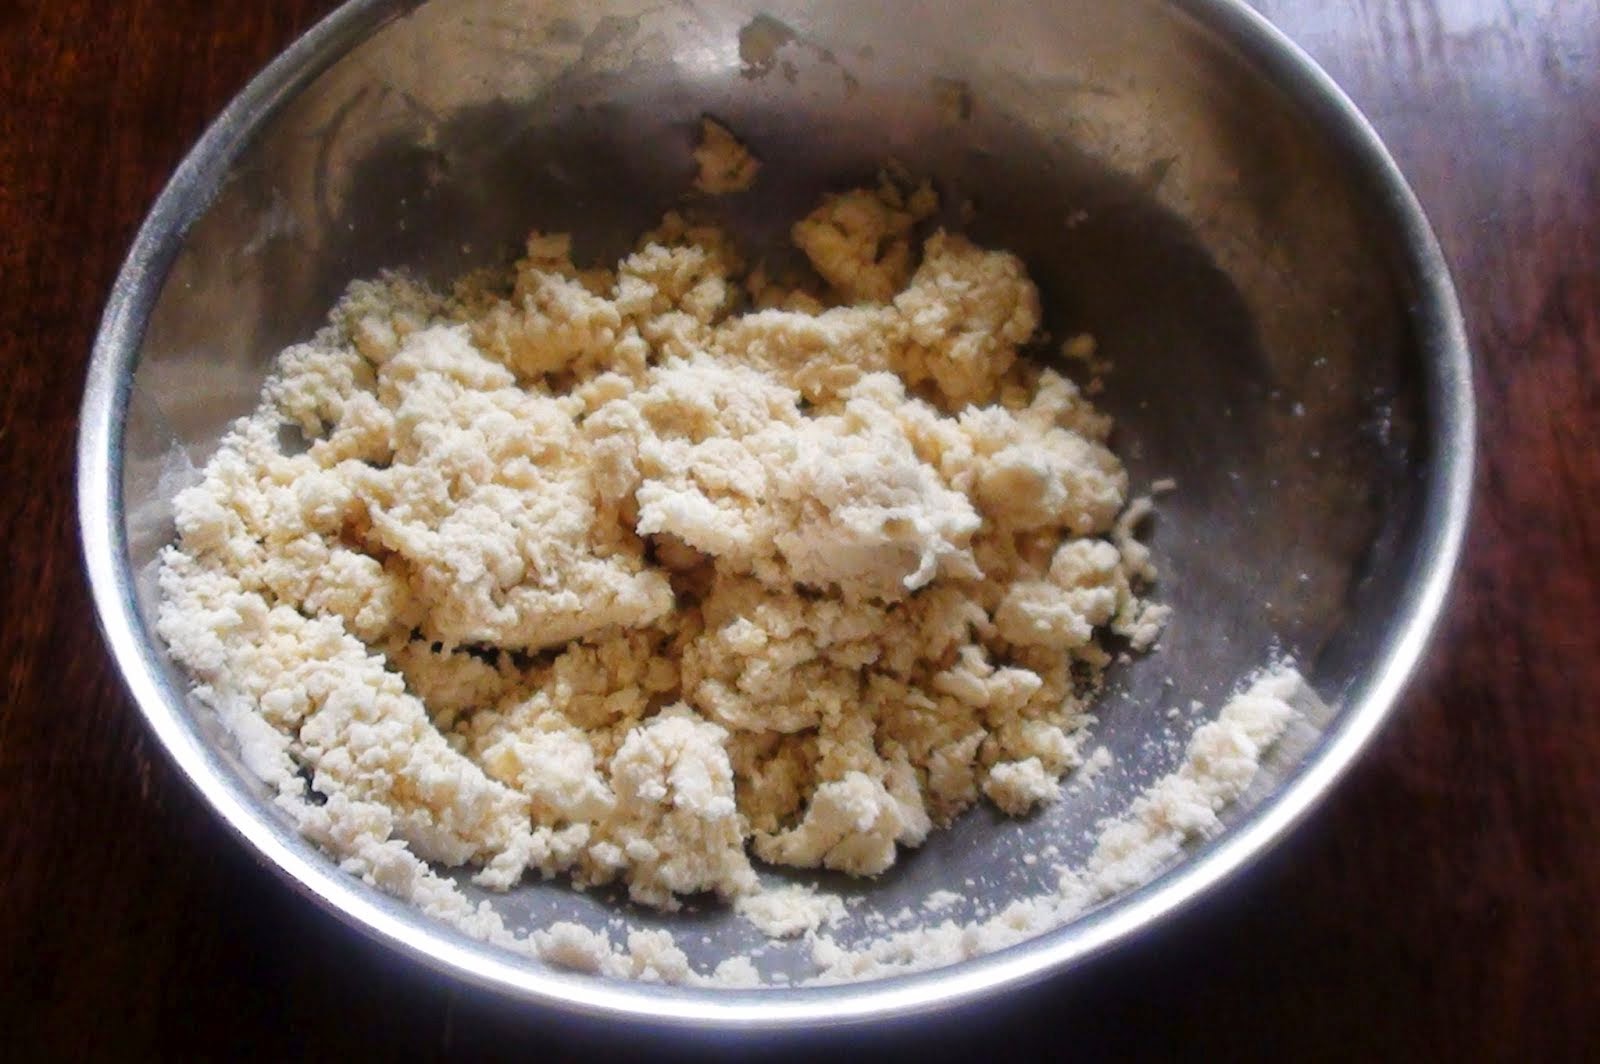
• Beat the butter and sugar until light and fluffy and stir in lemon zest.
• Beat in egg yolks and whole egg until fully incorporated.
• Stir in the sour cream.
• In a separate bowl, sift flour, baking powder, baking soda and salt.
• Add to wet ingredients and stir just until blended.
• Chill batter for 30 minutes, just to set butter a little.
• Preheat oven to 325F.
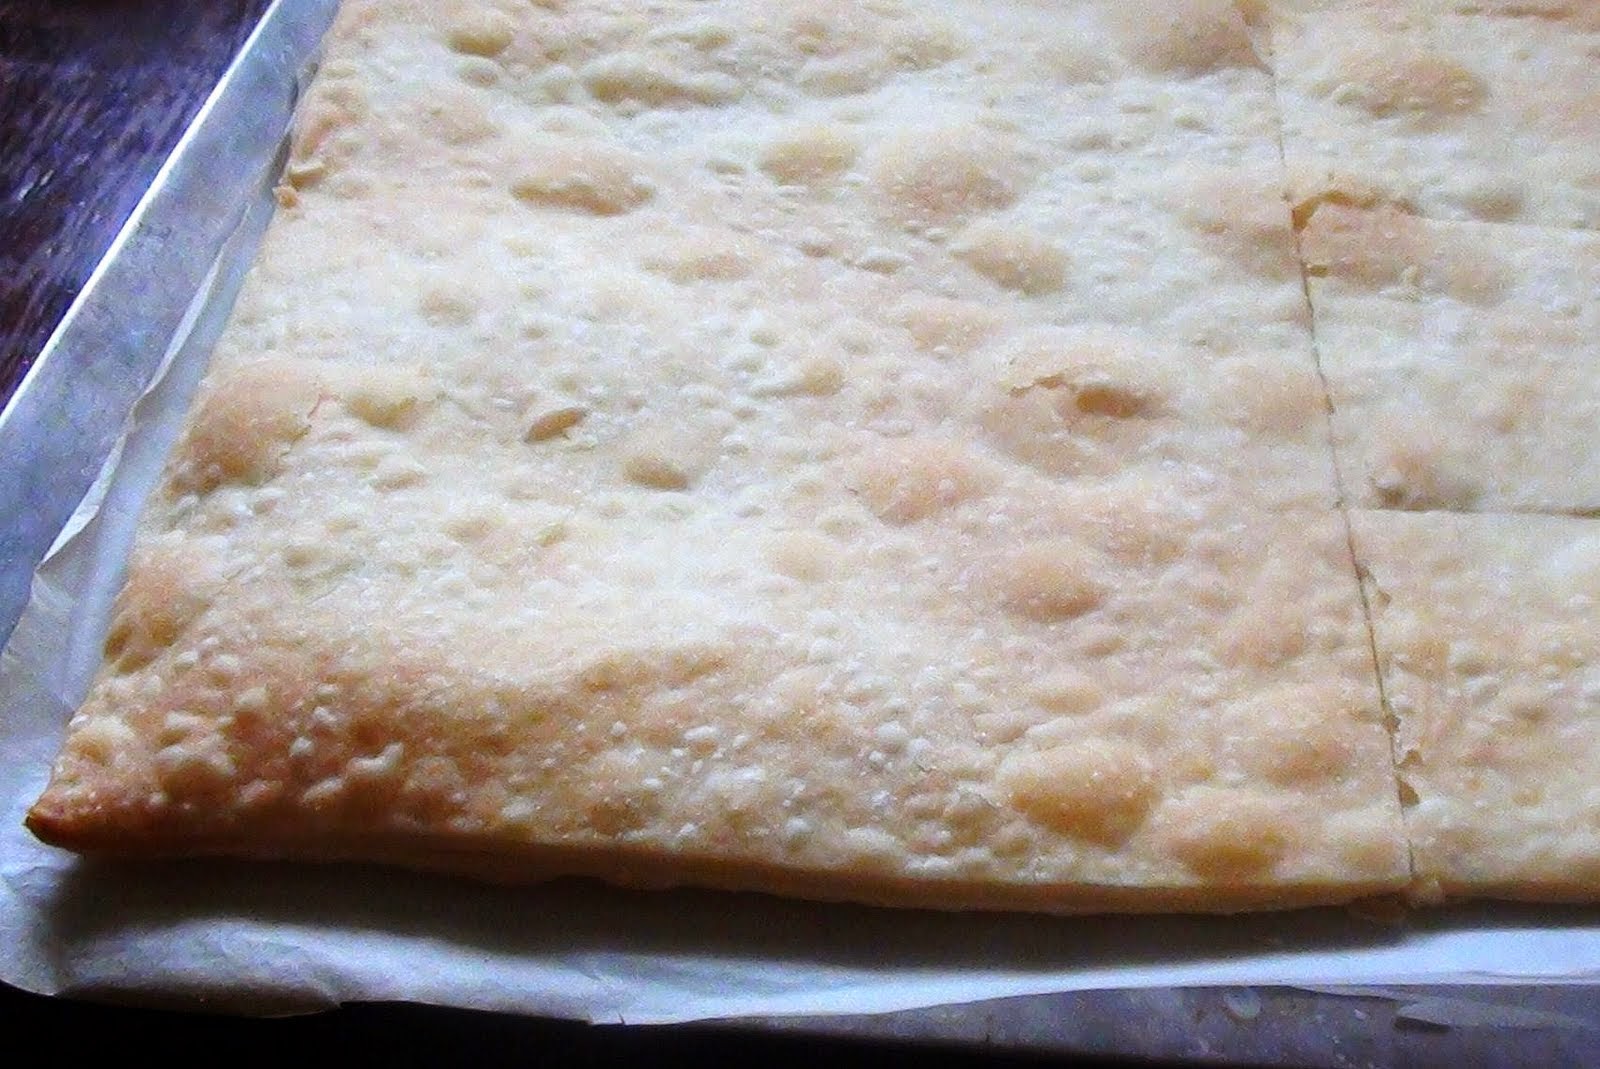
• Wet your hands every so often and form balls from a tablespoon of batter.
• Drop onto a parchment lined cookie sheet, leaving 2 inches between cookies.
• Bake for 15 to 18 minutes, just until the bottoms of the cookies turn golden brown.
• Allow to cool before icing.
• For icing, stir sifted icing sugar into lemon juice until smooth.
• Stir in melted butter.
• Spread the tops of the cookies with icing.
• Store the cookies between layers of parchment to prevent sticking.

POPPY SEED SPIRALS

I baked them more robust than usual; in general, poppy seed spirals are thin, crisp cookies. I cut the spirals thicker, left more space between the cookies for expansion and I had 28 cookies instead of 48. On a platter of brownies and cake cookies, thick cookies will look better. Adapted from CD Kitchen.

POPPY SEED SPIRALS
1 cup butter, softened
3/4 cup sugar
1/4 tsp baking powder
1/8 tsp salt
1 egg
1 tsp vanilla
2-2/3 cups flour
3 Tbsp poppy seeds
1 tsp finely shredded lemon peel

• Beat butter until fluffy.
• Add sugar, baking powder, and salt, and combine.
• Beat in the egg and vanilla.
• Then beat in flour.
• Divide the dough in half.
• Stir poppy and lemon into one half, and leave the other plain.
• On wax paper, roll each dough into a 9×6 inch rectangle.
• Position the poppy rectangle on top of the plain, and lightly roll the rolling pin over them to seal them together.
• Trim the long end closest to you and starting on that end roll up like a jellyroll.
• Wrap and chill until firm.
• Cut dough into 1/8-1/4-inch slices.
• Bake at 375F for 8-10 minutes, 1 inch apart.
• Transfer to wire rack to cool.

COUNTRY HASH BROWNS

Do not toss leftover baked potatoes. They are just what you need to make the world’s easiest hash browns. Bake twice as many potatoes than you will need. Then the following day turn the leftovers into hash browns. By then, the potatoes will have developed a nutty flavour. Peel, chop and slow fry them in butter and serve. Is there anything simpler?

COUNTRY HASH BROWNS
2 large russet potatoes
2 Tbsp butter
salt

• Preheat the oven to 400 degrees F.
• Scrub the potatoes well and dry with paper towels.
• Poke several holes in them with a skewer to allow steam to escape.
• Place the potatoes in the oven and bake, uncovered, until tender, about 1 hour.
• Allow the potatoes to cool to room temperature.
• Refrigerate in a plastic bag overnight.
• Next day peel and dice the potatoes.
• Melt the butter in a non-stick skillet and add the potatoes.
• Sprinkle with salt.
• On low heat slow fry until the undersides have a nice color to them.
• Flip and slow fry until potatoes lightly browned and serve.

26.3.12

MUSTARD PORK CHOPS - MUSTÁROS KARAJ

This is perfect comfort food and is ready in 30 minutes. Both sides spread with mustard are bound to burn, so season only one side of these chops. Use full fat sour cream for the sauce and serve it with buttered pasta. The listed ingredients make just the right amount of sauce for two pork chops. If you have more pork chops, increase the remaining ingredients to correspond to the number of chops you are cooking. This is a simple but very delicious dish.

MUSTARD PORK CHOPS
2 boneless pork chops
salt and pepper to taste
1 tsp mustard
2 Tbsp peanut oil
1-1/2 Tbsp butter
1/2 cup thinly sliced onions
1/2 cup sour cream

• Pound out two boneless pork chops thin with a meat tenderizer.
• Lightly spread on side with mustard.
• Sprinkle with salt and pepper.
• Melt 2 Tbsp peanut oil and 1-1/2 Tbsp butter in a non-stick skillet.
• Place the chops [with the mustard side up] in the skillet.
• Braise the chops until the underside begins to get a little color.
• Meanwhile chop the onions.
• Flip over the pork chops and braise them on the seasoned side for one minute.
• Transfer chops to a plate.
• Add the chopped onions to the skillet and sauté for 1 minute.
• Stir in the sour cream and put back the chops.
• Heat until sauce bubbles and serve on hot buttered pasta.

LENTIL SOUP – LENCSELEVES

In Hungary lentil soup is served on the first day to ensure prosperity for the coming year. I never followed this tradition and lentil soup is just another soup I make whenever I think of it. I am not sure where the soaking of lentils came from, to me it never made sense to soak lentils, when in less then 30 minutes of cooking the lentils fall apart anyway.

LENTIL SOUP
1/2 cup green lentils
6 cups chicken stock
1 bay leaf
1 carrot, peeled and thinly sliced
1 Bavarian sausage, thinly sliced
1 sprig of parsley
1/4 cup diced onions
1 garlic clove, minced
2 Tbsp extra virgin olive oil
2 Tbsp flour
1 tsp Hungarian paprika
sour cream

• Wash the lentils and drain.
• Place 6 cups of chicken stock, the lentils and the bay leaf in a medium dutch pot and slowly simmer for twenty minutes.
• Add the carrots, the sausage and the parsley and continue slow simmer.
• Dice the onions and mince the garlic.
• Heat 2 Tbsp of olive oil in a non-stick fry pan.
• Add the onions and sauté on medium heat until translucent.
• Add the garlic and stir in the flour.
• Remove from heat and stir in the paprika.
• Add the onion mixture to the soup and slowly cook for five minutes.
• Serve with sour cream.

ORANGE MARMALADE

I love a good marmalade on toast. What I don’t like are the thick chunks of rind or bitterness. If there is white pith in the marmalade, it can mean one of two things. The marmalade is bitter, or it was over processed. It had to be, because the pith is bitter and it is amazing how much pith there is in just two navel oranges. This marmalade is made without pectin. Orange is a high pectin fruit and it is unnecessary to make orange marmalade with additional pectin. Double the recipe for 4X250 ml jars of orange marmalade.

ORANGE MARMALADE
2 large navel oranges
1 lemon
4 cups cold water
3-1/2 cups sugar

• With a sharp chef’s knife cut the oranges into wedges lengthwise.
• Cut the orange flesh out and add to a stainless steel pot.
• With a sharp pairing knife cut the white pith out and discard.
• Discard the seeds.
• Slice the remaining orange rind [lengthwise] into very thin strands.
• Add these strands to the pot.
• Add 4 cups of cold water to the pot and bring to the boil.
• Immediately add 3-1/2 cups of sugar and stir until sugar dissolves.
• Remove pot from heat, cover and set aside for the night. Keep it at room temperature.
• The following day place on heat and bring the mixture back to boil.
• Reduce heat to a slow simmer. Continue simmer, uncovered, for two hours.
• Remove pot from heat.
• With a slotted spoon transfer the orange chunks to a blander. If some rind comes along, it’s OK.
• Puree the orange chunks and then add them back into the pot.
• Continually stirring, bring the marmalade back to slow simmer.
• Skim off foam that forms on top.
• Within 5 minutes, the marmalade is ready. Pureeing the orange chunks really speeds up the pectin development.
• Pour into hot sterilized 250 ml canning jars.
• Top with hot lids and screw bands.
• You do not need to put this in a hot water bath. As long as you use hot jars and hot sterilized lids, they will stay sealed.
• Prepare a dry pack: line a basket or a box with tea towels.
• Encase the dry pack into an old quilt or several blankets and leave it to cool.
• By evening, the jars will have sealed.
• Store the marmalade in a cool, dark place for up to 2 years.
 this was the pith that was removed from 2 navel oranges

25.3.12

NAPOLEON PASTRY CAKE

One of the best pastries we ever had was from a Dutch baker, who unfortunately no longer bakes to sell; it was for our youngest granddaughter’s baptism almost nine years ago. Mine will always be an imitation, but on occasion, we enjoy a version of it. This is the small 6-8 serving adaptation. [For the large pastry, double all the ingredients and use a large round cake pan. I also make more of an effort at decorating the large cake and usually cover the top pastry layer with vanilla glaze.]

I rolled the dough into a 24X18 inch rectangle. I cut out three rounds to fit my round cake pans and the fourth round I pieced together from two of the largest pastry remnants. This pastry cake is best if consumed on the same day, but still requires a couple of hours of chilling time to slice it neatly. Only then can you appreciate how wonderful this pastry cake really is.

NAPOLEON PASTRY CAKE
1/2 batch of Hungarian Flaky Pastry
1/4 cup seedless raspberry jam
1/2 batch of Pastry Cream
1 cup Stabilized Whipping Cream
icing sugar for sprinkling

• Make pastry cream and set aside to cool.
• Next make 1/2 batch of flaky pastry
• Chill for twenty minutes.
• Line two 9-inch baking pans with parchment paper.
• Preheat the oven to 400F.
• Roll out the dough to a thin 24X18 inch rectangle.
• Cut four pastry rounds to fit the parchment lined baking pans. One round will have to be pieced together from pastry remnants.
• Place the pastry rounds in the two prepared pans.
• Bake in the preheated oven for 4-5 minutes or until golden brown. Keep an eye on them, flaky pastry buns very quickly.
• Halfway through, deflate the parts that swell up by pricking them with a fork.
• Remove from oven and place the pastry rounds on a wire rack to cool.
• Repeat with the remaining pastry layers.
• Meanwhile make the stabilized whipping cream.
• Beat the chilled pastry cream until smooth.
• Fold the whipped cream into the pastry cream. This combination of whipped cream and pastry cream is what we call Bavarian cream.
• Use Bavarian cream promptly. It sets rather quickly.
• Place a pastry layer on a serving platter.
• Lightly spread with raspberry jam.
• Lay a pastry layer on the top.
• Spread a moderately thin layer of Bavarian cream on the top.
• Place the next a pastry layer on top.
• Spread another layer of Bavarian Cream on the top.
• Place the last pastry on the top.
• Spread the remaining Bavarian cream on the sides and sprinkle the top with icing sugar.
• Chill the cake for a couple of hours. After that, it will slice neatly.

MARINATED VEGETABLE SALAD

We really liked this one. This is my not-quite-Italian salad. I guess if I added stuffed olives, it could have been Italian. Not everyone I cook for likes stuffed olives or any kind of olives for that matter. It was good yesterday, today not as much. This is best sitting in the fridge for an hour, and then eaten up.

MARINATED VEGETABLE SALAD
1/2 lb [about a good handful] of fresh green beans
2 cups cauliflower florets
1 cup canned chickpeas, drained and rinsed
1 cup cherry tomatoes, cut in half
1/4 cup thinly sliced sun-dried tomatoes [I used my oven dried tomatoes]
1/8 cup red or white wine vinegar
1/8 cup extra virgin olive oil

• Clean the beans and cut the cauliflower into florets.
• Rinse and drain.
• Steam the beans and the cauliflowers separately. Cook until crisp-tender.
• Drain the chickpeas. Rinse under cold water and drain again.
• Place the beans and the cauliflower florets in a salad bowl.
• Add remaining ingredients and toss gently.
• Cover and chill for 1 hour and then serve.

OVEN DRIED ORANGE SLICES

California navel oranges are fabulous right now. I have been experimenting with drying them in the oven. It is essential to soak up most of the juice with paper towel. The slices that were untreated were drowning in juice. Those left with their skin on were bitter. I dipped some in sugar; these were just sweet, but not very orangey. The best ones were the thinly sliced, unsweetened orange slices with the skin and most of the pith removed.

OVEN DRIED ORANGE SLICES
navel oranges

• Preheat the oven to 200 degrees F.
• Wash and dry the oranges.
• Cut the bottom and the top off.
• Slice the oranges on their belly as thinly as possible.
• With a sharp knife cut away the skin and most of the pith.
• Place the orange slices between layers of paper towel and press out the juices.
• Lay the orange slices on a parchment lined baking pan.
• The slices can touch, but do not layer them.
• Bake in a 200F oven for 2 hours.
• Store the orange slices in a single layer between wax paper.
• Use these for cake decoration.

24.3.12

HUNGARIAN FLAKY PASTRY - LEVELES TÉSZTA

It seems every country has its own version of flaky pastry. Hungarian flaky pastry is no different. It is quick to make and yet worthy of krémes. Roll it out to any configuration or simply bake a sheet and cut it up into the desired shape while it is hot. Pile fruit, custard or whipping cream on the top, its perfectly delicious.

HUNGARIAN FLAKY PASTRY

Full Batch:
1-1/2 cup + 1 Tbsp flour
3/4 cup chilled hard margarine
1 pinch of salt
4 Tbsp cold water
4 tsp vinegar

Half Batch:
1 cup + 1 Tbsp flour
1/2 cup + 1 Tbsp chilled hard margarine
3 Tbsp cold water
1 Tbsp vinegar

• In a large bowl, crumble the flour and the chilled margarine to fine crumbs.
• Mix in the salt.
• Add to a small dish the cold water and the vinegar.
• Pour the liquid over the pastry crumbs.
• Stir to combine and gradually form a rough ball.
• Generously flour a board and roll out the pastry into a thin rectangle.
• Roll up pastry and divide into 4 parts.
• Roll each division into a thin rectangle.
• Stack the four rectangles on top of one another.
• Chill for twenty minutes.
• Repeat rolling, dividing and stacking and chilling the dough one more time.
• Preheat the oven to 400F.
• Line a baking sheet with parchment paper.
• Roll out the chilled pastry.
• Cut to fit the parchment lined baking pan.
• Place the pastry on the prepared pan.
• Bake in the preheated oven until golden brown. Keep an eye on it, flaky pastry can bun very quickly.
• Within about 3-4 minutes, deflate the parts that swell up by pricking them with a fork.
• Remove from the oven.
• If baking a sheet pastry, immediately cut to the desired shape. Once the pastry cools, it is not possible to cut it without it breaking apart.


STABILIZED WHIPPED CREAM

When I run out of commercial stabilizer, I use this recipe. The preparation is minimal and the whipping cream holds up remarkably well even on a warm day. I had the pastry on the table for three hours today and when I put the leftovers in the fridge the whipped cream frosting looked as good as new.

STABILIZED WHIPPED CREAM
1/2 tsp gelatine powder
2 Tbsp cold water
2 Tbsp whipping cream
1 cup whipping cream
2 Tbsp icing sugar
2 tsp pure vanilla extract

• In small bowl sprinkle 1/2 teaspoon of gelatine powder over 2 Tbsp of cold water.
• In a small saucepan, bring 2 Tbsp whipping cream to boil.
• Pour over the gelatine, stirring until dissolved.
• Refrigerate until consistency of unbeaten egg white.
• With a small balloon whisk, whisk until smooth.
• Whip 1 cup of whipping cream until soft peaks form.
• Add the gelatine mixture and whip to combine.
• Add the icing sugar, and the vanilla extract.
• Beat until stiff peaks form. Do not overbeat.

23.3.12

CRÈME ANGLAISE

Crème Anglaise or English cream is a light custard sauce. This is also the base of crème brûlée, Italian meringue and meringue buttercream. Stand on its own, crème Anglaise is the custard used for madártej, the Hungarian version of "floating island". Depending on the fat content of the milk or cream used, there is varying richness to crème Anglaise.

There are many uses for light custard sauce and many people have problems making it, which is what prompted me to post this sauce on its own. [This exact same custard sauce I make for madártej.] To take the guesswork out of crème Anglaise, a candy thermometer is necessary. Vanilla beans give the most intense vanilla flavor to custards, but since I make my own vanilla sugar from vanilla beans, vanilla sugar is what generally ends up in my madártej.

CRÈME ANGLAISE
5 egg yolks
1/4 cup sugar
1 Tbsp flour [optional]
2 cups whole milk
1/2 vanilla bean, cut lengthwise
Instead of the vanilla bean you can use 2 Tbsp of real vanilla sugar or 2 Tbsp pure vanilla extract

• Beat the egg yolks and sugar for 3-4 minutes until very thick and creamy.
• Add 1 Tbsp of flour and whisk to combine. This step is optional.
• Add the milk and whisk to combine.
• Transfer yolk-milk mixture to a saucepan.
• Split the vanilla bean and add to the saucepan. [If vanilla extract or sugar is used, you will add this later]
• Slowly heat the mixture and keep stirring with a wooden spoon
• You must NOT let the milk boil or the yolks will curdle. Let it come no higher than 175F or 80C. Dip the wooden spoon into the custard and run your finger along the back of the spoon. If the streak remains without the cream running down through the streak, it is ready.
• If you use vanilla extract or vanilla sugar, now is the time to add to the hot custard.
• Strain the hot custard through a fine sieve into a bowl.
• If you used vanilla bean scrape the seeds into the hot custard and stir. [Save the vanilla bean for other uses.]
• Serve the crème Anglaise hot or chilled.

22.3.12

VEGETABLE MASH

This is the second potato dish in two days and we are slowly turning into the Potato Eaters. I do remember once back in leaner days when my grandma served us up a three-course meal from potatoes. We had potato soup, followed by potato főzelék, and as a treat, we had fried potatoes. Thankfully, there was no dessert. I don’t have the same excuse, except my fridge is starting to have that spacious look again and still I didn't feel up to going shopping. Around dinnertime I took out the odd assortment that still lurked in the fridge and after a fleeting moment of despair I had an aha moment and didn’t have to call for takeout after all.

Long time ago I photocopied a “winter vegetable potatoes” recipe from a magazine. I tend to use what I happen to have at home; consequently this dish never tastes the same. Sometimes I use more potatoes and fewer vegetables and sometimes I roast the the vegetables. Sometimes I add bacon or spicy sausages or as in this case, I added a little bit of both. This is when the side dish turns into a one-dish meal and the only other requirement is to have some type of pickle with it. This amount can serve four people.

VEGETABLE MASH
3 russet potatoes
1/2 cup slivered bacon [if not using bacon, replace with 2 Tbsp olive oil]
1/2 cup thinly sliced spicy sausage
2-3 cups of assorted vegetables, thinly sliced [I used broccoli stems, carrots and savoy cabbage]
1/2 cup stock or water
2 Tbsp hot milk
2 egg yolks
1/2 cup finely chopped parsley
4 green onions, chopped
salt and pepper to pepper to taste

• Peel and chop the potatoes.
• Thinly slice and then chop the bacon and the sausages.
• Thinly slice the vegetables.
• Chop the fresh parsley and the green onions.
• Boil the potatoes until tender.
• Meanwhile, in a large skillet, fry up the bacon and the spicy sausages. Or replace the bacon with 2 Tbsp of olive oil.
• With a slotted spoon remove the bacon and sausages and set them aside in a warm place.
• Add the assorted vegetables to the skillet.
• Pour in the stock and sauté until the liquid is reduced.
• Remove skillet from heat and cover with a lid to keep warm.
• Drain the potatoes and mash them with hot milk.
• Add 2 egg yolks and whip.
• Place the mashed potatoes into a heated bowl.
• Add the fried bacon and sausages and the sautéed vegetables.
• Add the chopped parsley and green onions.
• Sprinkle with salt and pepper to taste.
• Loosely combine ingredients and serve.

POTATO CROQUETTES – KRUMPLI KROKETT


These are super easy and super fast and not your everyday laborious breaded croquettes. Two kitchen utensils are essential, one is a microwave and the other is a food processor. You can mash the potatoes by hand, though this takes a little more effort if you cook the potatoes in the microwave. [The texture will be different from your ordinarily cooked potatoes.] Once again, if you have no microwave, steam the potatoes and do not let them soak up any water. The best potatoes for this dish are the russet types or baking potatoes, because of their high starch content. Most croquette recipes call for cooking the potatoes in their jackets. Russets are very hard to cook in their jackets. The Yukon gold or the red potato varieties cook up nicely in their jackets, but because they contain less starch, they are more apt to fall apart when you fry the croquettes. Start out in medium hot oil with only a few croquettes. Then as they start to get a little color, add more. At a certain point, you may have to increase the heat or decrease it as needed. Avoid dropping the croquettes into very hot oil, because they will burn before you can turn them over. At the same time, maintain a solid frying temperature. If the temperature is too low, the croquettes will soak up oil.

POTATO CROQUETTES

4 cups of peeled and thinly sliced russet potatoes
1/4 cup water
1 Tbsp extra virgin olive oil
1/8 cup diced onions
1 garlic, minced
1/2 cup finely chopped fresh parsley
salt and pepper to taste
1 egg
1/4 cup flour
Oil for frying

• Peel and thinly slice the potatoes.
• Place in a shallow bowl and add 1/4 cup of water.
• Cover with a microwavable plastic dome and place in the microwave for 5 minutes.
• Meanwhile, place 1 Tbsp olive oil in a fry pan and sauté the onions and garlic until soft.
• Drain the tiny amount of water that remains and pat dry the potatoes with paper towels.
• Place the potatoes in a mixing bowl.
• Add the onion mixture, the fresh parsley, 1 egg, and 1/4 cup flour.
• Sprinkle with salt and pepper to taste.
• Combine the ingredients.
• With damp hands, shape the croquettes.
• Heat up the oil on medium heat. Avoid high temperatures because the croquettes will burn before you have a chance to turn them over.
• Start frying 4-6 croquettes, gently turning them over with a fork so they can brown evenly. Once the first croquettes start to have a little color, add a few more and increase or decrease the temperature as needed. Try to maintain the frying temperature.
• With a slotted spoon scoop out the finished croquettes and transfer to a paper towel lined dish and serve. Yield: 16


21.3.12

LEMON CAKE

When he asked me “what is the occasion?” I did not have an answer. So I told him “~nothing~” Which is not entirely true. Not only I am not observing lent this year, apparently I now have a problem with the Ninth Commandment. I had some yoghurt I had to use, but if truth to be told, I woke up with a serious case of lemon craving this morning.

I put a call to Ann in the hope she will stop by to take away some of this magnificent cake which two people cannot finish. I have been thinking about making this cake for a while now. We are talking about four and half cups of cake flour yeh, I could have cut it in half, but hey, I like making cakes. Besides the flavour and the crumb are both lovely. It is all good.

This is even better the following day, if that is possible, lovely and moist. Why people bother with package cakes, adding oil, eggs and pudding mixes to make them half-palatable always amazed me. If you went to all that trouble, you could have made a cake like this.

LEMON CAKE
4-1/2 cups cake flour
1 tsp baking soda
6 egg whites
1/2 cup sugar
1 cup butter, softened
1-1/2 cups sugar
6 egg yolks
grated zest of 1 lemon
juice of 1 lemon
1 cup plain yoghurt

• Preheat oven to 375F.
• Grease a large tube cake pan.
• Sift the flour and the baking soda together. Set aside.
• In a large bowl beat the egg whites until soft peaks form.
• Gradually add 1/2 cup of sugar, beating until stiff peaks form. Set aside.
• Cream the butter, 1-1/2 cups sugar, egg yolks, lemon zest and lemon juice together until fluffy.
• Add flour mixture alternately with the yoghurt to the egg yolk mixture.
• Gently fold in the egg whites and pour the mixture into the prepared pan.
• Bake in the preheated oven for 50 minutes.
• Let cake cool in pan over a wire rack.
• Gently remove cake from the pan and let it cool completely on the wire rack.
• Crumb coat with lemon frosting and place in the fridge for 1/2 hour.
• Frost chilled cake with the remaining frosting and serve.

LEMON FROSTING

Sure you can use lemon extract or concentrated lemon juice. But nothing will taste as real as real lemon.

LEMON FROSTING
1 cup soft unsalted butter
1/4 cup whipping cream
5 cups icing sugar
zest of 1 lemon
juice of 1 lemon
pinch of salt

• Cream the butter.
• Add the whipping cream and beat to combine.
• Slowly add the icing sugar, mixing on low speed for about 2 minutes.
• Add remaining ingredients and beat on med-high for 3-4 minutes until very fluffy.

20.3.12

LADYFINGERS – BABAPISKÓTA

Have you ever wondered who eats those dreadful ladyfingers they sell in the grocery store? They are so bad; you really have to make them yourself. The good news is, they are super easy to make.

There are two uses for ladyfingers. Eaten as is, or soaked in desserts such as trifle, charlotte, or tiramisu. On their own, ladyfingers are not overly exciting and that is why they feed them to babies in Hungary; hence the name babapiskóta or baby sponge. The rich buttery, sometimes chocolaty cookies shaped the same way go by a different name; those are called macskanyelv or cat tongues.

But for now, let’s stay with our everyday, multipurpose ladyfingers. These can be soft or hard depending on the type of flour used. Change the flour in the recipe and you get completely different ladyfingers. For a very small baby, who gums the cookie with a couple of teeth, the safest is hard ladyfingers. Same with a trifle or a tiramisu, you need tough ladyfingers that will not turn to mash right of way. For these, bread flour works the best. If you want to give a snack to an older child or dunk the ladyfingers into your coffee, make the exact same recipe with all-purpose or cake flour. Cake flour ladyfingers will be too soft to use in a tiramisu, but will have a delightful texture as a snack. Using the middle of the road all-purpose flour will give you the most versatile type of ladyfingers. All of these taste delicious of course, only the texture is different.

I made these ladyfingers with all purpose white flour. I used a pastry bag to shape them, but a strong freezer bag with one corner cut off will work just as well.

Watch the video how easy this is:
LADYFINGERS
3 large eggs
1/2 cup sugar
3/4 cup flour
parchment paper
icing sugar for sprinkling

• Preheat the oven to 350F.
• Line a large baking sheet with parchment paper.
• Beat the egg whites until soft peaks form.
• Gradually add the sugar beating all the while.
• Beat until hard peaks form, but do NOT overbeat. The peaks should retain a gentle softness.
• Add the egg yolks and beat to combine.
• Gently and gradually, fold in the flour.
• Fill a large piping bag with the batter and without using a tip, pipe the batter on the prepared baking pan.
• Lightly sprinkle the top with icing sugar.
• Bake in the preheated oven for 12 minutes.
• Remove from the oven and enjoy.

19.3.12

ALMOND COOKIES

Our lazy Monday just got sweeter. When I saw this recipe on Elisabeth’s blog, I knew I have to make it, with a cup of ground almonds you can’t go wrong. With sweet grandchild away on her spring break in Alberta, we are either walking her dogs or sitting around drinking coffee and munching on Elisabeth’s almond cookies. The sun is shining, the cookies are perfect, and life is good.

ALMOND COOKIES
1/2 cup butter, softened
1/2 cup sugar
1 egg
1-1/4 cups flour
1 cup very finely ground almonds
1 tsp pure vanilla extract
1 tsp pure almond extract
32 raw almonds

• Preheat oven to 400F.
• In a large bowl, cream together the butter and sugar.
• Beat in the egg, the extracts and beat in half the amount of the ground almond.
• Gradually mix in the flour and the rest of the ground almonds.
• Roll the cookies into little balls and place them on a parchment lined baking sheet.
• Press the little balls slightly with a flat, floured spatula.
• Press a whole almond in the center of each cookie.
• Bake 10-12 minutes in the preheated oven, or until cookies are lightly coloured.
• Yield 32 cookies

SAUTÉED LIVER STRIPS - VÖRÖSBOROS RESZTELT MÁJ

It was no surprise Canadians do not like liver. Not after that first [and last] liver dish at a good restaurant. I could not even look at my plate let alone touch it after the waiter put down that bloody liver in front of me. Blood pooled on the top and the entire plate was swimming in thick blood. Canadians don’t know how to cook liver? After that experience, I never took a chance on liver at a restaurant.

I always liked liver. It had this magic medicinal aura around it. You see liver was not available in communist Hungary to city people and the only time we could have it was at a restaurant. So I always ordered liver whenever I had the chance. I don’t know where they took the liver, probably to the same place all palatable beef went back in the days.

Eventually I learned to cook liver. It wasn’t easy, I didn’t know you cannot put salt on it. The recipe book didn’t say you must salt the liver on your plate or else you are cooking shoe leather. Eventually I figured it out or perhaps I asked someone for the reason why the more I cook liver the tougher it gets. So that is the first thing, don’t salt liver before serving. Cut out all the membranes, before cooking so cutting the liver into strips is the most economical way, because you can use up all the little bits that result from cutting out the membranes. One more thing, don’t wash liver like other meats, just wipe it with paper towels.

I have two great liver dishes. Today I made the first one. I haven’t made it for years, not since my darling’s heart attack. I thought, to heck with the cholesterol we deserve a little liver. Here it is.

SAUTÉED LIVER STRIPS
500 g beef liver
2 Tbsp extra virgin olive oil
1 large onion, thinly sliced
1 tsp marjoram
ground pepper to taste
1 Tbsp Hungarian paprika
1/4 cup red wine or water
Do NOT salt liver during cooking

• Wipe the liver with paper towels.
• Cut out the membranes with kitchen sheers. Turn each peace over to check for membranes. Sat aside the membrane free pieces and discard the membranous bits.
• Slice the onion very thin.
• In a large non-stick skillet, heat the oil over medium heat.
• Add the sliced onions and sauté until translucent.
• Meanwhile slice the liver into thin strips using a chef’s knife.
• When the onions are ready, add the liver strips.
• Sprinkle with marjoram and ground pepper.
• Gently stir and cook until the liver strips are white.
• Stir in the Hungarian paprika and add the red wine or the water.
• Continue to slow-cook the liver and the onions until the liquid is a reduced by half.
• Serve immediately with boiled potatoes.
• If the liver is on a serving bowl, do not salt it yet. The leftovers can be heated later, but not if the dish has been salted. Salt the liver on the individual plates only.


18.3.12

MARMALADE CANDIED CARROTS

With a jar of sugar-free orange marmalade in the fridge and noticing one of the ingredients was rum… I had to try this dish. Olalla is this ever good! My source was Diana Rattray recipe from Southern Food Guide. I added the rum at the end and omitted the nuts from the original recipe.

MARMALADE CANDIED CARROTS
3 cups peeled, sliced carrots
1/3 cup orange marmalade [I used sugar free marmalade]
2 Tbsp brown sugar
2 Tbsp butter
1 Tbsp rum

• Place the sliced carrots in a vegetable steamer over boiling water.
• Cover and steam for 6-8 minutes or until crisp tender.
• Meanwhile melt the butter in a large skillet.
• Add the brown sugar and cook over medium heat until sugar melts.
• Remove from heat, and stir in the rum. Set aside.
• When the carrots are ready, drain off the liquid and put carrots back into the pot.
• Immediately add the marmalade and stir until the marmalade melts.
• Transfer the carrot - marmalade mixture into the skillet with the rum sauce.
• Toss to coat gently and serve.

PINEAPPLE SAUCE

Ham season is upon us; I ordered my Easter ham at Garry’s weeks ago. I thought it to be timely to make a pineapple sauce for the ham steak I have in the freezer. There will be lot of leftovers after Easter and this super simple pineapple sauce is handy to doctor up some of those hammy leftovers.

PINEAPPLE SAUCE
1 Tbsp butter
1 can [1-3/4 cups] crushed pineapple including its juice
1 Tbsp cornstarch
1/4 tsp salt
1-2 Tbsp sugar

• In a small saucepan, melt the butter.
• Cook over medium heat, stirring constantly until mixture thickens.
• Serve warm with ham.

TZATZIKI

Used as an appetizer sauce by Canadians, traditionally tzatziki was made with cucumbers, garlic and full fat sheep or goat’s milk strained yogurt. Using 1% or even fat free yoghurt and draining it will leave you with no yoghurt to speak off. So always get the highest fat content yoghurt for tzatziki, also it is a good idea to add some full fat sour cream to the mix. Depending on tastes, fresh dill, parsley or sometimes mint is added. For a mellow garlic flavour, add roasted garlic instead of raw. Tzatziki will keep for a few days in the refrigerator, but if you make it with low fat content ingredients you may have to drain off some water and stir it up each time you use it. I didn’t have to, I used Greek Krema.

TZATZIKI
1 cup 11 % plain yoghurt
1/2 cup 14% sour cream
1 Tbsp fresh lemon juice
1 Tbsp extra virgin olive oil
1 Tbsp grated garlic
1/2 English cucumber, grated

• Peel and slice the cucumbers first.
• Transfer into a sieve and press out all the juices. Set aside.
• Peel the garlic cloves and cut off the woody ends.
• Grate them on the smallest grater and set aside.
• In a small bowl, combine the yoghurt, sour cream, lemon juice.
• Add salt to taste.
• Add the grated garlic.
• Fold in the well-drained grated cucumbers.
• Wrap it up well and place in the fridge for the night. This will combine the flavours and will taste extraordinary the following day.

HUNGARIAN CHEESE SPREAD – LIPTÓI KÖRÖZÖTT

Neither Slovak nor Austro-Hungarian, Liptó was a county of Hungary until the end of WWI. Same with the cheese, Hungarian juhturó or Liptói túró was Hungarian and yet the world knows it by its Germanic name, Liptauer and northern Slovakia gets the credit for its production. The area in question as well as the cheese never gets a mention by its actual Hungarian name.  Now anybody with a little bit of know in European history would realize that Liptó got annexed from Hungary in 1919 and with that went whatever was produced there. I was very disappointed Anikó Gergely failed to include Liptói túró  or the körözött recipe in Culinaria Hungaria. Liptó may be lost, but Hungarians never stopped eating liptói túró or körözött.

There is no substitution for the real stuff, no curd cheese or even goat cheese equals the sheep-milk based Liptói. This cheese has a unique flavour and is the basis for the Hungarian körözött, the amazing cheese spread that has no equal.

In Canada, I have to make do with either feta or soft goat cheese. Feta is a salty cheese, and the brined varieties should be soaked in water anyway, so there is no need to add salt to the feta mix. On the other hand goat cheese is unsalted and so I add salt to the spread. 

HUNGARIAN CHEESE SPREAD

WITH FETA CHEESE:
This feta based cheese spread is closer in resemblance to the authentic Liptói körözött.

1 cup feta cheese, pleasantly salt [If too salty, soak in water first]
125 g cream cheese [the small package]
1/2 tsp Hungarian paprika
ground pepper to taste
1 Tbsp partially ground caraway seeds
1/2 cup chopped chives or green onion

• Blend the feta cheese with the cream cheese.
• Add the Hungarian paprika, pepper and the caraway seeds.
• Mix to combine.
• Add the chopped chives or the green onions and mix to combine.
• Form into a ball, warp and set in the fridge for the night so flavours can meld.

WITH GOAT CHEESE:
This one is a nice alternative, and a little creamier than the feta based spread.

300 g unripened goat cheese
250 g cream cheese
1 tsp salt
1 Tbsp Hungarian paprika
1 Tbsp crushed caraway seed
1/4 cup minced red onions [but do not grate it]

• Place ingredients in a medium large bowl and beat it until soft.
• Spoon mixture into a small serving bowl and chill for 3 to 4 hours.
• Spread the körözött on bread or a crusty bun.
• Decorate open face party sandwiches with körözött piped on the top.


ASPARAGUS FETA TART

Not a pizza, this is a tart, an adult tart. It is rather rich and you really should not eat several slices of it, not if you don’t want the little people chasing you all through the night. I had two slices… enough said. Both pieces were delicious. This is amazing chilled and baking it with the asparagus spears chopped and the cold tart sliced into small squares… I see the potential for a great appetizer. But for now, here is the tart.

ASPARAGUS FETA TART
2/3 cup goat feta cheese
1-3/4 cups flour
2/3 cup softened butter
1 tsp salt
1 tsp sugar
1 whole egg
1 Tbsp cold milk
1 pkg. partially cooked asparagus spears
1 egg white for egg wash
1 whole egg

• Taste the feta. If it is too salty, soak it in water until it is pleasant to the taste. Depending on the type of feta, you could use it as is or it could require an entire day of soaking before the feta is palatable.
• Make the pastry next. Combine the flour, softened butter, salt, sugar, 1 egg and 1 Tbsp cold milk.
• Roll it into a ball it will be sticky. Wrap and chill for 1 hour.
• Meanwhile wash and dry the asparagus spears.
• Snap off the tough ends, discard or set aside for stock.
• In minimal water, partially cook the asparagus spears.
• Remove from the heat, drain and set aside for use later.
• Preheat the oven to 450F.
• Roll the chilled dough into a 10X16 inch rectangle.
• Trim off the edge and transfer rectangle to a parchment lined baking sheet.
• Reroll the trimmed pastry into a 3X 16 inch strip.
• Cut into 3 long strips.
• Brush the edge of the rectangle with egg wash. [I always have reserved egg whites in the fridge. If you have to crack an egg just for a bit of egg wash, reserve and add the unused egg yolk to the feta mixture later.]
• Now place the pastry strips all around the rectangle, the egg wash will act as glue.
• In a bowl, mash the feta cheese with a whole egg. Add the reserved egg yolk if you have one.
• Spread the feta mixture over the pastry rectangle.
• Arrange the partially cooked asparagus spears on the top.
• Brush the edge of the tart with the egg wash.
• Place in preheated oven for 20 minutes.
• Serve hot or cold.


Privacy & Cookies

This site uses cookies. By continuing to use this website, you agree to their use. To find out more, including how to control cookies, see here: Cookie Policy

Translate

me

My photo
It began with posting a few recipes on line for the family. "zsuzsa is in the kitchen" has more than 1000 Hungarian and International recipes. What started out as a private project turned into a well visited blog. The number of visitors long passed the two million mark. I organized the recipes into an on-line cookbook. On top of the page click on "ZSUZSA'S COOKBOOK". From there click on any of the chapters to access the recipes. For the archive just scroll to the bottom of the page. I am not profiting from my blog, so visitors are not harassed with advertising or flashy gadgets. The recipes are not broken up with photos at every step. Where needed the photos are placed following the recipe. Feel free to cut and paste my recipes for your own use. Publication is permitted as long as it is in your own words and with your own photographs. However, I would ask you for an acknowledgement and link-back to my blog. Happy cooking!