15.8.13

PEACHY CHEESE TART – SAJTOS BARACKOS LEVELES TÉSZTA

The peaches were magnificent this year. We sure will miss the peach tree when the kids move into their new house. Amongst the many fruit trees on our property the one tree we lack is a peach tree. The old tree died a couple of years ago and the new one is too young. So we have been relying on Leilah and Simone’s peach tree. I think they will miss it too. Leilah said when they landscape the new property they will have to put in a peach tree. But you know how it is with these new homes, big house, small yard. Hopefully our new tree will start producing soon.
 
Very delicious! This recipe is my own creation and the reason I gave it a Hungarian title is because the pastry is Hungarian and the cheese component is túró inspired. I already made a tart with commercial puff pastry once, but I didn’t like the outcome so I went back to my flaky pastry. It is one of those túró replacement recipes, which you will need dry curd cottage cheese and block cream cheese for, otherwise it will not work. Regular cottage cheese or ricotta [even if drained] would be too runny.

PEACHY CHEESE TART
half a batch of Hungarian Flaky Pastry
1-1/2 cups dry curd cottage cheese
125g block cream cheese [full fat]
2 egg yolks
1/4 cup sugar
1 Tbsp vanilla
2 egg whites
4 fresh peaches, peeled and sliced
sprinkling of sugar
 
• Prepare the flaky pastry dough.
• Preheat the oven to 400F.
• Line a baking sheet with parchment paper and set it aside.
• Place the dry curd cottage cheese, cream cheese, egg yolks, 1/4 cup sugar and the vanilla in the food processor.
• Pulse it a few times and then turn it on fast until a smooth paste results.
• Next roll out the pastry dough and place on the parchment lined cookie sheet.
• Roll the pastry ends back a little making a rim.
• Beat the egg whites until stiff peaks form.
• Gradually fold the beaten egg whites into the cheese mixture.
• Spread the pastry with the cheese mixture.
• Peel and slice the peaches.
• Arrange the peaches on top of the cheese layer.
• Sprinkle the peach slices lightly with a little sugar.
• Bake in the preheated oven until the pastry edge is golden brown.
• Remove tart from the oven and let it cool for 15 minutes before slicing into squares.


14.8.13

EGGPLANT PARMESAN

Over the years I tried out several eggplant parmesan recipes, but I was always disappointed. The flavours were too strong, it was runny and limp and the components remained disparate parts, failing to come together. Eventually I realized that the parts have to be delicious on their own, otherwise putting them together will not morph them into something wonderful. Salting the eggplant slices must be one of the most revolting things ever invented. That... and commercial tomato sauce. Those are always acidic.
 
So I decided to use breaded eggplants and mild, freshly made tomato sauce in my recipe. Breading and frying the eggplant slices gets rid of the bitterness and the breadcrumbs absorb all the superfluous fluid. Panco does not work here, you need plain breadcrumbs. Now for the sauce! Make your own tomato sauce. It is not overly time consuming. From start to finish, it took me 30 minutes. But boy was it ever worth it! This was the best eggplant parmesan I ever tasted! 

EGGPLANT PARMESAN
2 large, but young eggplants, sliced
1/4 cup flour
2 eggs, beaten
1 cup plain fine breadcrumbs
3/4 cup light olive oil
1 batch of Fresh Tomato Sauce [click on the link]
12 large slices of mozzarella cheese
1/2 cup Parmigiano-Reggiano cheese, shaved
 
• Prepare the fresh tomato sauce and set it aside.
• Preheat the oven to 375F.
• Take a slice off the first eggplant lengthwise and turn the eggplant onto the cut side. This will stabilize the eggplant and will make it easy to slice. Repeat with the second eggplant.
• Do not salt the eggplants, salt will make them limp and breading them will be difficult.
• Next set out 3 shallow bowls side by side. Put flour into the first one, beaten egg into the second and breadcrumbs into the third bowl.
• One by one dip the eggplant slices into the flour, the beaten eggs and finally into the breadcrumbs.
• When all the eggplant slices are breaded, heat the oil and in 3 to 4 batches fry the breaded eggplant slices on medium heat until crispy and golden brown on one side. Now turn them over and fry the other sides golden brown.
• Place the fried eggplants on paper towel and sprinkle them with salt. Repeat with the remaining slices, and make sure not to crowd the fry pan.
• Line the bottom of a square casserole dish with a little tomato sauce.
• Arrange half of the eggplants on the top.
• Cover the eggplants with half of the sliced mozzarella and half of the shaved parmesan cheese.
• Spoon half of the remaining tomato sauce over the cheese layer.
• Arrange the remaining eggplant slices on the top.
• Spoon the remaining fresh tomato sauce over the eggplants.
• Finally place the remaining mozzarella and shaved parmesan on the top.
• Place the dish in the preheated oven and bake for 30 minutes or until the dish is heated through and the cheeses begin to brown.
• Remove dish from the oven and let it rest for 10 minutes before slicing.
• This recipe will yield 4 regular and 2 large sized servings.


FRESH TOMATO SAUCE

The sauce was made from the first bucket of this year's assorted tomatoes from our garden. My husband just brings up a couple buckets of vegetables about mid afternoon and there they are on the counter and I have to do something with them. When we were younger I used to resent it - but now I look forward to the daily challenge dealing with the garden's bounty. I like the surprises best, like this first bucket of tomatoes.

This is a lovely tomato sauce and it is ready in 30 minutes. Fresh tomatoes make an exceptionally good sauce. I love the yellow fleshed low acid variety; they are not likely to cause heartburn.
 
Large tomatoes can be peeled and crushed. More than half of the tomatoes I used were cherry tomatoes and I just put them through the blander. Some people say tomato skins make the sauce bitter, but I didn’t detect any bitterness. In any case this sauce was not meant for preserving. 

FRESH TOMATO SAUCE 
2 pounds of fresh tomatoes [I used a mixture of cherry and low acid tomatoes]
2 Tbsp olive oil
1 carrot, peeled and thinly sliced
4 cloves of garlic
basil and oregano [you may use dried herbs]
2-3 sprigs of fresh, flat leaf parsley, chopped
salt to taste
1-2 tsp of sugar, depending on the tomatoes acidity
 
• Take the stems and leaves off the fresh tomatoes and wash them well.
• Cut out the large centers and discard.
• Chop the tomatoes and place them in a blander or food processor and puree.
• Place a non stick skillet on medium heat.
• Add the olive oil and the carrot slices and lightly sprinkle them with salt.
• Sauté the carrots for 2 minutes, stirring often.
• Add the garlic and continue to sauté until the garlic is translucent. Do not burn.
• Add the tomato puree and slowly cook on medium heat for 25 minutes.
• Add the herbs and sauté for 5 minutes longer. The sauce is ready when the oil floats to the top.
• Adjust the salt. If you started out with canned tomatoes instead of fresh ones there might be plenty of salt in the sauce already.
• Taste and add sugar to the sauce gradually and sparingly, the sauce should not become sweet. But even low acid tomatoes require a bit of sugar.

12.8.13

FOOD DEHYDRATOR

I borrowed my friend’s dehydrator, but upon realizing there was a big hole in the bottom where the motor and the fan is housed, so everything from the air that floats into it dies there, you would be surprised what floats around us, and then it gets circulated around the drying food… I got in the car, drove across the bridge to London Drugs and bought myself a model with the motor on top. This one is not open to the elements, it is totally enclosed by the drying trays so nothing whatsoever has access to the fan or to the inner workings of the machine ever, clearly this was the machine for me.
 
I’ve been drying apricots – tried it in various ways, the best one turned out to be what the recipe booklet suggested.
 
Cleanliness is very important as well as minimal handling of the fruits, basically avoid touching the fruit with your hands. And speaking of too much handling…
 
Always place the fruit with the skin down and cut side up, otherwise the fruit will stick to the racks. Don’t crowd the fruit, leave space around every peace; it will take less time to dry the fruit than drying it on overcrowded trays.
 
Pre-treat the fruit with lemon juice or ascorbic acid mixtures, pre-treated fruit will retain both its looks and vitamin content better.
 
Keep the trays pristine clean. I put my trays [including the bottom catch tray] through the “fast wash” in the dishwasher. [Fast wash doesn’t have a dry cycle] If your dishwasher doesn’t have this feature, put the trays through two rinses, one with detergent and one without. The instructional booklet says it is essential to keep your trays away from the dishwasher’s drying cycle. And of course the part that houses the motor must never be submerged in water; it has to be wiped off. This does not pose a problem with dehydrators that have the motor on top.
 
Select high quality, tender and crisp fruits and vegetables for drying. Do not use overripe fruit.

FOOD DEHYDRATOR 
fruit
lemon water

• Wash the fruit well.
• Remove the stone, blemishes and bruised parts and discard.
• Cut each apricot into 4 quarters.
• Place the slices in lemon water for 15 minutes, but no longer than 1 hour.
• Arrange apricot slices with the cut part up for drying on the trays. Do not overlap food.
• Stack the trays and put them on the dryer base.
• Put the lid on the top.
• Turn on the dehydrator. Check the food every half hour near the end of the recommended drying time. Fruits that are cut into 1/4- to 3/8-inch slices take six to ten hours to dry at 135F.
• When everything is dried, turn off the machine.
• Unplug and wash all the pieces thoroughly and allow them to dry completely before you store it away for the next use.

11.8.13

PIZZA BREAD

This bread is ready very fast and with minimal fuss. I call it pizza bread, because I use my standard pizza dough and bake it into two round loaves. This is the bread of choice when I have a short notice of company. If I start it at 2PM, by 6PM the fresh loaves are sliced and on the table.

PIZZA BREAD
2-1/2 cups flour
1 tsp sugar
1 tsp salt
2-1/4 tsp instant yeast [2-1/4 tsp = 1 package]
1/4 cup oil
1 cup lukewarm water desired toppings
 
• Place flour sugar, salt and instant yeast in a large bowl.
• Add the oil and the lukewarm water.
• Mix well.
• Let dough rest for 15 minutes.
• Transfer the dough to a stand beater and with dough hook attachment beat at medium high speed for 4 minutes. Or place the dough on a floured board and kneed until very elastic.
• Place the dough, it will be a bit sticky, in a lightly oiled bowl and turn over.
• Let the dough rise until doubled.
• Punch the dough down.
• Divide dough and shape into two balls.
• Preheat the oven to 400F.
• Place the balls on a parchment lined baking sheet.
• Sprinkle a little flour on the top and cut two slits into the dough.
• Let the breads double and then place them in the preheated oven and bake until nice golden brown.


FOCACCIA


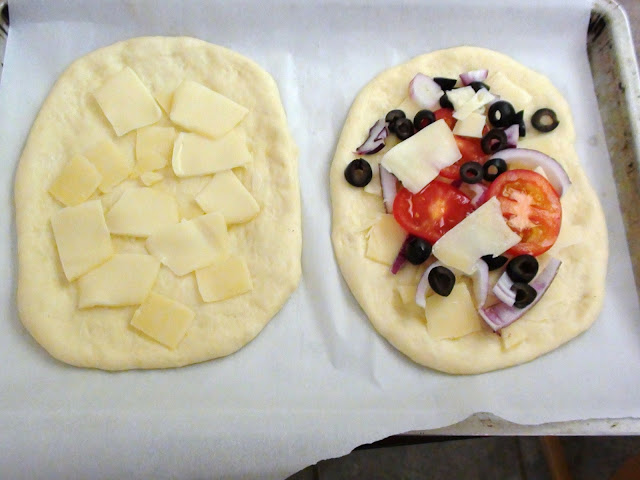
Just another pizza or is this something else? Like bread, pizza can come in many forms, a fact that has not been lost on the food industry. Certainly the explosion of flat artisan breads attests to that. If you have a good pizza dough recipe – you can make pizza, more pizza, bread, flatbread or focaccia. You know those flat breads with a couple of yummies on the top that the stores sell for exorbitant prices? Those. Roll out the pizza dough a bit thicker and put on a few vegetable slices, a bit of cheese and there it is: focaccia. Or just spread it with extra virgin olive oil and throw some salt on the top. It is that simple. My pizza recipe makes two large pizzas; four focaccias; eight servings of flatbread or bakes up as two round loaves of white bread.
 
2-1/2 cups flour
1 tsp sugar
1 tsp salt
2-1/4 tsp instant yeast [2-1/4 tsp = 1 package]
1/4 cup oil
1 cup lukewarm water
desired toppings
 
• Place flour sugar, salt and instant yeast in a large bowl.
• Add the oil and the lukewarm water.
• Mix well.
• Let dough rest for 10 minutes.
• Place dough on a floured board and kneed until elastic.
• Cover dough and let it rise for 1-1/2 hours.
• Punch down.
• Divide dough and shape into two balls.
• On floured board roll out 4 ovals.
• Place on two parchment lined baking sheets.
• Arrange the desired toppings on top, remember, this is not a pizza.
• Bake at 400F to a nice golden brown hue.
• Hot or cold, cut into strips and serve.


9.8.13

MOLTEN LAVA CAKES

When it comes to this much chocolate it has to be pure chocolate. I left out the liqueur because I made this for a 10 year old. The recipe calls for 6 oz custard cups. Six fluid ounces are equivalent in volume to 3/4 cup. I used 1 cup ramekins and the cakes came out perfect. If using smaller cups, the baking time should be reduced. This was adapted from Paula Deen’s recipe.

MOLTEN LAVA CAKES
6 squares [6 oz or 170g] bittersweet chocolate
2 squares [2 oz or 57g] semisweet chocolate
3/4 cup butter
1/2 cup flour
1-1/2 cups icing sugar
3 large eggs
3 egg yolks
1 tsp pure vanilla extract
2 Tbsp orange liqueur [optional]
 
• Preheat oven to 425 degrees F.
• Spray 6 large ramekins with cooking spray.
• Melt the chocolates and butter in a double boiler.
• Add the flour and sugar.
• Stir in the eggs and yolks until smooth.
• Stir in the vanilla and orange liqueur.
• Divide the batter evenly among the ramekins.
• Place in the oven and bake for 14 minutes.
• The edges should be firm but the center will be runny.
• Run a knife around the edges to loosen and invert onto dessert plates.

APRICOT MERINGUE PIE

Well the flavour of the apricot filling turned out divine, its structure was stable and so was the meringue. The apricot puree could be replaced with some other fruit, mango, papaya or perhaps passion fruit? But I have to say that apricot meringue pie made with fresh apricots has to be there at the height of culinary deliciousness.

The confusion on meringue pies is absolute, even well respected cooking sites; chef’s advice columns pertaining to the ins and outs of meringue pie fillings and meringues is full of bologna. In particular there is a very good-looking apricot meringue pie on line, the one with the six eggs and the cooked meringue with a sure to fail recipe… First of all cornstarch cooked for a total of 17 minutes will never set and cooking the meringue and then baking it at a high temperature is nothing short of a gastronomical blunder so don’t try it. After a failed attempt, think Zsuzsa think, think, I went back to a very old lemon meringue pie recipe; and adapted it to my rapidly ripening apricots. The recipe is at least sixty years old, but it cuts through a lot of the meringue pie hoo-ha. And one more thing! Don’t ever cut a meringue pie with a wet knife; pastry and water don’t do well together. Always let the pie cool down to room temperature and use a well buttered knife to slice it. 

APRICOT MERINGUE PIE
1/2 batch of pie pastry [click on the link for the recipe]
Apricot Filling:
320 g very ripe apricots [almost a pound]
1-1/2 cups sugar
5-1/2 Tbsp cornstarch
3/4 cup cold water
4 egg yolks
3 Tbsp butter, cut into cubes
3 Tbsp lemon juice [no more]
Meringue:
4 egg yolks
3/4 cup sugar

• Wash the apricots, remove the stones and puree in a blander or a food processor.
• Next make the pastry and blind bake the crust at 420F for 15 minutes.
• Remove the beans or the weights and bake the crust for 15 minutes longer.
• Remove the pie from the oven and set it aside.
• Reduce the oven to 350F.
• Next add the sugar and the cornstarch to a medium sized saucepan and whisk to combine.
• Separate the eggs and reserve the whites for use later.
• In a small bowl whisk the 4 egg yolks and set them aside.
• Gradually whisk 3/4 cup of cold water into the pot with the cornstarch mixture.
• Add 3/4 cup of the apricot and discard the remaining puree.
• Place the pot on medium heat [not high] and bring it to the boil.
• Boil the mixture for 1 minute.
• Remove the pot from heat. [Do not turn the heat off your electric stove]
• 1 tablespoon at the time, stir 4 tablespoons of hot apricot mixture into the reserved egg yolks.
• Now very gradually add the egg yolk mixture to the pot, whisking continuously.
• Place the pot back on the medium heat and boil for 1 minute, whisking all the while.
• Remove the pot from the heat and stir in the butter.
• Add the fresh lemon juice through a fine sieve and stir to combine.
• Pour the filling into the baked pastry shell.
• Next make the meringue.
• Beat the 4 egg whites until frothy.
• Add a little at a time, while beating, 3/4 cup of sugar and beat it until stiff and glossy. • Arrange half of the beaten egg whites on the top, all around the edge first, sealing the space between the pastry and the filling.
• Next pile the remaining egg whites in the middle making a dome shape.
• With the back of the spoon make swirls.
• Place the pie in the oven and bake at 350F for 15 minutes.
• Remove pie from the oven and place on a wire rack to cool down to room temperature.
• To serve the pie, butter the knife on both sides before each and every cut.
• Store the pie in the fridge for up to 3 days, but do not freeze.

7.8.13

WAX BEAN TARTLETS - ZÖLDBABOS TARTE

Oh my. These are dangerously good. But you do need a good pie pastry, which I do have here, because pastry enjoyment is an essential part of these tartlets. I used 3 large ramekins; smaller ones would not give balance between pastry and filling. With a salad you have a perfect meal for two and you can fight over the third tartlet the following day. I gave it to my constant friend and lately food taster Ann, who picked it up and brought back the ramekin with two words; “More please!”

WAX BEAN TARTLETS
1/4 batch of pie pastry
3 large ramekins

Filling:
200 g tender, young wax beans [2/3 cup chopped]
1 Tbsp olive oil
1 whole shallot, finely chopped
2 garlic cloves, minced
few sprigs of fresh flat leaf parsley, finely chopped
2 eggs, lightly beaten with a fork
1/2 cup feta cheese, crumbled [250 g]
1/2 cup whipping cream
3 Tbsp flaked parmesan
ground pepper to taste

• Use only fresh tender wax beans. Mature, stringy beans are not recommended.
• Use creamy feta. If the feta is very salty, soak in cold water for a couple of hours before use.
• Make the pie pastry first and then set aside.
• Preheat the oven to 400F.
• Wash the wax beans and remove the top ends only. Young beans are not stringy and you can also leave on the tails.
• Cut up the wax beans into inch long pieces and blanch them in boiling water for 3 minutes.
• Drain the beans and set them aside.
• In a small non stick skillet, sauté the chopped shallot and garlic they soften Do not brown.
• Remove skillet from the heat and add the wax beans.
• Transfer the mixture to a smaller bowl.
• Add the chopped parsley, the beaten egg, the crumbled feta, the whipping cream and gently combine.
• Season the mixture with ground pepper. Do NOT add salt, the feta will make the filling sufficiently seasoned with salt.
• Roll out the pastry into 3 large circles and fully line the ramekins.
• Divide the filling between the ramekins.
• Place in the oven and bake the tartlets for 25 minutes.
• After 25 minutes reduce the heat to 375F and bake until the tops get a nice golden color.
• Remove the tartlets from the oven.
• Tartlets can be served piping hot in the ramekins.
• If you want them served on their own, let them cool down so they can be handled.
• Hot or warm, serve the tartlets with a green salad.


4.8.13

APRICOT FETA SALAD

Sasha Gora called it Summer Apricot and Feta Salad. And it goes with this great dressing! A simple and colourful salad, and yes, it is perfect for summer.

APRICOT FETA SALAD
2-3 handfuls of salad greens
6 fresh apricots, quartered
1 cup feta cheese, cubed or crumbled [If feta is too salty, soak in water first]
1 batch of Sasha Gora Salad Dressing [click on the link for the recipe]
 
• Wash the lettuce or salad greens well and then spin to dry.
• Wash the apricots, remove stones and cut into quarters.
• Make the dressing.
• Assemble the greens in a salad bowl and top with the quartered apricots and the feta.
• Drizzle with the dressing.

SASHA GORA SALAD DRESSING

When I first made Sasha Gora’s Summer Apricot and Feta Salad, I just wanted to use the apricots our tree keeps churning out. The salad was good, very good, but the dressing she concocted for it is in a league of its own. I decided I had to add it to my salad dressings, lest it gets lost among the plethora of apricot recipes. It could be the recipe or that I used Grey Poupon. One thing is for sure, this is great salad dressing!

SASHA GORA SALAD DRESSING
1 tsp Dijon mustard
1 tsp maple syrup
2 Tbsp apple cider vinegar
5 Tbsp extra virgin olive oil
a squeeze of fresh lemon juice, about a scant Tbsp
salt and pepper to taste
 
• Place the ingredients in a jar, seal and shake well until everything is combined.
• Taste and adjust seasoning as desired.

3.8.13

APRICOT SPINACH SALAD

Apricots, apricots, they leave by the buckets, everyone is welcome and yet the tree is just as loaded as before. Desperate times call for desperate measures and a new salad is born.

APRICOT SPINACH SALAD
2 handful of fresh spinach
1 cup fresh apricots
1-1/2 Tbsp olive oil
1 diced garlic
2 tsp balsamic vinegar
salt and pepper to taste
 
• Use tender young spinach and ripe but firm apricots. I left the stems on, but you may remove them if you like.
• Wash the spinach and the apricots and set them aside to drain.
• In a large skillet heat 1-1/2 Tbsp olive oil on medium low heat.
• Add the minced garlic and heat until garlic starts to get a little color.
• Add the balsamic vinegar, bring to the boil and remove from heat.
• Add the spinach and the apricots to the skillet.
• Return to heat and toss for 1 minute or until spinach begins to wilt. [Do not cook longer]
• Transfer mixture to a serving dish.
• Sprinkle with salt and pepper.
• Serve immediately.

2.8.13

MARZIPAN APRICOT CAKE BARS - MARCIPÁNOS BARACKPITE

Not your average pite, the marzipan gives this cake bar a wonderful, unique flavour. Marzipan is not always available, but very easy to make; all you need is almond meal, sugar and water. You will find almond meal in the baking isle, or in the bulk food section of grocery stores. If your store does not carry almond meal, look for it in health food stores where they carry food stuffs for people on special diets and food allergies.

MARZIPAN APRICOT CAKE BARS
15 apricots
3 Tbsp marzipan [click on link for recipe]
3 eggs
scant 1/2 cup soft butter
1/2 cup sugar
1 cup flour
1 tsp baking powder
sweetened whipped cream
 
• Preheat oven to 375F.
• Line a 9X12 inch baking pan with parchment paper.
• Wash and drain the apricots.
• Place a large pot of water on the stove and bring to full rolling boil.
• Place the apricots into a large bowl and pour the boiling water on top.
• Keep the apricots submerged in the scalding hot water for 4 minutes, no longer.
• Meanwhile place another large bowl with ice water nearby.
• With a slotted spoon quickly plunge the apricots into the ice cold water.
• The skins will come off easily.
• Drain the peeled apricots, cut them in half, remove the stems and the stones and discard them.
• Set the apricot halves aside and prepare the batter next.
• Beat the soft butter and the sugar for 4 minutes.
• One by one add the eggs, beating well after each addition.
• Crumble the marzipan into the batter and beat to combine.
• In a medium sized bowl whisk the flour and the baking powder.
• Gradually add the flour mixture to the batter, beating just to combine. Do not overbeat.
• Pour the batter into the prepared pan.
• Arrange the apricot halves on the top and gently push them into the batter.
• Bake in the preheated oven. • Let the bar cool down and then cut into 12 squares.
• Serve the bars with sweetened whipped cream.


1.8.13

APRICOT PASTRY TART

This may appear to be a lengthy recipe, but either way the tart is simple to make. All you really need for it is pastry, fresh fruit and jam. This tart was made with homemade Hungarian Flaky Pastry.

APRICOT PASTRY TART
300g fresh apricots
1 batch of Hungarian Flaky Pastry [click on the link for the recipe]
or 1/2 pkg. of commercial puff pastry dough, defrosted in the fridge overnight
Fruitfresh for sprinkling [optional]
1/4 cup smooth apricot jam, melted
sweetened whipped cream to serve the tart with [optional]
 
• Preheat the oven to F.
• Line a rimmed baking sheet with parchment paper.
• Next, prepare the apricots.
• Bring a pot of water to full rolling boil.
• Wash and drain the apricots and place them in a large bowl.
• Pour the boiling water over the apricots and leave them for 4 minutes. [not longer]
• Place a large bowl of ice water next to the bowl with the apricots.
• Using a slotted spoon quickly transfer the apricots to the bowl with the ice water. This will halt the cooking process.
• Remove the skins, cut the apricots in half, remove and discard the stones. [If the apricots are large, slice them or cut them into quarters.]
• Set the skinned apricot halves to drain.
• Next, roll out the pastry of your choice on a floured surf ace. If using homemade pastry, follow the directions. If using commercial puff pastry, make sure to roll the dough with a pastry roller and avoid stretching the dough by hand.
• Lay the pastry on the prepared pan, turning over a little bit from the edge.
• Arrange the skinned apricot halves on the top.
• Sprinkle with Fruitfresh.
• Melt the jam and distribute it over the apricots.
• Place the tart in the preheated oven and bake until nice golden on the edges.
• Halfway through baking I had to poke the commercial puff pastry in the middle, because the pastry bulged up, displacing some of the apricot halves. Use the fork to push the apricot halves back to their spots and finish baking the tart.
• Take the tart out of the oven and let it cool down a little before slicing it into 6 to 8 portions with a pizza cutter.
• Serve the tart with sweetened whipped cream.

Privacy & Cookies

This site uses cookies. By continuing to use this website, you agree to their use. To find out more, including how to control cookies, see here: Cookie Policy

Translate

me

My photo
It began with posting a few recipes on line for the family. "zsuzsa is in the kitchen" has more than 1000 Hungarian and International recipes. What started out as a private project turned into a well visited blog. The number of visitors long passed the two million mark. I organized the recipes into an on-line cookbook. On top of the page click on "ZSUZSA'S COOKBOOK". From there click on any of the chapters to access the recipes. For the archive just scroll to the bottom of the page. I am not profiting from my blog, so visitors are not harassed with advertising or flashy gadgets. The recipes are not broken up with photos at every step. Where needed the photos are placed following the recipe. Feel free to cut and paste my recipes for your own use. Publication is permitted as long as it is in your own words and with your own photographs. However, I would ask you for an acknowledgement and link-back to my blog. Happy cooking!