30.9.17

JAM DUTCH BABY

The last hurrah of  plum season is over. The plums are dropping on the ground now. The jam is all tucked away downstairs in the cupboard, upstairs tiny bowls of the sweet stuff is hanging around, those that didn't make it into the jars. That's when I think Dutch Baby! There are endless recipes with jam added to Dutch Baby. But I wanted to come up with a version jam is baked with the Baby. I made several attempts, this time I am satisfied with the result. For two people this Baby can be ready in 25-30 minutes, but after 25 minutes keep a close eye on it. The longer Dutch Baby remains in the oven the more fanciful shape it will take. Just make sure it doesn’t burn. You won’t need syrup, the jam makes it plenty sweet. Despite a magnificent entry, as you can see here... the Baby always flops. So dig in.

JAM DUTCH BABY
3 eggs
1/2 cup milk [not skim]
1/4 heavy cream
2 Tbsp sugar
1/2 tsp salt
1/2 tsp pure vanilla extract
1/2 cup flour
2 Tbsp butter
4 Tbsp jam

  • Place a 10″ heavy ovenproof skillet on the middle rack of the oven, and preheat to 450F.
  • In a large bowl, whisk eggs vigorously until light and frothy, about 2 minutes.
  • Add milk, cream, sugar, salt and vanilla, and whisk until combined.
  • Add the flour and whisk just until smooth.
  • Let it rest for 10 minutes.
  • Slightly warm the jam but don’t let it melt.
  • Using heavy duty oven mitts, carefully remove the skillet from the oven.
  • Add the butter and let it melt completely, swirling the pan to coat the entire bottom. Pour the batter into the hot pan, and spoon the jam into the middle. Work quickly, but be mindful not to touch the hot skillet.
  • With the oven mitts put the skillet back into the oven. Shut the door quickly.
  • Bake for 20 to 22 minutes or until the Baby is fully puffed and the entire top is golden brown.
  • Remove from oven, loosen the edges and transfer to a serving platter. It will deflate very quickly.
  • Cut into large wedges and serve immediately.

29.9.17

WASHBOARD COOKIES


Some things are better left in the past. Recalling one consistent no thank you food event from my childhood was "darálós keksz", dry pain AKA száraz fájdalom? I thought I could come up with an alternative, a good alternative, only to discover there exists no such thing. To churn out cookies with a meat grinder, you need a flour-heavy dough and if you want to reproduce it using a pastry bag, yes there exists such, you better call in iron man. Having neither, I settled for half a batch of my spritz cookie recipe. I pushed out eight six inch length sausages with a giant #863 star tip. They were the right size at the time, but they spread during baking. I cut them in half and washboard cookie was born. Next time I will flavour it with grated lemon rinds. Afternoon tea may never be the same.

WASHBOARD COOKIES 
1 egg yolk 
2 Tbsp heavy cream 
1 tsp vanilla 
1/2 cup unsalted butter, softened 
1/3 cup sugar 
sprinkle of salt 
1 cups flour 

  • Preheat oven to 375F. 
  • Line a cookie sheet with parchment paper.
  • In the bowl of a stand mixer, beat butter, sugar and salt at medium high speed until light, fluffy and pale in color. 
  • Reduce speed and add the egg yolk cream and vanilla. 
  • Beat until thoroughly combined. 
  • Gradually add flour and mix until just combined.
  • Fill a large pastry bag with the dough and twist the top to close. 
  • Using a large #863 star tip pipe 8 six inch length strips on the prepared cookie sheet, leaving 2 inches between the strips. 
  • Bake for 10 minutes or until lightly golden brown on the edges. 
  • Remove from oven and immediately cut cookies in half.

28.9.17

SPICE ZUCCHINI CUPCAKES

Sometimes a recipe no longer looks or tastes like the original, suffice to say both this and its chocolate version could be sourced back to Taste of Home August/September 1997. The original cupcakes were re-purposed and so different as a child can be different from its parents. So much so I could have left off the sourcing completely. From a chemist’s point of view, there are definite standards that should be followed in the ratio of flour, fat, eggs and leavening agents. A 3 egg cupcake recipe that yields two dozen cupcakes does not fulfill the criteria I hold onto. Heaven help from the one egg wonders, unless of course a whole slew of different leavening agents are applied. Granted I am thoroughly partial to European style baked goods and I think very little of the heavy cakes and cupcakes North American recipes seem to produce. Aside from a health focused economy, I think it goes back to the British tradition of heavy cakes that in desperation are often soaked with spirits and other forms of wet stuff. Such culinary sins not even Taste of Homes is exempt from. For instance they never drained the shredded zucchini even though fully squeezing out the juices is imperative. Also no additional liquid is required...  

SPICE ZUCCHINI CUPCAKES 
1 cup fully drained shredded zucchini
2 eggs
3/4 cup sugar
3/8 cup vegetable oil
1 Tbsp pure almond extract
1 cup flour
1/2 tsp baking soda 
1 tsp baking powder
pinch of salt
1 tsp ground cinnamon
1/4 tsp ground cloves
1 tsp very finely grated orange grinds
  • Preheat the oven to 350F.
  • Line 12 muffin cups with parchment liners.
  • If using ordinary paper liners, lightly spray the liners with cooking spray.  
  • In a large bowl beat the zucchini, eggs, sugar, oil, and the almond extract.
  • In a separate bowl whisk really well together the flour, baking soda, baking powder, salt, cinnamon, cloves and the orange rinds.
  • With a wooden spoon fold the flour mixture into zucchini mixture until thoroughly combined.
  • Divide the batter evenly among the prepared baking cups.
  • Bake for 25 minutes or until the tops spring back. Do NOT overbake.
  • Cool in the pan on a wire rack for 10 minutes.  
  • Remove cupcakes from the pan and cool down completely.
  • Meanwhile make a batch of Real White Chocolate Buttercream
  • With a large star tip pipe the buttercream on the tops.

27.9.17

CHOCOLATE ZUCCHINI CUPCAKES

These are chocolaty with a great crumb and you won’t even think you are eating a vegetable. Even with the skin left on you would be hard pressed to find the green bits. But if you want to conceal the zucchini completely, peel it before shredding the pulp. Shredded zucchini should always be drained of its juices, otherwise the cake will be waterlogged. Adapted from Taste of Home, August/September 1997.

CHOCOLATE ZUCCHINI CUPCAKES
1-1/2 cups fully drained shredded zucchini
2 eggs
3/4 cup sugar
1 Tbsp instant coffee powder
3/8 cup vegetable oil
1 Tbsp pure vanilla extract
1 cup flour
1/2 tsp baking soda 
1/4 tsp baking powder
pinch of salt
1/3 cup cocoa powder

  • Preheat the oven to 350F.
  • Line 12 muffin cups with parchment liners. 
  • If using ordinary paper liners, lightly spray the liners with cooking spray.  
  • In a large bowl beat the zucchini, eggs, sugar, instant coffee powder, oil, and vanilla.
  • In a separate bowl whisk together the flour, baking soda, baking powder, salt and the cocoa.
  • With a wooden spoon fold the flour mixture into zucchini mixture until thoroughly combined.
  • Divide the batter evenly among the prepared baking cups.
  • Bake for 25 minutes or until the tops spring back.
  • Cool in the pan on a wire rack for 10 minutes.  
  • Remove from pan and cool down completely.
  • Meanwhile make a batch of Real Chocolate Buttercream.
  • With a large star tip pipe the buttercream on the tops.

26.9.17

HUNGARIAN HOMEMADE SAUSAGE ROASTED - SÜLT HÁZI KOLBÁSZ

I had this sausage recipe for two decades, never actually made it, I kept thinking one day I will invest in a sausage making equipment. After my recent visit to an Italian store I came down to Earth and decided that spending 1500.00 on professional meat processing equipment at my age would be folly, not to mention the heavy work such course of action would require.

Recalling the occasional Disznótoros care package my uncle sent from Siklós and the coils of raw sausage Grandma roasted in the oven afterwards... I decided I can perhaps reproduce the raw sausage and reduced the recipe to a tiny fraction. Some parts I measured and some I guessed, the smallest unit my scale registers is 4 grams. There was of course the added challenge, that the spices and salt cannot be reduced proportionally. So a word of caution. Sure you can double the recipe, but any more than 1 kg of ground pork and you would do better calculating the ingredients from the original recipe. And even then, use your judgement as far as the spices are concerned.

Well call it luck, we LOVED the flavour, though in all honesty, next time I will use medium ground pork, as this was a bit on the lean side. But the flavour was familiar. The colour was vibrant enough, though had it been in casings, smoked and hung, it would have been brighter red still. This recipe requires real, FRESH Hungarian paprika. Don’t use Spanish paprika and never from a tin. 


HUNGARIAN HOMEMADE SAUSAGE ROASTED
50 g medium ground pork
1-1/2 tsp table salt
1/4 tsp black pepper, ground
1 Tbsp Hungarian paprika
2 garlic cloves, minced
1/4 tsp caraway seeds, ground
1/2 tsp sugar
3-4 Tbsp oil for the roasting

  • Preheat the oven to 350F.
  • Place the ground pork in a wide bowl and measure the salt and the spices on the top.
  • With clean hands work the spices into the ground meat.
  • The spices must be thoroughly combined with the meat, keep working at it for several minutes.
  • Add the oil to an ovenproof skillet.  
  • Press the meat into a compact skinny loaf.
  • Put the loaf inside the skillet and place the skillet on the stove over medium heat.
  • Sear all four sides, carefully turning the loaf with a spatula in one hand, guiding it turn with the other hand. Take care not to burn your hand, but the loaf will not be too hot, at this point the meat is still raw on the inside.
  • When all the sides are seared, place the skillet in the preheated oven and bake it for and hour or longer.
  • After an hour, lightly poke the middle with a sharp knife and if clear liquid flows out the meat is done.
  • Remove from the heat and let the loaf rest for a few minutes before slicing.

25.9.17

REAL CHOCOLATE BUTTERCREAMS

Chocolate, chocolate, chocolate! 

I baked two batches of cupcakes and wanted real chocolate buttercreams to conclude them; one white and one dark chocolate. Both buttercreams were ample enough to cover one dozen large cupcakes without surplus. This is both convenient and economical, because let’s be honest, how often do we use up the small container of leftover icing tucked away in the freezer?

Use only the finest Belgian Chocolates... I love Callebaut! It comes in one and a half inch thick bars. In western Canada, Baker’s Chocolate is widely available and so is Lindt Chocolate. Generally look for over 70% chocolate content. Avoid house brands and most chocolate chips. Although there are pure chocolate chips in speciality stores, the brand names grocery stores promote are anything but “pure”.


WHITE CHOCOLATE BUTTERCREAM

1 cup soft butter
3 cups sifted icing sugar
1 tsp real vanilla extract
1/2 cup good quality white chocolate, finely chopped
1/4 cup whipping cream

CHOCOLATE BUTTERCREAM
1 cup soft butter
3 cups sifted icing sugar
1 tsp real vanilla extract
1/2 cup good quality dark chocolate, finely chopped
1/4 cup whipping cream

  • The preparation for white and dark chocolate buttercreams is the same.
  • Place the butter, icing sugar and the vanilla in a standing beater and beat for 5 minutes until frothy.
  • Meanwhile chop the chocolate finely and place in a small bowl and slightly melt it in the microwave for 30+ seconds.
  • Stir down the remaining chunks until smooth.
  • Add the whipping cream and stir smooth.
  • The cold cream will cool down the chocolate so you can scoop it into the butter mixture right of way.
  • Beat to combine.
  • Make sure the cupcakes are at room temperature before piping.
  • Each buttercream is the exact amount to cover 12 large cupcakes.

24.9.17

YEAST CREPES - KELT PALACSINTA

I recall my grandmother mentioning once that leavened crepes go further if one was short of money, which was a slight exaggeration come to think of it, because Hungarian recipes are notoriously egg rich. She never made it, not for a family of rigid eaters, nothing new or different was tolerated by my brothers. I think of yeast crepes as crepe - pancake hybrids, though they are more refined and not as doughy as one egg pancakes. I wouldn’t roll them up or stuff them with  a filling, that would be too cumbersome and all along I would wish they were thinner... These would be great with a savory accompaniment, such as a ratatouille, mushrooms, melted cheese or sausages. But I knew how Jim would like it, with something sweet and fruity on the side.

YEAST CREPES
6 egg whites
6 egg yolks
3/4 cup sugar
2 cups lukewarm milk
1 tsp instant dry yeast
sprinkling of salt
2 cups flour
oil

  • Beat the egg whites until stiff peaks form. Set it aside.
  • Beat the egg yolks and sugar until thick.
  • Add the yeast and the salt to the yolk mixture.
  • Add the flour and the milk alternatively.
  • To avoid lumps start with a little bit of flour and milk first and stir it into the yolk mixture.
  • Gradually increase the amounts alternating the flour and the milk, until all two cups are added. Finally fold in the stiff egg whites.
  • Set aside to rest for 15-20 minutes. It won’t rise much, only the consistency changes.
  • Heat a stick free larger skillet and add 1 tsp of oil.
  • With a large ladle scoop up from the batter and ladle it onto the hot skillet.
  • Tip the skillet so the batter spreads out evenly.
  • Flip the crepe after holes appear on the top.
  • When the underside gets a nice colour, slide it on the plate and gently fold it over.
  • Serve the crepe with the desired topping or accompaniment.


23.9.17

2 CHOCOLATE TOPPED MUESLI BARS


What holds these two very delicious loosely bound muesli bars together is a nice layer of good quality melted chocolate. These bars are less of a sustenance and more of a treat. If the ever decreasing quality of commercial muesli bars is proof of anything, it is that nothing can substitute quality ingredients.

CHOCOLATE TOPPED NUTELLA MUESLI BARS
Bars:
2 cups good quality muesli
1/2 cup chopped almonds, toasted
1/8 cup butter
4 Tbsp Nutella
1/4 cup real maple syrup
sprinkle of salt
Topping:
1/2 cup pure, good quality dark chocolate, shaved
2 Tbsp butter
1/4 cup heavy cream

  • Line an 8×8 inch square baking pan with parchment paper.
  • Place the muesli and the toasted almonds in a large bowl.
  • In a smaller bowl melt the butter in the microwave.
  • Add the Nutella, maple syrup and the salt and stir to combine.
  • Add the Nutella mixture to the big bowl and stir to combine.
  • Transfer to the prepared pan and press into an even, compact layer.
  • Melt the chocolate and the butter and add the heavy cream.
  • Stir to combine.
  • Spread the chocolate topping over the muesli bar and chill thoroughly before slicing.
  • Keep the bars between strips of parchment paper for 1 week in the fridge, or up to 2 months in the freezer.
WHITE CHOCOLATE TOPPED PEANUT BUTTER MUESLI BARS
Bars:
2 cups good quality muesli
1/2 cup chopped almonds, toasted
1/8 cup butter
1/4 cup peanut butter
1/4 cup real maple syrup
sprinkle of salt
Topping:
1/2 cup good quality white chocolate, shaved
2 Tbsp butter
1/4 cup whipping cream

  • Line an 8×8 inch square baking pan with parchment paper.
  • Place the muesli and the toasted almonds in a large bowl.
  • In a smaller bowl melt the butter in the microwave.
  • Add the peanut butter, maple syrup and the salt and stir to combine.
  • Add the peanut butter mixture to the big bowl and stir to combine.
  • Transfer to the prepared pan and press into an even, compact layer.
  • Melt the white chocolate and add the butter and the heavy cream.
  • Stir to combine.
  • Spread the white chocolate topping over the muesli bar and chill thoroughly before slicing.
  • Keep between parchment paper for a week in the fridge, or up to 2 months in the freezer.

21.9.17

SKILLET PORK CHOPS

It’s already suppertime and all you have are these thick pork chops? Never fear, it’s easy. Cook it like I cook my steak and you won’t believe how tender, tasty,  juicy and great quickly cooked pork chops can be. You won’t ever have to eat tough, dry pork chops again.

 And speaking of great... How great is this?
My grandson's rock band To the Wolves at the “Whisky a Go Go” on the Sunset strip in LA. Check them out here 
tender, juicy and great!
SKILLET PORK CHOPS
2 thick boneless pork cops
salt to taste
garlic powder
2 Tbsp olive oil
1 Tbsp butter

  • Pound the chops on both sides with a meat tenderizer.
  • Rub salt and garlic powder onto both sides.
  • On medium high, heat up the oil in a non stick skillet.
  • Add the butter.
  • When the butter melts, add the chops.
  • Sear on side and then turn over with a pair of kitchen thongs and sear on the other side. Do not stab the chops with a fork.
  • After both sides are seared, cover the skillet with a well fitting lid and turn the heat down to low medium. Cook for 5 minutes. Do not lift the lid.
  • After 5 minutes, turn the chops over with the kitchen thongs and replace the lid. Cook for 5 more minutes.
  • Remove the skillet from heat and set it aside, covered for 10 minutes. The fibres will relax during rest.
  • Pour the rusty pan juice over the meat and serve.
  • Be prepared to be amazed at the tenderness and the flavour of the chops you just made.

CARAMEL MUESLI BARS

I made several no bake muesli bars from a box of cereal. The main difference between muesli and granola is that muesli is made from uncooked mixture of grains. Granola is baked or roasted. But first things first, I picked out the raisins. The two ladies I made them for loathe raisins. It also had some tiny cornflakes in it but I thought those would only add crunch interest to the bars. All right I will develop a nice muesli mixture on my own... eventually. But for now Kellogg’s will do. I began every recipe with 2 cups of the raisin free muesli. I only added chopped, toasted almonds, but the possibilities could be endless using other nuts, seeds and dried fruits. The next step was what to put into the mixture that would bind it together without the stuff they don’t fancy, such as mashed up dates or honey. The muesli may have had some of those already, but I won’t tell. Personally I didn’t want the bars to become overly sweet. This was my first muesli bar and it turned out absolutely delicious! 

CARAMEL MUESLI BARS
2 cups good quality muesli
1/2 cup chopped almonds, toasted
1/8 cup butter
1/4 cup real maple syrup
10 caramels
2 sprinkles of salt
1/4 cup heavy cream

  • Line an 8×8 inch square baking pan with parchment paper.
  • Place the muesli and the toasted almonds in a large bowl.
  • Place the butter, maple syrup, 10 caramels, and the salt in a double boiler until the caramels melt. Stir in the heavy cream.
  • Pour the melted caramel mixture over the muesli mixture and stir to coat.
  • Transfer the mixture to the prepared pan and press into an even, compact layer. If it’s too hot for your hands, place a square of parchment paper on top, it will be easier to press it in place.
  • Keep an eye on it, this will firm up quite rapidly and you may want to cut it into bars before the bar fully hardens.
  • Layer the bars between parchment paper. Keeps for 1 week in fridge and 2 months in  freezer. 

20.9.17

FREEZER JAMS

After making several batches of peach freezer jams, I thought it might be useful to write down a few pointers while fresh in my mind. It is not always easy to remember how it went a year earlier. Olivia is our official raspberry freezer jam maker and bless her 14 years old heart, she doesn’t even like raspberries. I think she just likes the colour.

Other General Good Ideas about Freezer Jams

The fruit is not really cooked in a freezer jam so it retains its fresh flavour and color. You kind of get used to that. For baking nothing compares to cooked apricot jam, but on my toast I want freezer jam. The one drawback is if you don’t have a lot of freezer space, you may not want to reserve it for a year’s supply of jam.  

Pectin is necessary for making freezer jam. Most fresh fruits contain natural pectin, but not enough for jam consistency. Liquid and powdered pectin both work well, what to use is a question of preference and availability. Canning supplies are often depleted during fruit season. Before you use it, make sure the pectin hasn’t expired.

Crush or dice the fruit by hand, it is easiest to crush ripe fruit at room temperature. Don’t use a food processor or a blander; you will have foamy fruit on your hands. That’s not good for jam.

For the recipe follow the Freezer Jam Directions. They vary from brand to brand. Jam making is an exact process so measure carefully or you will have failures. It isn’t surprising that major Pectin companies keep 24 hour jam hotlines.

If using glass or plastic jars, leave 1/2 inch space at the top for expansion in the freezer. After filling the jars with the jam, cover and let them stand at room temperature for 24 hours before placing the jams in the freezer.

The shelf life of freezer jams are 3-4 weeks in the refrigerator and up to a year in the freezer.

19.9.17

CAKE BROWNIES

Someone once compared fudge brownies to New York cheesecake. You are dying to have it, you have a slice and then you are done. But cake brownies... they are in a different class altogether. Especially with ganache on top. This really IS a cake, why it's called a brownie I do not know. Adapted from Taste of Home

CAKE BROWNIES 
2/3 cup butter, cubed
3/4 cup baking cocoa
1/4 cup vegetable oil
2 cups sugar
4 eggs
2 tsp pure vanilla extract
1-1/2 cups flour
1 tsp baking powder
1 tsp salt
1 batch of chocolate ganache
  • Preheat the oven to 350F.
  • Line a 13x9 inch baking pan with parchment paper.
  • Melt the butter in a large heavy skillet.
  • Add the cocoa and the oil and stir smooth.
  • Cook over low heat stirring continuously until well combined.
  • Transfer mixture to a large bowl and stir in the sugar.
  • Add the eggs, one at a time, stirring well after each addition.
  • Stir in the vanilla.
  • In a separate bowl whisk together the flour, baking powder and the salt.
  • Gradually add the flour mixture to the cocoa mixture. Stir to combine.
  • Spread the mixture into the prepared baking pan.
  • Bake for 25-30 minutes or until a cake tester inserted in the center comes out clean.
  • Cool in the pan on a wire rack.
  • Prepare the ganache and spread over the top.
  • Let the ganache set a bit before cutting into squares.

18.9.17

OVERNIGHT BUNS

These take the guesswork out of rising dough. I can’t stress enough how effortless these buns are. If you need  success with bread dough, this surely is the one to try. Like many bakers, I went through the no kneed phase and found no-kneed-breads and buns wanting. I came to the conclusion that when it comes to texture and longevity, nothing will replace  thorough kneading aka the elastic dough. I don’t think much of unrefined rustic breads and while I still have them among my recipes, I can’t remember the last time I made one. The no-kneed-bread will go down in the history of culinary arts as a fad just like meringue mushroom caps decorated cakes, jellied salads, frosted ribbon loaves and the horror of horrors, the coq au vin [I call it slimy chicken]. If you are any way yeast dough challenged, try this, I can’t think of a way to ruin these buns sort of a power outage.
OVERNIGHT BUNS
3-1/2 cups flour
2 tsp instant dry yeast
3 Tbsp dry milk powder
2 Tbsp sugar
1-1/2 tsp salt
1/4 cup butter, soft
1 cup water
1/2 cup lukewarm milk
1+1 Tbsp butter, melted for brushing

  • Combine ingredients and make a very soft, pliable dough. If you are kneading by hand, here is a shortcut: throw the dough down on the counter 100 times, this really helps to develop the gluten.
  • Place the dough in a greased bowl and let it rise for one to two hours or until almost doubled.
  • Line a larger baking pan with parchment paper.
  • Punch down and divide dough into 15 equal pieces and round each into a ball.
  • Brush the tops with 1 Tbsp of melted butter.
  • Cover completely with plastic wrap and a clean kitchen towel and refrigerate overnight.
  • Take the rolls out, uncover and let them sit on the counter for 15 minutes.
  • Meanwhile preheat the oven to 350F.
  • Bake in the preheated oven for 22-24 minutes or until lightly browned.
  • Brush with the remaining melted butter if desired.
  • Remove to wire racks to cool.


17.9.17

ZUCCHINI PRALINE CAKE

This was a cake high on sugar and Jim LOVED it. Which would have been fine except I also put in two cups of walnuts and that just tipped over the scale for me. Next time it’s either the praline icing or the walnuts, but the two together kept me up for most of the night and only after swallowing a heaping tablespoon of baking soda and two cups of water was I able to sleep for a few hours. I was thinking there will be no write up this time and only when Jim carted away the cake to the freezer for himself I thought... well maybe I should add it to my recipes. I still intend to make a couple of loaves without the praline and the walnuts, because as far as the batter is concerned it tasted delicious and the crumb was superb. Passionate Plate’s mama really knew what she was talking about.


ZUCCHINI PRALINE CAKE
Cake:
3 eggs
1 cup vegetable oil
2 cups grated zucchini
2 tsp. vanilla
3 cups all purpose flour
1 tsp baking soda
2 cups granulated sugar
1/4 tsp baking powder
1 tsp salt
1 Tbsp cinnamon
Praline Icing:
1 cup packed brown sugar
1 cup butter, cut into small pieces
1/4 cup whipping cream
1 tsp maple extract
2 cups icing sugar
1/2 cup nuts [optional]

  • Grate the zucchini in a food processor fine and set it aside.
  • Preheat oven to 325F.
  • Fully line two 9-inch cake pans with parchment paper.
  • Place a large fine sieve over a catch bowl. A catch bowl is just a bowl your sieve fits over perfectly.
  • Squeeze the life out of the zucchini, which means squeeze, push, press against the sieve to rid the zucchini all of its moisture.
  • Place zucchini, eggs, oil, sugar, vanilla, baking soda, baking powder, salt, and the cinnamon in the beater bowl. Beat well to combine.
  • Using a wooden spoon, gradually stir in the flour.
  • Scoop the batter into the prepared cake pans. For a four layer cake divide the batter evenly, for a three layer cake, scoop a little more batter into one of the cake pans.
  • Bake until the cake is set in the middle about 30+ minutes. Even though one cake was higher they were ready about the same time.
  • Turn the cakes out onto a rack to cool.
  • While the cakes cool, make the praline.
  • In a heavy fry pan, combine brown sugar and butter and cook over medium heat, stirring constantly for 2 to 3 minutes or until the sugar is dissolved and no longer grainy.
  • Pour in the whipping cream and continue to stir and bring it to a boil, but just.
  • As soon as the praline comes to the boil, remove from heat and stir in the maple extract. Set it aside until it cools down slightly.
  • Rinse the fine sieve and the catch bowl [used to squeeze out the zucchinis] and pour the praline through the sieve to catch any sugar clumps it may have. 
  • Cut the cake[s] horizontally. For a neater cake, trim off the rounded tops before assembly.
  • Place one cake layer on a cake plate and pour some of the still warm icing on the top. Spread the icing out to the edge and set the next cake on top. Repeat. Set the third cake on.
  • Pour the remaining praline on the top first and the second time pour on the remaining praline and let it drip down the sides of the cake. Don’t touch the top, but the praline that will pool at the bottom can be swept up a little while later when the praline begins to solidify. Dip the spatula into hot water and smooth it out.
  • Chill the cake before slicing, but best eaten when the cake is at room temperature.  


16.9.17

DULCE DE LECHE OATMEAL BARS

My kitchen filled with the sweet smell of caramel, but at first I found the bar overly sweet. I already gave away most of it when I thought maybe... maybe I should take a photo of the few I had left. I am glad I did, because by evening it turned into a different bar cookie, the texture settled and the flavours mellowed. It was less sweet too. Still I increased the salt from a pinch to 1/2 tsp. This was a bit more involved bar than your average "Magic Cookie Bar", though opening a can of dulce de leche was a far cry from making it from scratch. From Roxana’s Home Baking. Go ahead, eat your oatmeal!

DULCE DE LECHE OATMEAL BARS
1 1/2 cups flour
1 1/2 cups rolled oats
1 cup brown sugar
1/2 tsp salt
1 cup cold butter, diced
1 can 300ml Eagle Brand dulce de leche

  • Heat the oven to 350F.
  • Fully line an 13X9 inch baking pan with parchment paper. Set it aside.
  • In a food processor add all the ingredients except the dulce de leche.
  • Pulse it a few times until it comes together in a ball.
  • Reserve 1/2 cup of the cookie dough. Press it together, wrap it in plastic wrap and put it in the freezer.
  • press the remaining dough onto the prepared baking pan.
  • Bake for 20 minutes.
  • Meanwhile, pour the dulce de leche in a saucepan, and heat it and heat it to pouring consistency.
  • Take the pan out of the oven and pour the dulce de leche on the top.
  • Grate the frozen reserved dough over the dulce de leche layer and bake it for 25 more minutes or until golden brown. The sides are a good indicator the bar is ready, don’t let it harden to a candy.
  • Place the pan on a rack and let the bar cool down completely.
  • If the bar is stuck to pan, press down a pastry cutter along the sides to dislodge. 
  • You may cut the bar into squares or rectangles, but is you wait a few hours, the flavour and the texture will improve considerably.

15.9.17

PARMESAN CRUSTED VEGETABLES

This time I used broccoli and zucchini from the garden, but there are a large variety of vegetables that can be prepared this way to create a colourful dish. You may deep fry the vegetables, but a half inch layer of vegetable or light olive oil [not extra virgin] is perfectly sufficient to fry up a large batch. This is a versatile dish,serve it as a side or a snack with dipping sauce or in place of meat in a vegetarian meal. This is a good way to start kids on vegetables, who otherwise would turn up their noses on everything green. Over the years the baby of the family was gradually seduced to eat meat this way. Without deep frying we would have been stuck on hot dogs. But she eats chicken, pork, halibut, and grouse now and not strictly fried. Currently we are working our way through the vegetables...

PARMESAN CRUSTED VEGETABLES
4 cups of vegetable wedges of choice: 
[carrots, sweet potato, parsnip, broccoli, zucchini, cauliflower, large mushrooms, eggplant...]
1/2 cup flour
2 eggs, whisked
1/2 cup shaved parmesan
oil for frying
salt

  • If you have a large batch, preheat the oven to 160F. This is where you will transfer the freshly fried vegetables to keep warm. Omit this step for a small batch.
  • Wash, drain and dry the vegetables with paper towels.
  • Cut them into bite size lengths. The softer vegetables like the zucchini should be cut into thicker wedges, the carrots sliced thinner. The mushrooms depending on size may be left whole or cut into halves. The eggplant should be sliced.
  • Place the flour the eggs and the parmesan cheese in separate bowls.
  • Dip the vegetables into the flour, the egg next, then roll into the shaved parmesan and then back for a slight dip into the flour again. Be casual about it, you don’t want to uniformly coat the vegetables.
  • For a small amount of vegetables, I put a scoop of flour into a small baking dish, roll the vegetables into the flour, whisk up an egg and pour it on top, dump a handful of parmesan on the whole thing and just roll the vegetables around, haphazardly coating them.
  • Add half an inch of oil, or less to a heavy fry pan and heat it up on medium high heat.
  • Piece by piece lower the first batch of vegetables into the hot oil, making sure there is room left to turn them during frying. Use a pair of kitchen thongs to turn, or flip them with a fork, but don’t pierce them.  
  • Fry for 1-2 minutes or until the vegetables are tender and golden.
  • Transfer to baking tray lined with paper towel.
  • Place in the preheated oven to keep warm.
  • When all the vegetables are fried, transfer them to a serving plate and sprinkle with salt.
  • Serve immediately.

14.9.17

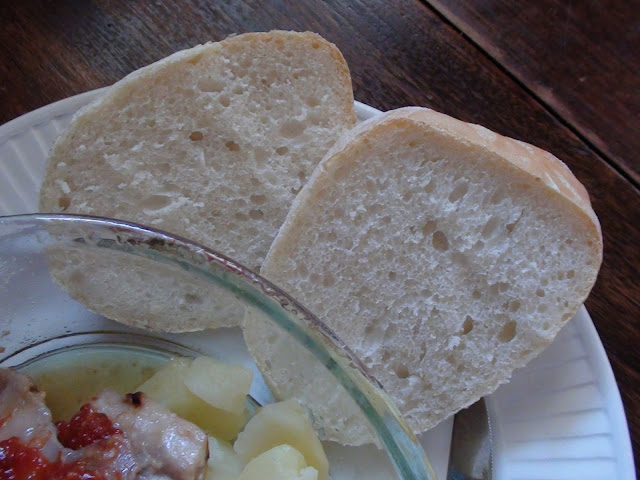
CIABATTA BUNS

Adapted from Chef De Home, these are fabulous ciabatta buns, better than from the bakery. The original recipe makes only eight buns and I was really sorry I didn’t double the recipe. Should you double the recipe, don’t double the salt, instead increase it by half. So instead of 3 tsp of salt, use only 2-1/4 tsp. 


CIABATTA BUNS
Dough Starter:
1-1/3 cup flour
1/2 tsp sugar
1 tsp instant dry yeast
1 cup water
Dough:
4 Tbsp warm water
1/2 cup warm milk
1 tsp sugar
1-1/2 tsp salt
2 Tbsp Olive oil
2-1/4 cup flour
2 tsp instant dry yeast

  • Mix starter and let it ferment for 4 hours or until dough starter doubles in size.
  • Stir the risen starter, stir it and let it rest for 5 minutes.
  • Sprinkle 2 tsp yeast over the rested starter.
  • In a mixing bowl, combine the water, milk, sugar, salt and oil.
  • Add 2 cups of flour and mix well.
  • Kneed, adding from the remaining 1/4 cup flour, 1 Tbsp at a time until the dough comes together.
  • Kneed for 5 more minutes. 
  • Transfer to a large oiled bowl, turn over and cover.
  • Let the dough rise until it triples in size.
  • Punch down risen dough on well floured surface.
  • Roll into a rectangle and divide into 8 parts with a dough scraper.
  • Fold up each rectangle against itself, tucking the corners inside.
  • Transfer the buns to the prepared baking pan 3-4 inches apart.
  • Cover and let buns rise again until doubled.
  • Preheat oven to 425F and line a baking pan with parchment paper.
  • Bake in preheated oven for 20 minutes until tops are brown and bottoms are hollow when tapped.

Privacy & Cookies

This site uses cookies. By continuing to use this website, you agree to their use. To find out more, including how to control cookies, see here: Cookie Policy

Translate

me

My photo
It began with posting a few recipes on line for the family. "zsuzsa is in the kitchen" has more than 1000 Hungarian and International recipes. What started out as a private project turned into a well visited blog. The number of visitors long passed the two million mark. I organized the recipes into an on-line cookbook. On top of the page click on "ZSUZSA'S COOKBOOK". From there click on any of the chapters to access the recipes. For the archive just scroll to the bottom of the page. I am not profiting from my blog, so visitors are not harassed with advertising or flashy gadgets. The recipes are not broken up with photos at every step. Where needed the photos are placed following the recipe. Feel free to cut and paste my recipes for your own use. Publication is permitted as long as it is in your own words and with your own photographs. However, I would ask you for an acknowledgement and link-back to my blog. Happy cooking!