13.12.18

FANCY SHORTBREADS

I fancied up my shortbread recipe for the annual Christmas tray. These were only the leftovers. Half of the dough received the pecan treatment and I added dried blueberries to the other half.

FANCY SHORTBREADS  
3/4 cup soft butter
1 cup flour
1/2 cup cornstarch
1/2 cup icing sugar
  • Cream the butter a little but do not beat it until frothy, it should not grow in volume. 
  • Creaming the butter on its own will help the dough come together, but overbeating will make it too soft to handle. 
  • Sift together the flour, cornstarch and the icing sugar. 
  • Combine the creamed butter with the flour mixture. 
  • You can flavor the shortbread with some vanilla bean scraping, but extract adds moisture and makes the dough too wet and chilling the dough will not help much. 
  • Shape half of the dough into 1 inch balls. 
  • Place 1- 1/2 inches apart on ungreased cookie sheet. 
  • Flatten them lightly with the palm of the hand and press a pecan into the middle. 
  • Add a handful of dried blueberries to the rest of the dough and kneed to combine. 
  • Shape the dough into 1 inch balls. 
  • Place 1- 1/2 inches apart on ungreased cookie sheet. 
  • Flatten lightly with floured fork. 
  • Bake at 300F for 15-20 minutes until edges are lightly browned.

5.12.18

WHITE CHOCOLATE SWISS MERINGUE BUTTERCREAM

Swiss meringue buttercream is not for the faint of heart. Lots of people seem to find it difficult, but there is plenty of help too if you run into trouble. Some bloggers list endless do’s and don’ts. My advice is don’t think you know better, just follow the recipe. Be organized and clean and it will work for you. This is the most luxurious, silky smooth buttercream imaginable.

WHITE CHOCOLATE SWISS MERINGUE BUTTERCREAM 
5 egg whites 
1 1/2 cups sugar 
2 cups unsalted butter 
1/4 tsp salt 
3/4 cup white chocolate 

  • Cube the butter first and set aside.
  • Meanwhile melt the white chocolate in a microwave at 15 seconds intervals, stirring after each until melted.
  • Cool the chocolate to room temperature.
  • Combine the egg whites sugar and salt in the bowl of a stand mixer.
  • Place the bowl over pot of simmering water so the water does not touch the bottom of the bowl.
  • Whisk the egg whites until just hot to the touch.
  • Set the mixer on high and whip the egg whites until thick and cooled down to room temperature. This should take 5 minutes or longer.
  • Turn the mixer speed down to medium and using a spoon, add the butter one cube at the time. Make sure the butter is fully incorporated before adding the next one.
  • Add the melted room temperature white chocolate and vanilla and mix to combine, [don’t beat] until smooth.
  • If the icing is too runny, refrigerate briefly until it thickens.

10.10.18

SOURDOUGH BOULE FROM ANY FLOUR

This one is from all purpose flour 

Here is a great sourdough bread recipe. For the starter you will need 1 pkg of dry yeast and 2 cups of some kind of glutinous flour. Starter made the traditional way from flour and water can be made from all purpose flour, but will lack the strength to raise the bread. But as you see great bread can be made from all purpose flour as long as you kick start the process with a little bit of yeast. Such sourdough starter will remain active for several bakings, but then  one day the bread will fail to rise. To develop a healthy starter the old fashioned way, best use whole grain or whole ground flour. But that is a whole different cattle of fish, one of which I won't go into here. My shortcut sourdough starter is based on 1 pkg or 2 and 1/4 teaspoon of dry yeast. It will make 3 cups of starter, enough to make 6 boule loaves from it. To keep the starter alive for future bakings, feed it daily.

When making the bread, let the dough rise by 75% during the first rising, the first rising can take up to 6-9 hours, and the second rising must not be longer than 30 to 40 minutes. Do not let your sourdough over rise, as this will affect the texture of the bread. This holds true for every type of bread. Follow the specific recipe and never let bread over rise.

SOURDOUGH BOULE FROM ANY FLOUR

The Starter:
1 pkg. dry yeast, any kind
2 cups warm water [not hot]
2 cups all purpose flour

• You can make the bread from different flours, but always feed the starter with the same flour. 
• Sprinkle yeast into a large, dry non metallic bowl.
• Add the water slowly.
• Stir with a non metallic utensil.
• Add the flour gradually, stirring constantly.
• Stir the mixture to breakup all the lumps.
• Cover the bowl with a clean towel and let it stand for 48 hours at room temperature.
• Stir it down occasionally.
• Use some of it on the third day.
• Replenish what you take out with equal amount of flour and water.
• Cover with plastic wrap and refrigerate.
• If you don’t feed the starter for two weeks, chuck it and start anew.
• This recipe makes 3 cups of starter.
This recipe makes two boule loaves. If you need only one, cut the ingredients by half.

The Boule:
1 cup starter
2-1/2 cups water
3 tsp salt
6-7 cups of flour
butter, margarine, lard or oil for greasing

If this is your second bake, your starter has been chilling in the fridge. Let it warm up on the counter overnight.

  • Start in the morning, depending on the temperature and the humidity, sourdough baking can take anywhere from 6 to 9 hours.
  • Place one cup of starter in a large bowl.
  • Add the water to the starter and stir it lightly.
  • Next add 4 cups of flour.
This is how: Dip your 1/2 cup scoop into the flour, scoop it up and sweep the top level with a knife.

  • Add the salt only after half the flour is added.
  • Stir it up really well.
  • Gradually add the remaining flour.
  • Resist the urge to add more water.
  • Instead, let the mixture rest for 30 minutes. It will soften.
  • After 30 minutes dump the entire contents of the bowl, scraping out the sides onto a clean surface.
  • Begin to knead it together.
  • When all the flour is incorporated and you have uniform dough, it is time to soften it to develop the gluten:
  • By hand: Pick up the dough and whack it down on the counter 50 times.
Or
  • With KitchenAid: divide the dough into 4 parts and beat with the dough hook for 5 minutes and then combine the parts by hand.

  • Next grease a clean bowl and place the dough in it, turning it over once.
  • Cover with a clean kitchen towel and set it to rise.
  • Allow for 75 percent of rise. This means the dough should rise until not quite doubled in bulk. The time this can take depends entirely on the environment. In general sourdough baking requires considerably longer time than yeast baking.
  • Your dough now has grown 75% of its original size.
  • Take an old baking sheet or line a good one with parchment paper.
  • Grease the surface lightly and scatter a handful of flour on top.
  • Next place the dough on a clean surface and cut it into 2 parts.
  • Pick up one piece and turn it smooth side down.
  • Slightly flatten it by hand.
  • Fold over the ends into the middle until you get a round shape.
  • Turn over and guide the dough into a round shape.
  • Once the dough ball is tightly shaped, place it seam-side down onto the prepared baking sheet.
  • Repeat with the remaining dough.
  • Scatter little flour on top of the loaves and smooth it out by hand.
  • Or brush with melted butter.
  • Set the timer for 35 minutes.
  • Heat the oven to 400F.
Please note: the second rising combined with time needed to heat up the oven must not take longer than 40-42 minutes. Do not let your sourdough over rise, as this will affect the texture of your bread.

  • Next give both loaves a few slashes with a sharp knife and place them in the preheated oven.
  • Set the timer for 30 minutes.
  • If the loaves need more time, bake for 5 to 10 minutes longer. The loaves should be golden brown and the bottoms sound hollow when thumped.
  • Move the loaves to a cooling rack and cool for at least 30 minutes before slicing.
  • Stoves don't all work the same, so write down the baking time for the next time. 


from part whole wheat bread flour part white bread flour

28.7.18

FREEZING BROCCOLI

Freezing broccoli is problematic. Can’t freeze it without blanching or it becomes mush. Except blanching makes them soggy. What I do is I chop them small, blanch them, but barely, drip dry them and then freeze them on parchment lined trays. The following day I pack them into freezer bags. They will be not as good as fresh broccoli, but if you have a dozen broccoli plants maturing all at the same time, freezing it is one of your options.

FREEZING BROCCOLI

  • Put a cattle of hot water on the stove and bring it to full boil.
  • Meanwhile wash all the broccoli, drain and chop them fine.
  • Dump the whole lot into the boiling water.
  • Once the water comes back to simmer, pour the whole thing through a large colander.
  • Drain and run cold water over it to cool them down to room temperature.
  • Let the broccoli drain for an hour.
  • Then transfer to a clean tea towel to drain it some more.
  • Line a couple of large baking sheets with parchment paper.
  • Arrange the broccoli in a single layer and freeze it overnight.
  • The following day pack the frozen broccoli in a single layer, not in bunches, in medium or large freezer bags.

20.2.18

CANDIED NUTS

This is a simple and fast way to candy a small batch of nuts. Most nuts will take only 5 minutes in the fry pan, larger nuts such as hazelnuts up to 8 minutes. For larger amounts check out my Candied Almonds.

Nut Facts:

Walnuts selected for in-shell sale are fumigated or heat treated to kill insects in storage. The in-shell nuts are then bleached using a dilute solution of bleach.
Shelled walnuts are not bleached. However they may be treated with an anti-oxidant to preserve them in storage.
Recommendation: buy organic, in-shell or organic, shelled.

Besides buying organic there is one more requirement: freshness. Stores sell nuts way past their prime. Buying nuts in the shell does not ensure freshness. Beware especially of prepackaged shelled nuts, they are expensive and can contain taste altering preservatives. Purchase shelled nuts from stores that have high turnover of stock. Otherwise stick to the gourmet specialty store and pay the inflated price. Or plant a tree. We did. While I cook, Jim oftentimes sits at the table shelling walnuts. He packs them in sturdy plastic containers, labels and dates them and takes them down to the freezer.

About a week before Christmas, after the stores have rid themselves of the old stock, that is when the fresh nuts appear. Besides tasting, there are visual signs to look for; discoloration and worn edges that suggest rancidity. It is especially easy to see it in walnuts and sliced almonds. Rancid nuts are toxic and roasting or baking with them may mask the rancidity somewhat, but will not rid them of the toxicity or carcinogenic properties. Rancid nuts smell bad and look discolored. Rancidity is fat gone stale. If I end up with less than perfect quality nuts, I take them back to the store right of way. Shelled nuts from bulk bins should not be kept in the cupboard. Pack them first in freezer bags, and put them in the freezer. The thin plastic bag they came in is no protection from freezer burn. 

CANDIED NUTS 
2 cups of shelled nuts
1/8 cup butter
1/4 cup sugar
salt to taste

  • Line a large tray with parchment paper.
  • Place a heavy fry pan on medium heat. [Don’t use your non stick skillet for this]
  • Add all the ingredients to the fry pan.
  • Set the timer for 5 minutes, [8 minutes for hazelnuts].
  • As the butter and the sugar melts, start stirring with a wooden spoon.
  • Continue stirring until the timer goes off.
  • Immediately transfer nuts to the prepared tray. Don’t worry if they stick together.
  • Once the nuts cool down to room temperature it will be easy to break them apart.
  • Pack the candied nuts into a lidded container and store them in the fridge. 

18.2.18

RICOTTA FILLED PASTA – RICOTTA DERELYE

It is not Italian ravioli, not Hungarian derelye or Ukrainian perogy, only all of the above. Ricotta is a pretty flavourless cheese product, also grainy, so even the good quality 10% version needs a flavour boost. As for Italian pasta, I find it just a bit tough for my Hungarian sensibilities, so yes the pasta is Hungarian. The ricotta and the parmesan is Italian, but the filling is more like Ukrainian perogy. This might be Canadian way of thinking, but I find serious advantage to diversifying.

RICOTTA FILLED PASTA
Pasta:
1-1/2 cups flour
2 eggs
pinch of salt
1 egg white
2+2 Tbsp butterFilling:
1 cup ricotta 10% fat content [anything less is too wet]
2 egg yolks
2 tsp sugar
1 tsp grated onion
1 cup mashed potato
1/2 cup grated parmesan
1/8 cup melted butter
salt to taste [actually taste it how much to add]
fresh basil or parsley leaves

• Combine the flour, eggs and salt and 2 Tbsp melted butter and kneed it into a smooth and fairly firm dough.
• Shape into a ball, wrap in plastic and let it rest for 30 minutes. This will make the dough soft and easy to roll out.
• Meanwhile combine the ingredients for the filling, reserving the fresh herb.
• Roll the dough out very thinly, and cover the other half with a clean kitchen towel.
• Dot one half with a teaspoon of filling 1-1/2 inches apart at regular intervals. 
• Place a leaf of fresh herb on the top of each mound.
• Whisk together 1 teaspoon of water with the egg white. Reserve the yolk for the filling.
• Brush the dough between the heaps of filling with the egg white mixture.
• Remove the cloth and fold the other half of the dough over the filling.
• Press down firmly in between the heaps of filling.
• Using a pasta cutter, cut into separate squares, each containing one heap of filling,.
• Cook in boiling water in a covered saucepan for 8-10 minutes.
• When the pasta squares are cooked transfer them to a sieve to drain.
• Place in a serving bowl and pour 2 Tbsp melted butter on the top.

16.2.18

RIBS

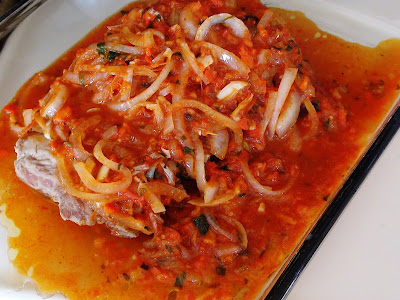
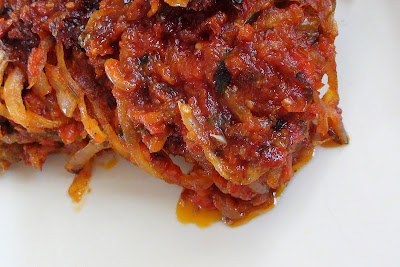
Although he wouldn’t enjoy the annual rib fest down at Riverside Park, something about the crowds… but Jim loves ribs! He doesn’t get it nearly enough and it seems every time I make it for him and let’s be honest because he bought home some, I throw things together from the pantry. Tomatoes and onions are the big thing for the sauce and the ribs are roasted in the oven. We never barbecued save on a stick over the campfire. Barbecue die-hards will hate me for this, but eating charred food is not the healthiest thing in the world.

Ribs take a long time to make tender and anyone will tell you the best rib is the one that the meat falls away from the bone and yet still moist with some fatty bits. Once I tried pressure cooking the ribs for 20 minutes before placing them in the oven. It made great stock. After that I came to the conclusion you cannot hurry ribs. Ribs must be covered and slow roasted in the oven to sublime tenderness before sauce is applied.

Ah the sauce. I have two previous rib recipes. In the first one the sauce forms while it bakes with the meat and stays chunky. The next one is a more refined version, but essentially the same. This time the sauce just kind of came together as I assembled the ingredients by feel. It is too bad I can't put them side by side for comparison. None of my barbecue sauces are hot. Even the kids and the elderly can eat it. But if you prefer fiery, nothing can stop you from putting in a few chilies. 

And speaking of spices… I tend to omit black pepper from my recipes. That’s because black pepper is most enjoyable freshly grated over the prepared food and not cooked with it. If chili powder is not one of your staples, I seldom use it myself, it is best keeping it in the freezer. Once the seal is broken on the package both the colour and the aroma is subject to rapid deterioration. People sometimes keep spices for decades, but everything has an expiry date, even rocks.

RIBS
1 pork rib
salt to taste
olive oil
Barbeque Sauce:
3 Tbsp olive oil
3 cups chopped tomatoes
1 cup chopped bell pepper [any color just not green]
1 onion, sliced
4-5 sprigs of Italian parsley
salt to taste
1 tsp chilli powder
1 Tbsp brown sugar
1 tsp honey
3 garlic cloves, smashed

  • If frozen fully defrost the ribs.
  • Sprinkle with salt on both sides and let it sit on the counter from 2 to 4 hours.
  • Take a baking pot with a well fitting lid.
  • Oil the bottom and place in the ribs.
  • Drizzle the top with olive oil, and pour a cup of water beside the ribs.
  • Cover the pot and place in the oven.
  • Turn the oven on to between 325 to 350F.
  • Check on the ribs every hour.
  • Roast it until the meat is ready to come off the bones.
  • In the meantime prepare the barbeque sauce.
  • Puree the tomatoes and the peppers in the food processor.
  • I used chopped frozen tomatoes and peppers. Set these out to slightly thaw.  Pureeing frozen vegetables is very taxing on the food processor.
  • Place a large non stick skillet on medium heat.
  • Sauté the onion slices for a couple of minutes.
  • Add the pureed vegetables and the remaining ingredients, except the garlic.
  • Bring it to a simmer and slow simmer for 3-4 minutes.
  • When the sauce comes together, add the smashed garlic.
  • Set the sauce aside until the ribs are very, very tender. 
  • Pour the sauce over the ribs.
  • Increase the oven temperature to 375F and bake the ribs uncovered for an hour.


14.2.18

CHOCOLATY CHOCOLATE CHUNK COOKIES

Ahhh the love of chocolate heaven! These cookies are insanely chocolaty. The secret is in the large chunks of good quality chocolate, forming the cookies with a light hand and not over baking… Not an economical cookie mind you. Have I not had the ingredients already, the chocolates alone would have been a 30 dollar investment.  You only use a portion of each bar, collectively 2 cups of chopped white, milk and dark chocolates. Since I have no cupboard raiders anymore I always have Calebout. I stopped baking with chocolate chips a while ago; the brand names that continue to make claims of “pure” are anything but. For now it’s either Callebaut or Lindt… or Ghirardelli. 

CHOCOLATY CHOCOLATE CHUNK COOKIES
1/2 cup butter, softened
3/4 cup sugar
1 tsp vanilla
1 egg
1-1/4 cups flour
1/4 cup cocoa
1/2 tsp soda [no more]
1/2 tsp salt
2 cups of the best quality of white, milk and dark baking chocolate [about 2/3 cup each]

  • Line a large cookie sheet with parchment paper.
  • Preheat the oven to 350F.
  • Cut off chunks from each bar. Aim for about 2 cups of larger chunks of chocolate. There will be chunks and some finer shavings. But don’t worry, it’s all good.
  • In a large bowl beat the butter, sugars, vanilla and the egg until fluffy.
  • In a separate bowl, whisk together the flour, cocoa, soda and the salt.
  • Add the flour mixture to the butter mixture and using a wooden spoon stir to combine.
  • Scrape in the chocolate chunks including the shaved bits.
  • Give it a stir to combine.
  • Loosely gather up a chunk of dough with your fingers, about a size of a small egg, and plunk it down on the prepared cookie sheet at 2 -3 inch intervals. It is crucial not to squeeze the dough at any time. Don’t shape it at all. It will settle into a round shape as long as you leave sufficient space between the cookies to grow.
  • Bake the cookies for 12 to 14 minutes. Do not over bake. They should be soft to the touch but will solidify as they cool.
  • You can sample, but let the cookies solidify before moving them. 
  • Makes 15 

11.2.18

KRISTEN CAKE

I have a new cake, lovely and uncomplicated. I made it for Kristen, our lovely granddaughter. It’s a basic piskóta with Nutella buttercream. A great combination and I don’t know why I haven’t thought of it before. Maybe I needed the inspiration of Kristen’s visit. Our grandchildren are coming into their own one after the other. Jimre how did we get so lucky?

I used two 9-inch spring form cake pans and made two piskóta layers from 8 eggs. I set out the unsalted butter a couple of days earlier so it was super soft. When making buttercream, beat the sweet butter with the icing sugar for at least 6 minutes, and add the rest of the ingredients, in this case the nutella, afterwards. In Canada and the U.S. powdered sugar contains cornstarch to counter humidity. Sifting it through a fine sieve and extra beating helps to diffuse its harshness. Believe it or not, not all icing sugars are of the same quality; some are more refined than others. I make it a standard practice to add 1/8 cup of whipping cream towards the end. The small amount of heavy cream tames and softens the buttercream. But alas Kristen is lacto sensitive and I had to leave off the cream. Alternatively, whipping the butter and the icing sugar for what seemed like an unreasonably long time accomplished the same result and the buttercream was as it should be, smooth, fluffy and delicate.

KRISTEN CAKE
8 eggs separated
8 Tbsp sugar
8 Tbsp cake flour, sifted
1/2 tsp baking powder
Nutella Buttercream
1-1/2 cups unsalted butter
2 cups icing sugar, sifted
3/4 cup Nutella
1/8 cup whipping cream [optional]

  • Preheat the oven 350F.
  • Line two 9 inch spring form cake pans with parchment paper.
  • Beat the egg whites until soft peaks form.
  • Add 2 Tbsp sugar and beat until stiff peaks form.
  • Transfer meringue to a large mixing bowl.
  • In the same bowl beat the egg yolks and the remaining sugar until very fluffy.
  • Add the baking powder and mix to combine.
  • Gradually add the sifted cake flour and beat to combine.
  • Gently fold the egg whites into the yolk mixture.
  • Bake until the cake tester comes out clean.
  • Allow the cakes to cool to room temperature.
  • In the meantime prepare the Nutella buttercream.
  • On low medium speed, beat the soft butter, gradually adding the icing sugar until combined.
  • Switch to high speed and beat the buttercream for 6 minutes.
  • Add the Nutella and if using add the whipping cream.
  • Beat for 2 minutes longer until the ingredients are fully incorporated.
  • Transfer the cakes to the fridge and fully chill before assembly. 
  • Cut the cakes in half horizontally and make sure to keep the knife flat for even layers.
  • The two bottoms are the flattest. Those will go on the bottom and on the top. The rest of the layers will be sandwiched in between.
  • Spread each layer with buttercream and apply a thin layer of buttercream all over the cake, this is called the crumbcoat.
  • Chill the cake for 30 minutes before applying the final coat of buttercream.
  • The cake will slice best when chilled; however it is most enjoyable at room temperature.

7.2.18

CHEESY HAM POTATO BAKE

Following the various layered potato dishes, in particular, the inclusion of cheese, this being my own concoction, but in fact is a fusion of French and Hungarian sentiments. I mention this because to a Hungarian, there are two cuisines that matter, Hungarian and French. Both of my Hungarian cookbooks contain French dishes, and in the somewhat more recent publication, each chapter is divided into two sections, one for Hungarian and one for French dishes. England, the New World or the rest had no impact on Hungarian cuisine before the Internet, even though many of the ingredients, corn, tomato and potato came from the Americas.  

CHEESY HAM POTATO BAKE
3 large waxy potatoes*
salt to taste
1 cup of small broccoli florets
small wedge of onion
1 red pepper
3 Tbsp flour
1-1/4 cup cold milk
2 Tbsp butter
1/4 tsp dry mustard
1-1/2 cup grated Havarti, or any other hard white cheese
1 cups diced ham

*Waxy potatoes have low starch content and hold their shape after cooking. You may of course use starchy potatoes. In that case omit precooking because they would simply fall apart. However, raw potatoes require longer baking time and it could take up to 2-1/2 hours in the oven, by which time the the broccoli and the red pepper will become limp and unappetizing. I would omit those and just double the ham.

  • Wash all the vegetables.
  • Peal and slice the potatoes thinly.
  • Place in a large skillet and pour enough water on top to cover all the potato slices.
  • Bring it to a steady simmer.
  • Maintaining the simmer, cook uncovered until almost all the water is reduced.
  • Set the skillet aside to cool and bring a small pot of water to the boil.
  • Meanwhile prep the other vegetables.
  • Plunge the broccoli florets into the boiling water for 1 minute.
  • Remove with a slotted spoon and set them aside.
  • Slice the onion, and dice the red pepper.
  • Make the sauce next.
  • First make slurry from the flour and the cold milk.
  • Melt the butter in a clean skillet.
  • Add the dry mustard and the slurry and bring it to a simmer stirring it continuously until the sauce thickens.
  • If there are lumps, force the sauce through a fine sieve.
  • Add the grated cheese. It will be fine if not all the cheese melts at this point.
  • Preheat the oven to 350F.
  • Next assemble the casserole.
  • Butter a standard casserole dish and arrange half the potato slices on the bottom.
  • Salt the potato slices.
  • Scatter the diced ham on top.
  • Arrange the onion slices, the broccoli florets and the diced red pepper on top.
  • Cover with half of the sauce.
  • Place the remaining potato slices on top, salt it to taste and cover with the remaining sauce.
  • Bake in preheated oven for 45 minutes or until lightly browns on top.
  • Let the casserole sit for 10 minutes before serving.

6.2.18

SOFTEN BROWN SUGAR

Jim looks for sales. That's how I ended up with two pounds of rock hard brown sugar. Which reminded me of the beloved character on the old Anne of Green Gables television series. Matthew goes to Carmody to buy Anne a dress. But before he says what he really came in the store for he asks for 20 pounds of brown sugar: “... now--if it isn't too much trouble--I might as well--that is--I'd like to look at--at--some sugar." ... "I'll--I'll take twenty pounds of it," says Matthew, with beads of perspiration. Poor Marilla, she didn’t have a microwave! 


SOFTEN BROWN SUGAR 

  • Place the brown sugar block in a microwavable bowl.
  • Cover the bowl with two sheets of moist paper towel and cover it with a plate.
  • Microwave it for 20 seconds.
  • If you have a large block, turn it over and repeat it.
  • Repeat at 20 second increments until the brown sugar begins to melt in spots.
  • Remove and start chopping at it with a heavy knife.  Don’t use your expensive chef’s knife. By then the sugar should be malleable enough.
  • You can also soften brown sugar with a slice of bread, but it takes several days and I found it hardens up again. 

5.2.18

COOKING WITH SAUERKRAUT

Sauerkraut and cabbage - can you tell which is which? 

Not every tradition is worth hanging onto. One of my pet peeves is how Hungarian recipes handle sauerkraut dishes. With the passage of time, sauerkraut gets increasingly sour. That is why recipes containing sauerkraut will instruct rinsing the sauerkraut before cooking. But that's just removing the health benefits fermented foods provide... like moving things along. Why not mellow the sauerkraut with fresh cabbage instead? If you still rinse sauerkraut, you are discarding the good stuff. You may be thinking that brining the green cabbage and discarding the cabbage juice is the same thing. Well not quite. Fresh cabbage juice cannot produce the same probiotic and enzymatic benefits of sauerkraut juice.

COOKING WITH SAUERKRAUT
1 cup sauerkraut
2 cups thinly sliced fresh green cabbage  
Salt to taste

  • Brine the fresh cabbage first.
  • To brine it, rinse the thinly sliced green cabbage under running water. 
  • Next, sprinkle it with salt. The amount of salt used is a matter of taste. 
  • Let the cabbage brine in salt for at least an hour, it will let some of its juices.
  • Squeeze it out really well.
  • Place the sauerkraut in a bowl.
  • Add the brined cabbage and stir to combine.
  • If you have time let the mixture sit for an hour or longer.
  • The mixture should taste pleasantly sour.
  • Use this when the recipe calls for sauerkraut.
  • Always taste sauerkraut dishes before salting. There is a good chance the dish will not need additional salt.

3.2.18

PURÉED BUTTERNUT SQUASH

If ever I was unsure the Internet is saturated with misinformation and rubbish I am sure of it now. I was researching butternut squash; the Hungarian translation is not sütőtök. The correct translation is pézsmatök. Well it’s neither here nor there for the majority of my readers, but there it is. And then there are the dream interpretations of squash, yes squash, hold me down while I haha for awhile. Dreaming with squash  is apparently associated with feelings of something that’s boring, unappealing or unattractive. Well which is it? Never mind. This I know, butternut squash is delicious. Don't pass it by, it's a great winter vegetable. While lots of vegetables are waterlogged in February, the squash just sits in its bin waiting. A gift of the New World, archaeological evidence suggests that butternut squash has been cultivated in the Americas for 10,000 years. I was going to make mashed butternut squash to serve with leftover Italian Meatballs yesterday, meatballs being all the more delicious the following day. At first the texture wasn’t to my liking so I put it through the food processor and reheated it. The combination was perfectly satisfying and comfortingly delicious. 

Untitled 16 Dreaming of Squash?

PURÉED BUTTERNUT SQUASH
1 butternut squash, peeled and cubed
1 Tbsp butter
1 Tbsp heavy cream
2 tsp brown sugar
salt to taste
freshly grated nutmeg

  • Must use a good chef’s knife to cut butternut squash:
  • Cut off and discard the ends.
  • Cut in half crosswise. Now you have a solid base to peel the squash.
  • Place both end pieces on the thicker end and with the chef’s knife slice downward to cut off the peel.
  • Next scoop out pulp and seeds from the bottom end pieces. Spoon is a clumsy tool for this, but a melon-baller works with ease. Every dollarstore will have melon-ballers.
  • Next chop the squash into uniform cubes. Smaller cubes will cook faster.
  • Steaming the squash will take anywhere from 12 to 20 minutes.
  • [Steaming is the fastest way to cook butternut squash, even faster than in the microwave. Cutting it in half lengthwise they may be roasted, that will of course take about an hour.]
  • Mash as you would for potatoes or purée in the food processor.
  • Add the butter, heavy cream, brown sugar and salt to taste and give it a good stir.
  • Reheat and serve hot and top with freshly grated nutmeg.
  • One butternut squash makes 2 to 4 servings.

28.1.18

RUSSIAN STRUDEL - OROSZ RÉTES

Amazing...

Unlike the average strudel and more like a yeast-roll with almonds and candied fruit; it's one more recipe from Margit néni’s cookbook. It was old already fifty years ago, the cover and part of the index were missing. My dad had it rebound and it was one of the few things I brought with me to Canada. One day I should be buried with it; nobody will want it, certainly nobody from my immediate circle of friends or family. Every time I translate a recipe I feel like I am saving it from nothingness. The cookbook is at least a hundred and fifty years old. You know the old saying "Entropy isn’t what it used to be." I did a search and nothing even resembling this recipe exists on line. Feeling nostalgic I wrote a rant* while the dough rose to the occasion. It's for my grandchildren.  

RUSSIAN STRUDEL

3/8 cup lukewarm milk
1/4 cup slightly melted butter
2 eggs
3 egg yolks
3 tsp yeast
6 Tbsp sugar
1 + 2 and 1/2 cups flour
1/4 cup melted butter for greasing
1 cup sliced almonds
1/2 cup chopped candied or dried apricots
1 lightly beaten egg

  • Put the lukewarm milk, melted butter, eggs and egg yolks, yeast and the sugar in the mixing bowl.
  • Add 1 cup of flour and give it a stir.
  • Let it sit until doubled.
  • Begin to add from the remaining flour gradually kneading on medium speed with a dough hook. The dough should be pliable.
  • Knead it really well to develop the gluten. If you don’t have a standing beater, knead by hand and beat the dough against the counter with force about 50 times or more.
  • Place the dough in a buttered bowl, turn it over and cover.
  • Let the dough double.
  • Punch down and roll the dough on a lightly floured surface 1 cm thick.
  • Brush lightly with melted butter and scatter a quarter of the sliced almonds and chopped dried fruit on the top.
  • Roll the dough up in jelly roll fashion and let the dough rest for 20 minutes.
  • Roll the dough out again in the opposite direction, brush with melted butter and top with the almonds and the apricots.
  • Repeat the resting, rolling and topping with almonds and apricots twice more. [4 times altogether]
  • The last time you roll it up, place on a parchment lined baking tray.
  • Brush the strudel with the melted butter and let it rise until doubled.
  • Heat the oven to 350F.
  • Brush the top with beaten egg and place in the preheated oven for 90-100 minutes or until the top is nicely browned.
  • Rest the strudel on a wire rack.


*Budapest in the Fifties: 

We shopped for food every day. Few people had ice boxes; nobody had a fridge, not even the milk store. The milk was ladled into metal cans. The can had a lid and a handy carrying handle. Bread was a 2 kg loaf or cut in front of you into a half a loaf or a quarter of a loaf. They gave you a 3 inch piece of tissue paper for handling it. The only thing that was prepackaged was the sugar, flour, salt and the grits. Everyone carried homemade grocery bags. You had to stand in line when you wanted to buy something. There was no self serve. State run sales people were snarly. Kids were ignored. They would serve the adult next in line and ignore the kid. There were frequent shortages. Sometimes you couldn’t find sour cream or batteries. You got most of your vegetables at the open air market. Drug stores only sold drugs. Meat stores sold only meat. Household stores sold the cleaning stuff. Beauty products were sold in the beauty product store. You made your pasta at home. There was no tropical fruit until 1957. Cocoa and green coffee beans appeared after the revolution. You had to roast the coffee beans and grind them to make espresso. Vegetables were available in season or canned in jars. There were no green vegetables during the winter. The first green thing that appeared in the spring was green onions. They were expensive. Nobody had central heating. We burned coal and wood. Everyone was poor in September. That is when the winter fuel was delivered. We kept it in the basement. Each apartment had a stall in the basement. If you lived on the third floor and your house had no lift, you had to haul it upstairs in metal bins. You woke in a cold room. About 10:00 AM we opened up the windows for fresh air, mom went down to the basement and brought up the daily wood and coal and started the fire. That was a happy time. Only communists had cars. We traveled on foot or by streetcar. There was a short line of metro and later buses. Most deliveries were conducted by horse drawn buggies. We had a 6 day workweek. People worked for 48 hours. We went to school on Saturday. We had one day off, Sunday. All the museums and galleries had free admission on Sunday. Movie theaters were cheap. The busiest was the 2:00 PM showing. Before the movie there was a News Report. It had interesting things in it but mostly just propaganda. Sometimes in the intermission there was a magician or a couple of acrobats. I always felt sorry for them. Our tickets were numbered. Grandma and I liked the 2nd row in the middle. We only ever saw Hungarian or synchronized Russian films. The first American film I saw was the Red Shoe. There were lots of indexed books. Opera and live theater was state subsidized and cheap. You could be poor and cultured at the same time. I had one dress but I had season tickets to the opera, live theater and to Philharmonic events. Only communists were eligible for post secondary institutions. You had to pay to pee. All public bathrooms had an attendant. We carried tissue paper with us because all they ever gave you was a small piece of toilet paper. We used cut up newspapers at home. Magazines were shiny and not very absorbent. Newspaper worked better. Not everyone had a bathroom. We had an indoor toilet and an iron wall sink in the kitchen, but no bathtub or shower. We bathed in the kitchen. Mom would heat up some water and poured it into a very large basin placed on a stool. You washed your hair and the upper body first. Next we would put the basin on the floor and step into it to wash the rest. The bathwater was poured down the toilet. Kids shared the bathwater. It was a treat to visit a relative with a bathtub. You got married twice if you were religious. No church could marry without a civil ceremony first. That still applies. If you practiced a religion it meant you were enemy of the state. From grade five on you had to learn Russian. We hated everything Russian, especially the Russian soldiers. We had to sing the Russian anthem after the Hungarian anthem. People tended to be opportunistic. Once I got a pair of sheepskin gloves for Christmas. It was a big deal. Two days later I dropped one on the street and before I bent down to pick it up someone snatched it away from me. There were several people around but I couldn't tell who took it. I was ten years old and just stood there crying. What would half a pair of glove do for somebody? We used handkerchiefs to blow our noses. Laundering them was really gross. So were the cloth diapers. I didn’t know anyone with a washing machine. On washing day all my mother did was wash. For drying we had a large ceiling rack in the kitchen. It worked with a pulley. It would be lowered for hanging the clothes and then pulled up. We had them drying overhead for days. All the heat we had in the kitchen was from the stove. Only one room was heated. In the afternoon my grandmother's door would be opened to let in some warmth. The toilet and the front entrance were always cold. The only source of running water was an iron wall sink in the kitchen. That is where we got our drinking water, washed our hands, brushed our teeth and filled the pots for cooking and bathing. Dishes were washed on the kitchen table in a large basin. Everything had to be dried with a kitchen towel. I remember the day when a second basin was put next to the dish basin for rinsing off the soapy dishes. My family had two rooms. Grandma had the small room and we had a slightly larger one. That is where we lived, ate and slept. For meals the table was pulled out and a table cloth laid on it. There were no napkins. My dad wiped his mouth into the corner of the table cloth. We used spoons and forks but I don't remember using knives. We were not allowed to speak during the meal. According to my father Hungarians do not speak while eating. There was no drink on the table. We drank water after we finished eating. Getting ready for bed was complicated. One by one the day-night bed and the day-night armchairs were opened up and bedding laid on them. The room turned into a wall to wall bed. We had to crawl over each other's bed to get to our own. Before I left home nine people slept in the room, my parents with seven children. The youngest slept on top of a large office desk in a cardboard box for two months. After that the state gave my parents a 4 room rental unit overlooking the Eastern Railroad Station. A month later I left for Canada. I was eighteen. I went back four times. The last time just before my mother passed away in 1990. It was the year of the first free election. Being used to Canadian elections I couldn't believe the American style electioneering on the streets of Budapest. The whole country was drunk on the belief that the thousand years of oppression was over. I warned them they were only exchanging overlords. My brothers said I didn't know what I was talking about. Twenty seven years later Hungary is a full fledged fascist dictatorship. Racism and anti-Semitism is as strong as ever. Freedom is imaginary.  State run propaganda strangely resembles the communist era. Only the bogeyman is different. I don't see any difference between the old left and the current right wing dictatorship. The rhetoric changed, but the method stayed the same.      

26.1.18

FRESH CRANBERRY LOAF

 Well… we made a good dent in it last night… Unable to resist, slices for breakfast.

Full of cranberries, it is a cross between a robust cake and a glorified loaf. Not a bread to be sure; this is too rich and much too refined to be a fruit bread. The almond extract plays an essential part as it pairs brilliantly with the cranberries. Making the loaf with fresh cranberries would be quite straightforward, though I found it a bit challenging with frozen berries. Once you add the frozen berries, prepare to pack the batter into the parchment lined pan right of way, as the frozen berries will quickly freeze the batter into a clump. Baking time will have to be increased substantially. I kept adding the minutes before the loaf finally baked through. You may opt to partially thaw the berries first, but I didn’t want streaks of cranberry juice in my loaf. In the end it was fine except I lost track of the time the loaf took to bake. It is a beautiful, buttery, moist loaf and requires no embellishment or butter. Just cut a slice and enjoy!


FRESH CRANBERRY LOAF
3 eggs
1-1/2 cups sugar
3⁄4 cup butter, very soft
2 tsp pure almond extract
1/2 tsp baking soda.
2 cups flour
2 cups fresh or frozen cranberries*

*Be sure to read the write up if using frozen berries.

  • Preheat the oven to 350F.
  • Line a loaf pan with parchment paper. Grease the corners of the pan.
  • Beat the eggs and the sugar for 3-4 minutes until smooth and thickened.
  • Add the soft butter, the almond extract and the baking soda.
  • Beat until very fluffy.
  • Stir in flour and fully incorporate.
  • Stir in cranberries.
  • Quickly transfer to the prepared loaf pan.
  • Bake in the preheated oven for 50 minutes or until the cake tester inserted into the middle comes out clean. It will take considerably longer with frozen berries.
  • Let the loaf cool to lukewarm before slicing. 

Privacy & Cookies

This site uses cookies. By continuing to use this website, you agree to their use. To find out more, including how to control cookies, see here: Cookie Policy

Translate

me

My photo
It began with posting a few recipes on line for the family. "zsuzsa is in the kitchen" has more than 1000 Hungarian and International recipes. What started out as a private project turned into a well visited blog. The number of visitors long passed the two million mark. I organized the recipes into an on-line cookbook. On top of the page click on "ZSUZSA'S COOKBOOK". From there click on any of the chapters to access the recipes. For the archive just scroll to the bottom of the page. I am not profiting from my blog, so visitors are not harassed with advertising or flashy gadgets. The recipes are not broken up with photos at every step. Where needed the photos are placed following the recipe. Feel free to cut and paste my recipes for your own use. Publication is permitted as long as it is in your own words and with your own photographs. However, I would ask you for an acknowledgement and link-back to my blog. Happy cooking!